There is a real cover-up going on here. It’s perpetrated by me. And I did it on purpose.
Last time, when I started the Medallion Project, I started hastily. This time, I have started slowly and I’ve taken a little more care with the initial stages of the project. I don’t usually talk about my cover-up jobs with my embroidery projects, only because they always come after the fact: after I’ve taken photos, after I’ve done a round of stitching, after I’ve straightened everything up after a session. And frankly, I never really think about it.
When I straighten up from a stitching session, I always (always always always always – get the point?) cover my embroidery project. If it’s a large project on a frame, I lay a clean cloth over it (could be a piece of muslin, could be a clean pillow case, etc.). If it’s a small project in a frame, I’ll slip it into the bag I’m using with the project. If it’s on a hoop, I take it off the hoop and put it in my project bag. But the point is, it’s good to cover your work when you’re not working on it. Why? The reasons are somewhat obvious, I suppose – to reduce dust accumulation, to keep excess light off it, to ensure against something accidentally snagging on it – whatever. The idea is to protect it.
But it’s also a good idea to protect your work while you’re working on it.
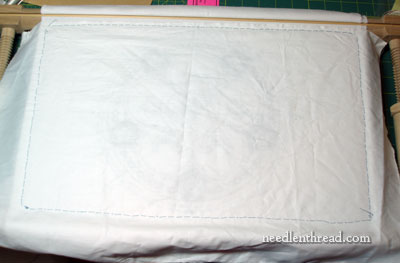
On the Medallion project, I decided to build my cover cloth into the project. I’ll tell you why as I show you what I did.
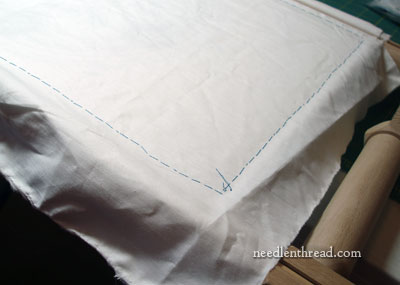
It’s very simple, really. I took a clean piece of white muslin and basted it over the whole piece in the frame.
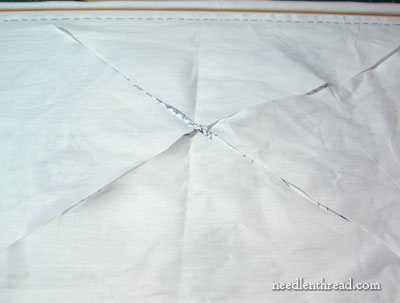
Then I cut an X in the middle of the muslin, over the whole design area.
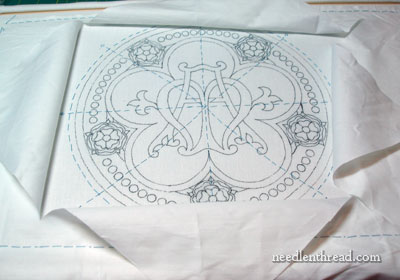
I can fold back all four portions of the X and see the whole piece…
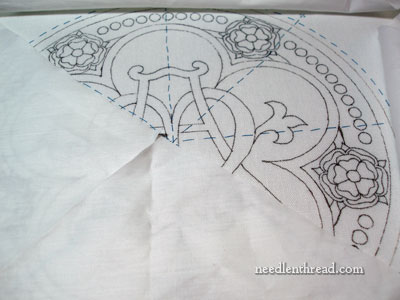
…or I can leave some portions folded down and some folded up, exposing only part of the piece.
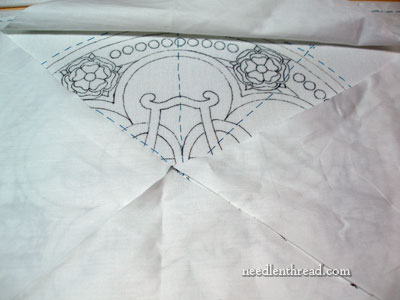
In fact, I can expose just a little portion of the piece at a time. This keeps the portions underneath the covered parts protected – it keeps me from rubbing my hands across the fabric or the stitches already there, and it keeps excess fuzz or dust off.
I know this isn’t a new concept, to keep a cloth or tissue paper over your work while you work on it. I don’t usually build my cover cloth into the project, though. I’ll generally just use a scrap of cloth and lay it over the part of the design where I’m not working, just to keep things covered and to keep my hands off the fabric. And at the end of the session, I’ll cover the whole thing and leave it.
So, why the built in cover job? I’m working with flat silk for the background behind the monogram. This is finicky stuff – easily snaggable, easily shiftable until it’s couched over with gold. I’m not going to take any risks with it. I’m working a small portion at a time, laying the silk, couching the gold, and as I work through the piece, I want to make sure the area worked is not exposed.
It’s easy to build a cover into your own project, and it does go a long way to protect it from the elements and the environment. If you’re working with a hoop, you can hoop up a piece of muslin along with your project and then cut the muslin to expose your stitching area. This is a great way to protect your work from dirt rings around the hoop area. For framed pieces, you can baste on your cloth like I did above, or just make sure you have a clean cloth or tissue paper handy while you stitch, to keep your work covered. The oils from your hands are subtle – but they are pretty much always there. Same with dust in the air, even if you don’t see it.
Cover-ups are sometimes a very good thing!
So how about you? Are you guilty of cover-ups? Do you protect your work as you stitch, or after you stitch, or both – and how do you do it? If you haven’t done so before now, are you going to start doing it? Or do you think I’m nuts and going overboard? That’s ok. I was called an embroidery geek the other day. I can handle that. So leave a comment below and feel free to be candid!


