The silver thread in yesterday’s article cries for transformation into a snowflake. After all, here in Kansas, winter’s coming, and so is Christmas. A hand-made Christmas ornament will make a perfect “small” project.
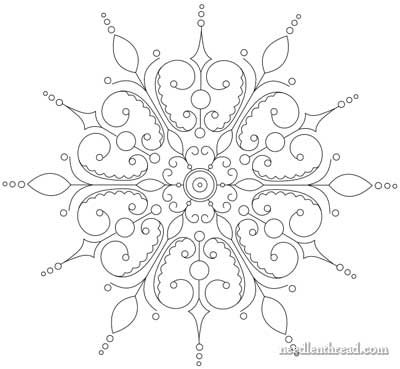
I started playing with the idea of a snowflake design by working out 6 lines on a circular grid. I made little changes and additions along the way, until a design emerged, eventually ending up at something that just might fill the snowflake bill. The embroidery pattern continued to develop until I had a look I wanted, but I kept making adjustments. I thought I’d show you the evolution and then the devolution of the design, sharing my thought process along the way.
This will probably end up looking like one of those picture games – can you spot the differences in the snowflakes?
Probably this isn’t the most efficient way to go about developing a design, but here it is, nonetheless!
What I want to do is embroider a snowflake, using this silver thread, silver spangles, white silk, and little seed beads. The ground fabric for the snowflake design is a deep, bright blue synthetic “suede,” backed with white cotton muslin for added stability. Now, if the pseudo-suede doesn’t work out, I may switch to a velveteen, but I’ll share more of that with you as I go. Today, let’s just talk about the design.
To accommodate the materials I’d be using for embellishment, I wanted a design with lines, swirls, and dots, as well as areas that would fill well with silk. I don’t know if real designers go about designing in this way, but I always think it’s useful to develop an embroidery design taking into consideration the materials that you have in mind. Now, if you don’t have any particular materials in mind, that’s another story. But when you want to use specific materials, it’s a good idea to consider how those materials will fit within the design you’re developing.
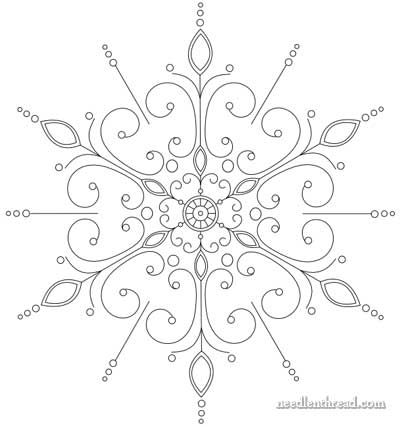
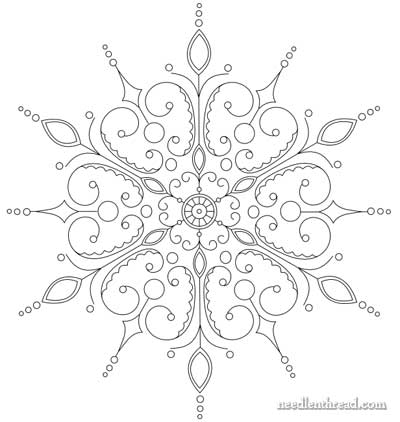
The image above was my “first arrival” at something that I thought was not too bad.
But I wanted a little more filigree. So I added the scallops inside the large curls that make up the main arms of the snowflake. I took off the little “sticks” in between the main arms of the design, thinking that it might be too much.
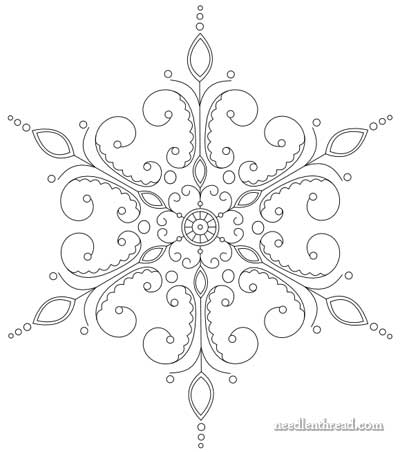
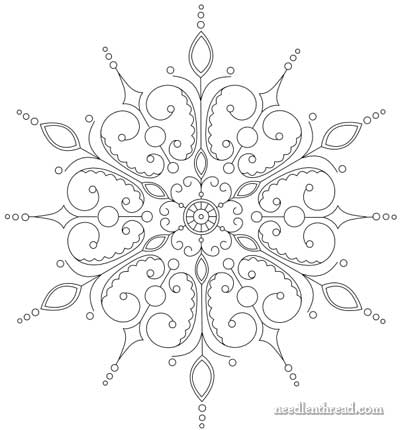
But then I put the sticks back. I like it better with them.
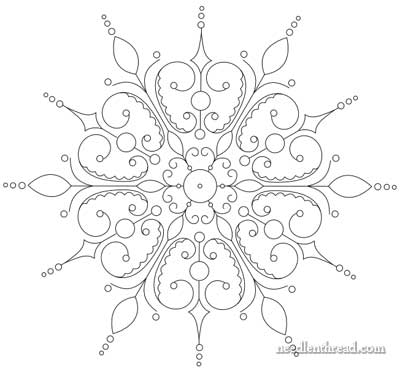
The “marquis” shapes on the main arms of the snow flake – those are the pointed pillow shapes – will be filled. To balance out that filling, I thought a filled area on the little extra sticks between the main arms might be a good addition, so I added an open space on those little in-between sticks.
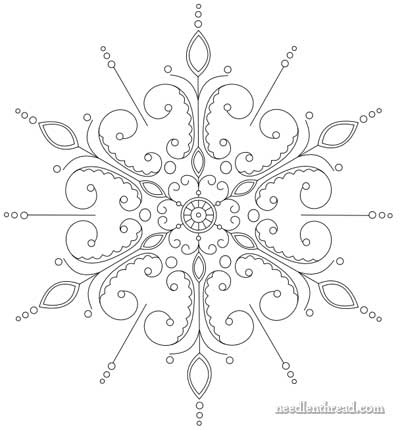
What the heck! Might as well add another large dot, to fill the area between the large curls on the main arms and to end the little in-between sticks.
In fact, to add another whole “arm” element between the curls on the main arms might be an ok idea, so I extended the stick on the in-between arms to join the circles.
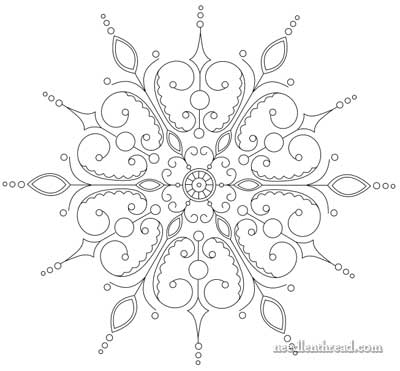
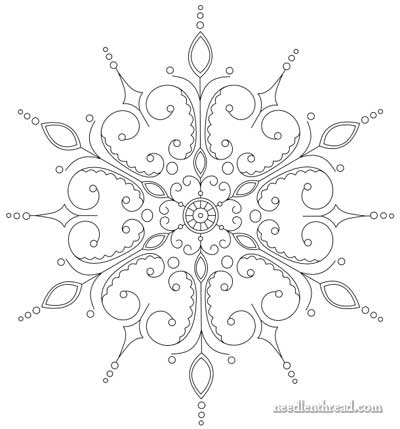
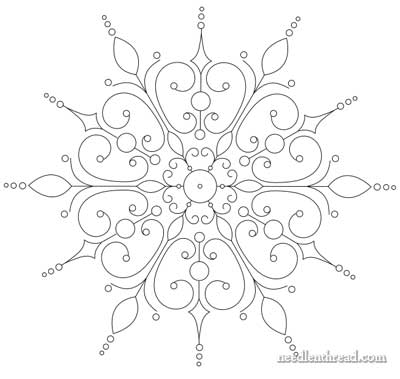
Can you see any difference in the design between these last two images? At this point, I decided to turn the design by 1/6th. It flattens the snowflake a little bit, but now the central vertical “axis” is gone, and I think that makes the design look a little more interesting.
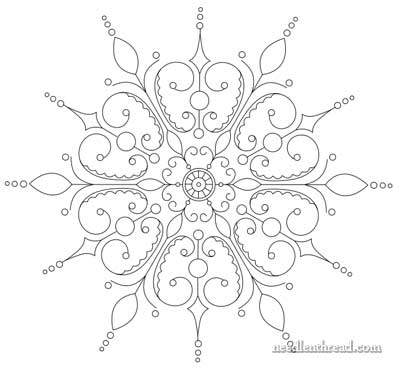
The image immediately above will be my “reference” image, but in fact, it’s way too busy as it is to work as a pattern transfer – too many small elements that won’t transfer well.
So now, the design needs to devolve.
First thing to go: all the double lines in the areas that can be filled. The double lines, in my mind, are where I will outline around a solid filled are. But this doesn’t really need to be indicated on the pattern. I can figure that out as I go.
The very center of the snowflake had a “spoked” area, which I planned to achieve with a certain stitch. But I don’t need the spokes drawn there, and when it comes to transferring the design, they’ll just add confusion. So they’re gone.
Come to think of it, I don’t need the double line in the center, either, so it’s gone, too.
I like the scallops inside the larger swirls – but I won’t need them as part of the pattern itself. I can eyeball those, using a reference image.
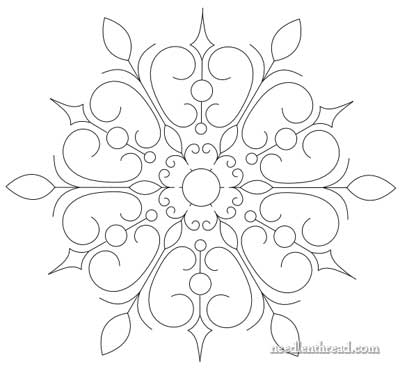
And finally, the last thing I don’t need are all the circles that indicate the placement of spangles and beads. Again, that’s something I can figure out by referencing the complete pattern, or I could just make a tiny dot on the pattern to mark where a bead or spangle will center.
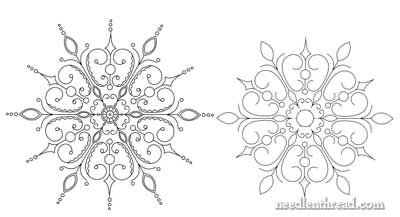
So now we’re down to the bare bones. On the left is the “reference” image that I’ll use as I stitch. On the right is the transfer design.
Removing all the little details in order to create a clear transfer design is especially necessary for this little guy, because, at its widest point, the snowflake will only span about 4 inches. Relatively small, but not itsy bitsy.
So, that’s how my snowflake evolved and then devolved. Next step: transfer! I’ll let you know how it goes!

