When working vertical satin stitches to fill an irregularly shaped area, it’s extremely tempting to crowd the stitch on one side of the design or the other. I think the reason for this is that satin stitch is generally demonstrated in diagrams as worked straight up and down, right next to each other. For example, this is what a typical satin stitch diagram might look like:
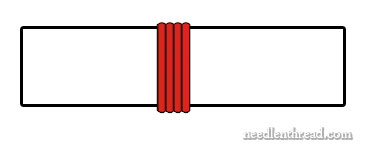
That’s your basic satin stitch, right? The stitches lie parallel to each other, right next to each other, without overlapping. And to achieve that stitch, we know that we come up in the fabric right next to the previous stitch, and we go down in the fabric right next to the previous stitch, too. Isn’t that the way it works?
But what happens when you want to work a vertical satin stitch (straight up and down like the ones in the diagram above), keeping your stitches perfectly vertical and parallel, but you’re filling an area that is irregularly shaped?
Take a look at what I mean:
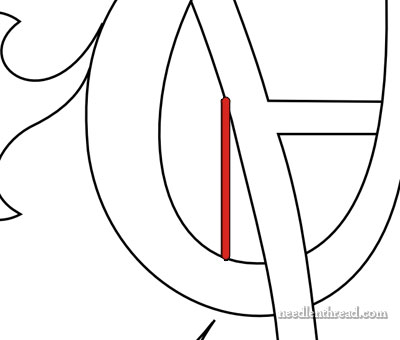
This is part of the Medallion design (only upside down, because, in the photos below, I’m working with the project upside down). If I want to fill the space in the diagram above, where the red line represents my first vertical satin stitch, if I follow the “start-and-end-right-next-to-your-previous-stitch” scenario, what’s going to happen?
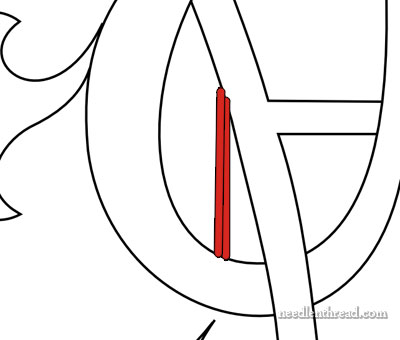
When I add my second stitch, if I crowd the top of the stitches – that is, keep them snuggly next to each other – you can see that the perfect vertical is quickly going to be lost.
In fact, the more I try to keep the tops of my stitches right next to each other, the more the stitches are going to fan out and start turning.
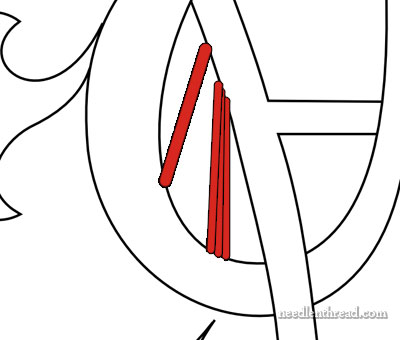
Eventually, the direction of my stitches will end up similar to direction indicated by the larger red line in the diagram above.
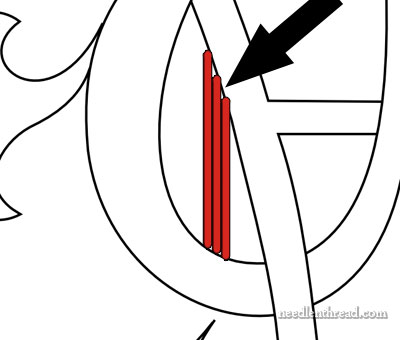
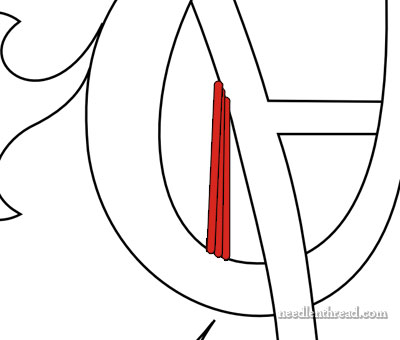
To solve this problem, “step” your stitches. That’s what I call it. I doubt it’s a technically correct term, but the idea is pretty clear: space the top of each satin stitch quite a distance up the slant from your last stitch, stepping up the diagonal line at the top of each stitch. See the resulting “space” between the tops of the stitches? This isn’t noticeable in the stitched product, I promise.
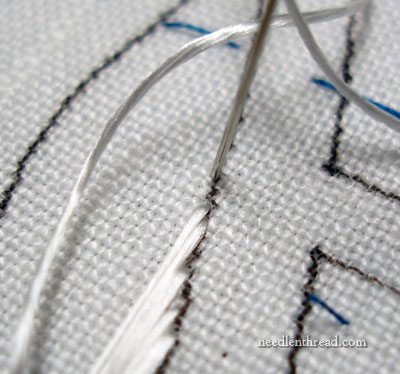
In the photo above, I’m working the exact design area illustrated in the diagrams above. My needle is heading down into the fabric. See how far away I seem to be from the top of my previous stitch?
As I begin the next stitch, check out that gap! I left a good space between the top of the previous stitch and my new stitch, moving up the slant of the line.
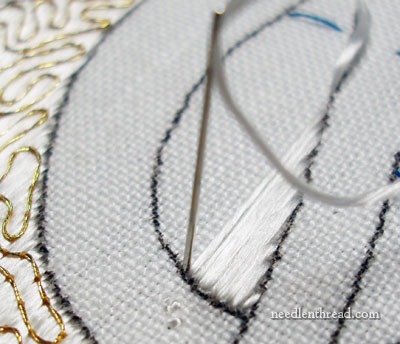
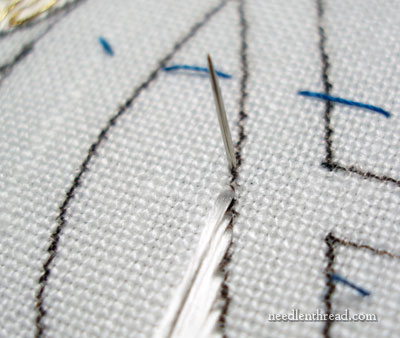
At the base of those stitches, though, the threads are right next to each other.
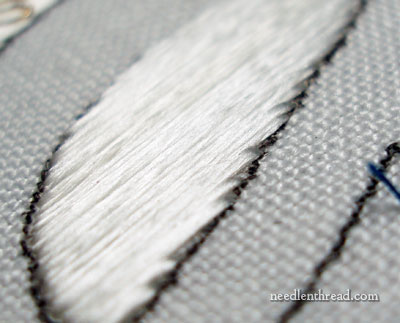
You can see the “steps” in the satin stitch up the slanted design line.
And voilá! Vertical, uncrowded satin stitches.
This applies when you’re trying to achieve perfectly vertical (or horizontal) satin stitches. If you want your stitches to be slanted, then this wouldn’t apply. But if you’re doing “laid work,” which is what I’m doing here – where the silk is stitched down in vertical lines covering the whole area – then you would want to keep those lines as vertical as possible, because your finished product will look better.
So, stepping your stitches when one part of your design is made up of a diagonal line will keep your satin stitching vertical and smooth. Give it a try and you’ll see what I mean!

