Yesterday, we mused over the stitching of the central monogram on the Medallion project. I was considering padding the monogram with felt, and working long & short stitch over the felt to fill the monogram. But the felt that I chose was a very dark blue, deeper in color than the silk thread I am using for the stitching. And this presented a problem: I couldn’t see the stitching well enough against the dark blue felt.
But I liked the effect of the long & short stitch over the felt. So, to be able to accomplish that, I had to find a solution. Some readers suggested other filling techniques, and there are a few that I think would work well, but not for this project right now. When I’m up against a deadline with a commissioned piece, I try not to spend too much time playing around with too many ideas (I already wasted a bit of time with the initial framing problem and the first work on the monogram). For this piece, against the time frame I’m facing, I need to concentrate on getting the job done with techniques I know will work to get the results I want.
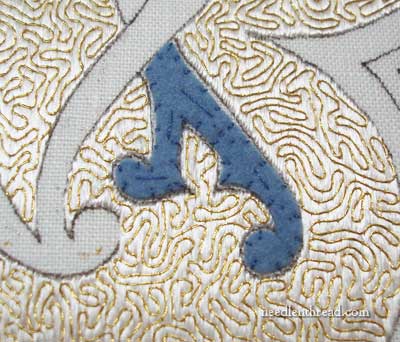
The solution I came up with in this case, since I like the felt padding under the long & short stitch, was to find a different color of felt that would work below the blue silk thread. One reader suggested matching the felt to the linen (in this case, it would be white felt), but because of the fuzzy nature of the surface of felt (even a good, tight wool felt has a slightly fuzzy surface), I didn’t think white would be the thing. I searched through the wool felt I had on hand, and came up with this muted blue. It’s not nearly as dark as the navy blue I used in the test piece, the stitching was visible enough to make it a decent choice, and the blue was blue enough that it won’t cause any problem should a speck peek through.
I’ll show you a bit later how I cut the felt to fit the pattern. Once I had all the felt pieces cut out, it was just a matter of securing the felt to the surface of the fabric and stitching. To secure the felt, I used a regular (blue) sewing thread, worked a couple long stitches in the middle of the felt piece to keep it in place, and then stitched all around the edge with small, evenly spaced stitches.
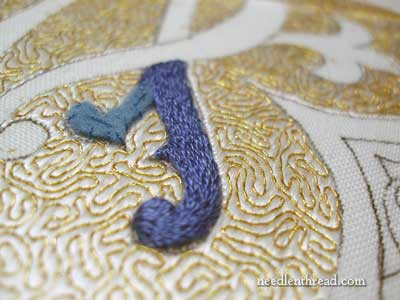
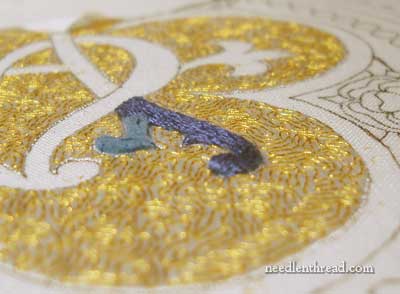
Then, beginning at the top of the felt, I worked the filling in long & short stitch. Long & short stitch is most often seen with shading techniques, but it also works up into a wonderful solid filling. The colors on the monogram are solid, one entwined letter slightly darker than the other. The only shading (and I’m still debating this) will be done on the fleurs de lis coming off each side of the monogram. If I do shade the fleurs de lis, it will be very subtle shading.
You’ll notice that the felt and the filling on the monogram don’t quite fill the whole monogram space. The filling doesn’t quite meet the edge of the background around the monogram – there’s a tiny bit of space left there for the gold edge that will surround the monogram.
The felt raises the stitching slightly above the background filling – not enough to put it in high relief, but just enough to set it up a bit.
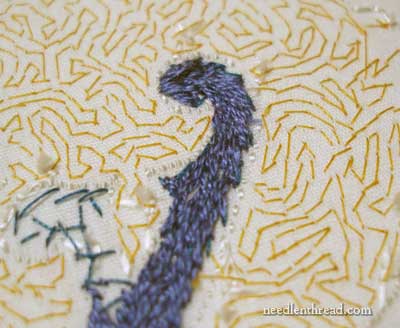
And just for the fun of it, here’s the back of the embroidery. In the area on the left, you can see the tacking stitches that hold the felt. The solid blue is the back of the long & short stitch in silk.
It was suggested that the monogram be worked in gold instead of blue silk. The problem with this is that the piece is meant to be seen from a distance. Because the background is predominantly gold, if the monogram were worked in a solid gold filling (even with a blue outline), the contrast would not be as great, and the design would not be as easily recognizable from a distance. With church embroidery (or any embroidery piece that will be viewed by an audience or congregation from a distance), it’s important to keep contrast in mind.
So that’s the decision on the monogram, and the stitching on that is underway. I’ve had to take a little break from the project to take care of some other looming events (the Nesting Place class is almost ready to launch again!), but I hope to show you some good progress on this next week. I’ll also show you how I prepared and cut the felt for this piece – an easy technique that is helpful in any kind of raised needlework or appliqué project, where an intricate design needs to be cut from felt.
If you’d like to follow along with the progress of this project from beginning to end, you’ll find all the articles about the Medallion Project arranged here for your convenience.

