You might call this splitting hairs – going into too much detail over something that seems to matter little – but it’s a question that comes up often, so it’s probably worth addressing briefly.
This is the question: when you work the split stitch in hand embroidery, does it really matter from which direction you split the stitch?
Most split stitch directions will tell you to split up into the stitch from underneath it. But, you might argue, as long as you’re splitting the stitch, does it really matter all that much? Can’t you split from the top, which is much easier to accomplish because you can see right where your needle’s going?
To answer the question, I’m going to take the middle path: it depends…
Split stitch can be used a number of ways in hand embroidery.
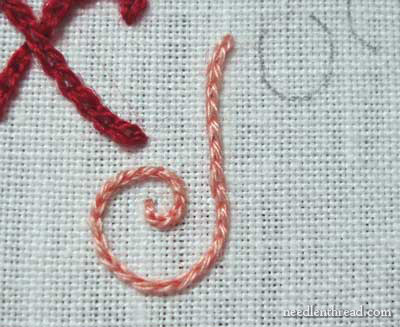
It can be used “as is” – as a line stitch that stands on its own. For example, in the photo above of lettering with split stitch, the split stitch is used with cotton floche to “write” the letter.
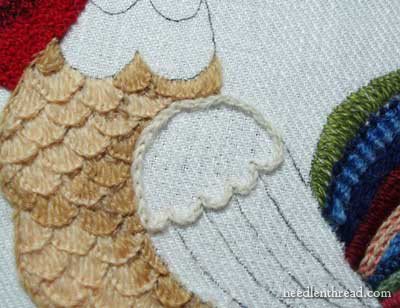
It can be used as an outline stitch underneath long & short stitch or satin stitch, to help define and lift the edges of the filled element. For example, in the photo above, I outlined the top of the wing on my crewel rooster with split stitch before stitching over the outline with long and short stitch, to give good definition to the area and to give some lift to the edge.
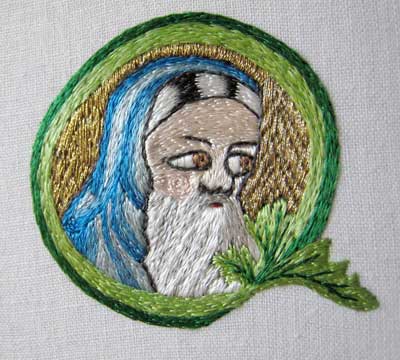
It can be used as a filling itself, by working rows or spirals of split stitch to fill in an area of embroidery. For example, Opus Anglicanum, a medieval embroidery technique, makes use of split stitch this way. The photo above is a small sample of Opus Anglicanum worked by Margaret Cobleigh.
And then, “split stitch” is also involved in another stitching technique: the long & short stitch. Long & short stitch is, after all, rows of stitches that are split by subsequent rows of stitches coming up underneath them. You can see how long & short stitch is done by taking a look at my series of long & short stitch tutorials, if you wish.
When you take one approach or the other to split stitch, there’s a noticeable difference between splitting up and splitting down.
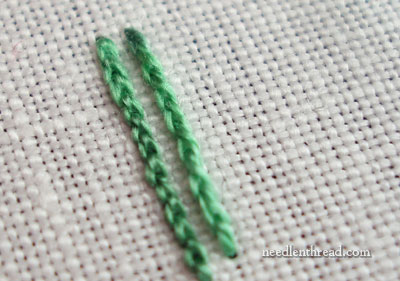
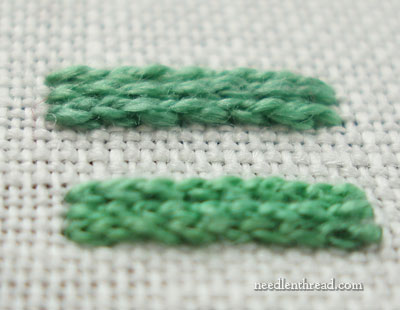
In the last two photos above, you can see two little lines about an inch long each, stitched with #12 perle cotton. One line of stitches is split by going up into the stitch, while the other is split going down into the stitch. Can you guess which is which?
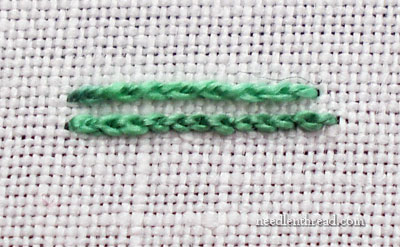
It’s not hard to guess, is it? The line that looks dented from the top is the line that is stitched going down into the stitch. That’s the lower line in the photo directly above. When splitting from above, each stitch is pushed down against the fabric, pushed apart, and separated as the needle and thread pass through it. This causes each stitch to be more compact and the whole line to look a bit tighter.
The individual stitches in the top line look less compact, because when you stitch up into the split stitch, you lift each stitch away from the fabric and separate it. As your thread pulls through, the stitch continues to lift. The stitch, after being split, closes around the thread. The finished result is a stitch that hugs lightly around the base of the next stitch.
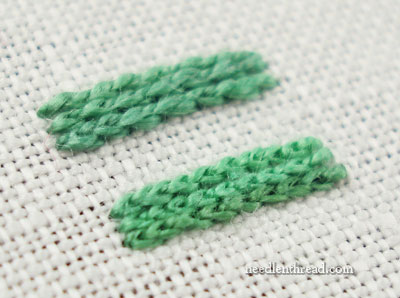
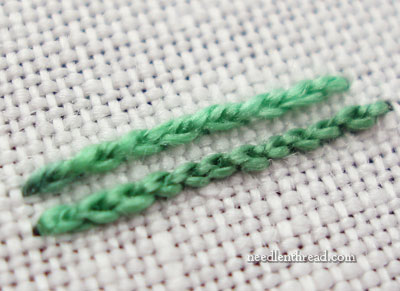
Here, you can see a few rows of split stitch, stitched both ways. The top area is split up, the lower area is split down.
You can see that the individual stitches in the top area are less defined, though they still possess that chain-like look that occurs with split stitch. The individual stitches in the lower area are better defined, and that chain-like appearance is more obvious.
The stitches in the top area blend together better, while the stitches in the lower area are more obviously separate.
The top area of split stitch sits up off the fabric a bit – there’s a little more “lift” to it. The lower area is more compact, and sits closer to the fabric. It has a tighter look to it.
There is a difference, then, in the stitching itself, when you split from below or above when working the split stitch. The approach you decide to take with split stitch will definitely change the outcome of your stitching. If you want a tighter, more compact look, with defined individual stitches that don’t blend together as well, you might decide to purposely split your stitches from above.
If you want your stitches to blend together more smoothly and to lift a bit from the fabric, then you’d work split stitch the regular way, split from below.
When you’re using split stitch as an outline underneath another stitch to lift and define the edge (like satin stitch or long & short stitch, where you outline first and then stitch over the outline), it doesn’t matter so much which direction you go, because the line will be covered. You’ll get a slightly higher lift on the edges if you split from below, but will it really be that noticeable? Probably not.
In long & short stitch, if your point is to blend together your long & short stitching into a smooth, needle painted finish, the stitches should be split from below. If they’re split from above, each subsequent layer of split stitch will form a defined line that sits on top of the previous layer of split stitch, rather than blending with it.
So, if you’ve ever wondered if it makes that much of a difference whether you split from below or above with the split stitch, now you know! It does make a definite difference in the way the stitch looks.
Can you say that one way is “right” and the other is “wrong”? Well, not necessarily – it depends on the look you want and what you’re trying to achieve. The only place I’d say there’s an Absolute on the below / above issue is in long & short stitch, when you want to achieve that smooth, blended, needlepainted look. In that case, the outcome is achieved by splitting the stitches from below.
Me, I’m a splitter-from-below. What about you? Do you split from below, or do you split from above? Leave a comment below and let’s split some hairs together!

