Let’s start the week with a bit of Stitch Play!
If you’re doodling about with hand embroidery stitches, and you’re looking for a way to create a wide line with a bit of added interest to it, you might like this simple combination of chain stitch and buttonhole stitch.
Combining chain stitch and buttonhole stitch in layers is not a new idea. There’s a certain type of needlework called Parma embroidery (which Jeanine demonstrates on her blog Italian Needlework) that combines three rows of chain stitch topped by two facing rows of buttonhole stitch worked close together. Parma embroidery is a whitework technique that produces a very textured line due to the closely worked buttonhole stitches.
My Stitch Play idea here evolved from Parma embroidery – I was looking for a wider line, though, so I extended the base to four rows of chain stitch, and, to create interest with color, I reduced the number of buttonhole stitches, placing one buttonhole stitch per chain stitch.
You can play with this whole idea of stacked stitch combinations, by fiddling with the number of buttonhole stitches in each chain stitch, by stitching your buttonhole stitches from different directions (creating a different twist on the lines where they meet in the middle), by testing the stitch in different color combinations, or working the layers in the same colors, or working the layers in light or dark shades of the same color… lots of room for play here!
When I was playing about with this sample, this is what I did:
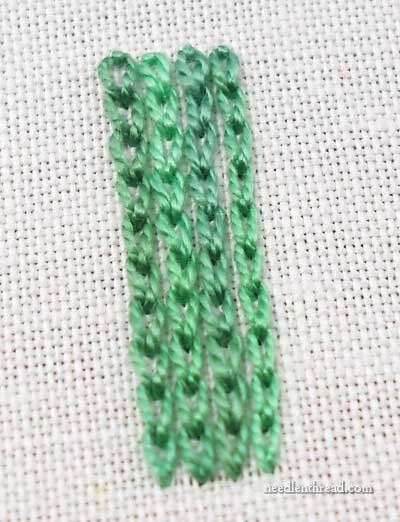
I started with four rows of chain stitch, worked side-by-side, in a #12 perle overdyed cotton. I kept the chain stitches synchronized all the way up each line. If you were working this on a very large design, this would be the tricky and time consuming part! This combination looks best when the chain stitches line up next to each other.
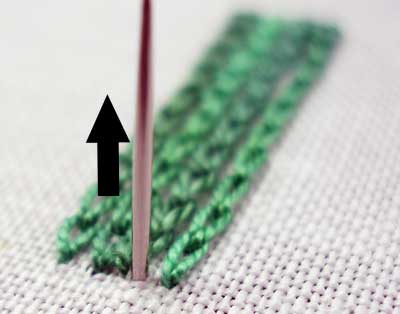
Starting near the beginning of the line of chain stitches second from the right, I brought my needle to the front of the fabric.
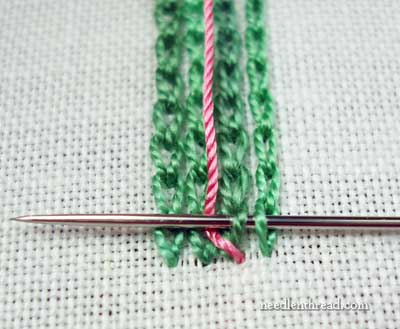
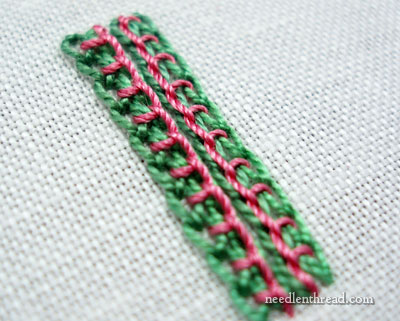
Working over the two right-most lines of chain stitch, and picking up the facing halves of the chains on each of those lines, I worked the buttonhole stitch so that the line created by the buttonhole stitch is running up the middle of the four lines of chain stitch.
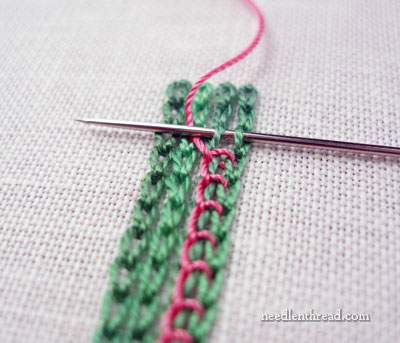
To achieve the look in this sample, it’s just a matter of passing through the middle of each chain stitch, and over the working thread, all the way up the line.
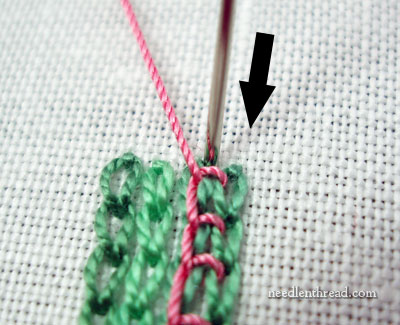
At the end of the chain stitches, the buttonhole is anchored by taking the needle and working thread down into the fabric near the top of the chain stitch line.
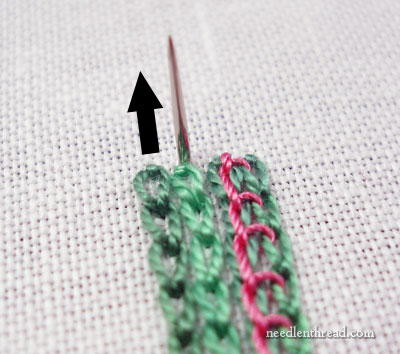
At this point, I cheated. For right-handed people, it would be easier to go back to the same end of the chain stitches that we started on above, turn the fabric 180 degrees, and stitch down the line. Instead, to avoid changing the thread, I jumped over to the other side of the chain stitches here, to work down the two lines of chain stitch on the left, using my left hand to stitch. You can do it whichever way is more comfortable for you – understand, though, that you’ll get a different twist on your chain stitch, depending on the direction you work from.

So, here, you can see I’m working down the left side of the chain stitch rows, in the same manner I worked the right side, going into the middle of the chain stitches and over the working thread.
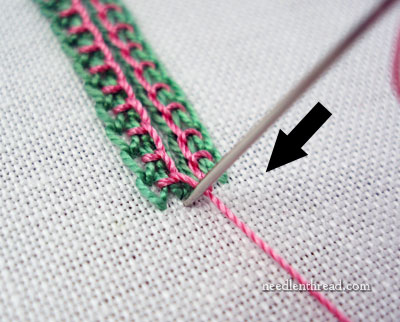
At the end of the left side, I sunk the needle and anchored the buttonhole.
This is just one of an infinite variety of ways you can layer your stitches and combine two stitches to create a different look. This isn’t a rigid “how-to-do-this-technique” tutorial, as you can see. The purpose of Stitch Play isn’t rigid instruction. Rather, it’s to show you how you can dabble about with stitches, and to encourage you to play around with various embroidery stitches. Dabbling with stitches can be a lot of fun – it’s a good way to get comfortable with surface embroidery!
So – go dabble!
If you have any ideas you’d like to see worked out for this Stitch Play series, leave a comment below and let me know!
Hope your week is off to a good start!

