Approaching the gold dots on the outer edge of the Medallion design, I decided that they should tie in with the center goldwork area on the Tudor-style roses that surround the Medallion. The center of the dots, then, should be filled with a goldwork embroidery technique called chipping or chip work. This involves cutting up tiny bits of check purl and sewing the bits down by taking the needle and thread through them and sewing them down like beads, in a random fashion, until the area is filled up.
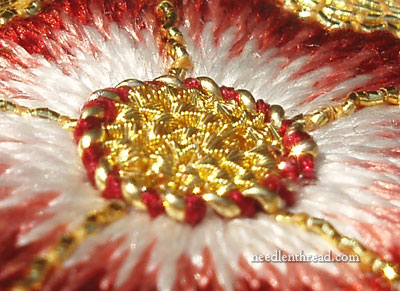
You can see this goldwork technique worked in the photo above, which is a close-up of the center of the Tudor-style rose.
Using the same gold thread, which is a #10 (very small!) bright check purl, I started working on the dots. Remember that the dots are quite small – about 5/16″ in diameter (just over a quarter inch) – so the real metal thread used to do the chip work would have to be pretty small, too. #10 bright check purl is quite small. I had to use a #12 crewel needle to fit through the center of the purl. Nothing else would work, though I did try a #15 beading needle, which duly snapped after a few stitches. I foraged about for my reserve of #12 crewel needles, and found them – four lonely needles wrapped in a tiny bit of tissue paper and tucked into a tiny envelope. I made a note to order more!
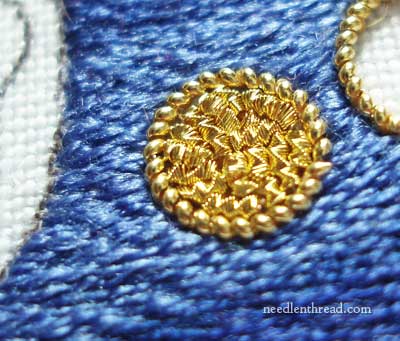
I tend to crowd the chips into their space, always afraid that the fabric will show through. Keep in mind, I’m not padding this area with felt (thank goodness – cutting out 50 tiny felt circles and sewing them all down is the last thing I want to do at this point!), so without the yellow felt behind the gold chips, there’s more of a chance of the noticeable white ground fabric peeping through. Or so I thought. Actually, looks can be deceiving. Because the area is so small, any bit of white that does show through is teeny. While they might be visible in close-up shots with the camera, they are practically undetectable otherwise.
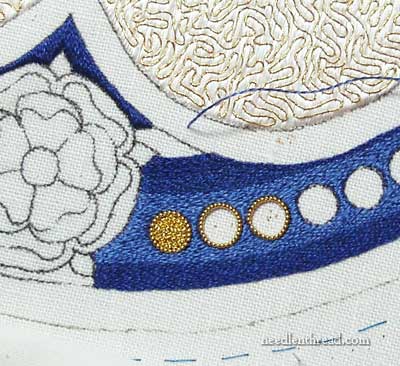
Adding a stem stitch outline in the darkest blue around the outside of the dot gives it a little further definition, and it keeps the dot from looking too flat.
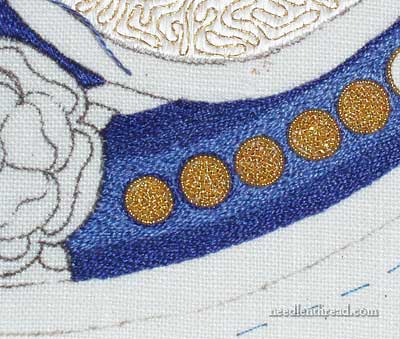
You can see the difference here between the dots with the blue outline and those without it.
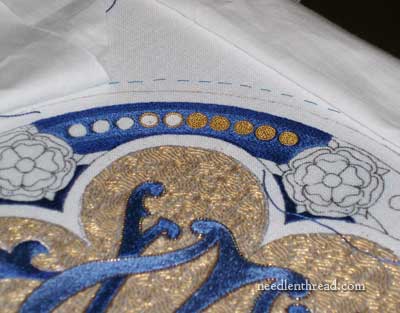
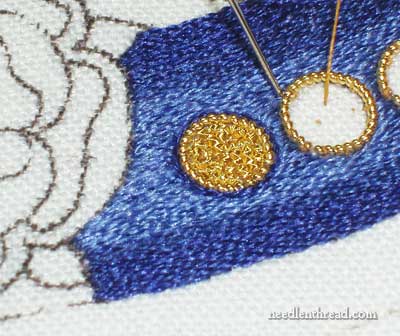
And, finally, from a different angle, so you can see the golds and blues working together…
As I work through the rest of the dots around the outline, I’ll try to put together some step-by-step tutorials on using the pearl purl around the outer ring, and cutting and filling with the chips of bright check purl.
If you’d like to follow along with this project from its beginnings until now, I’ve got all the articles relating to it organized under the Medallion Project Index. Feel free to read the back story and follow the work involved in getting the project underway!

