When I played with the detached chain stitch and the ribbed spider web stitch a couple weeks ago, to create the Chain Stitch Spider Daisy, a reader wrote and asked if there was a way to make the flower domed rather than flat.
So today, for Stitch Play, let’s look at the Raised Spider Daisy! Now, the concepts involved in creating this domed spider daisy are found in other raised stitches (for example, in raised satin stitch dots), so you can actually apply these concepts to creating all kinds of domed elements in your embroidery.
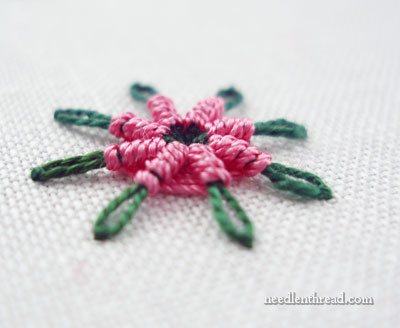
This is what we’re going to create in today’s Stitch Play:
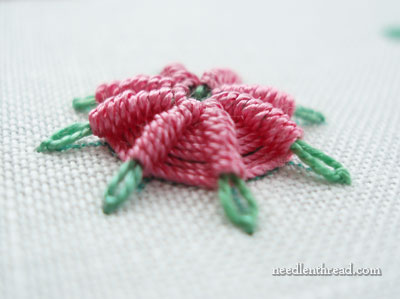
You might think it looks just like the Spider Daisy we created a couple weeks ago, right? Well, read on… and below you’ll see the comparison photos!
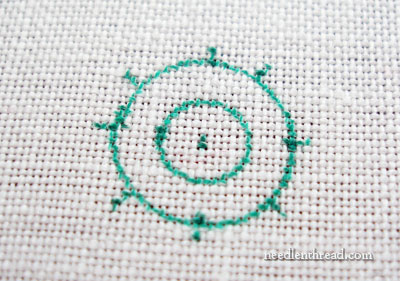
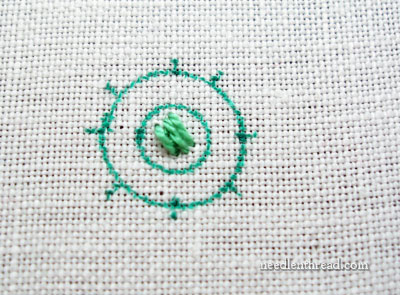
Whenever building the padding area for a circular stitch, you might want to start with concentric circles drawn on the fabric, because it helps to keep the “dome” that we’re going to build in the center right in the middle, so that the raised effect is evenly distributed. You don’t have to draw circles on your fabric for this – you could eyeball it. But for this demonstration, we’ll start with circles on the fabric.
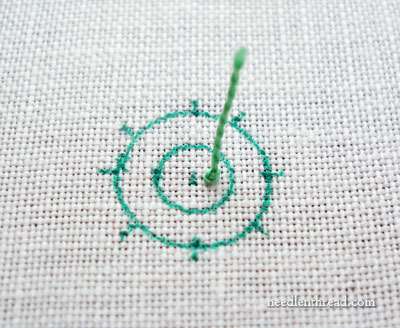
I’m going to start the whole process with a waste knot and anchor stitches. I’ve covered this technique before in other little tutorials here on Needle ‘n Thread, but for those who are seeing it for the first time, it’s a good lesson on starting your thread in hand embroidery without leaving a knot on the back of the fabric, and without having to turn over your work.
So, in the middle of the center dot, I’ve taken my thread down into the fabric and left the knot on the top of the fabric.
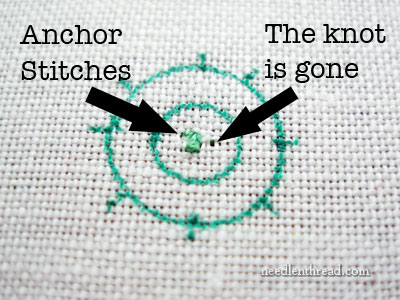
Then, in the same center area, I’ve taken three tiny stab stitches right close to each other. These anchor stitches will hold the thread securely, and they will be covered by subsequent stitching. Any time you can cover anchor stitches with your embroidery (you can even start your embroidery thread with anchor stitches on a line), this is a great way to begin a thread. Notice that the knot is gone – I pulled up on the tail and cut the thread right next to the fabric to remove the knot. And my thread is perfectly secure.
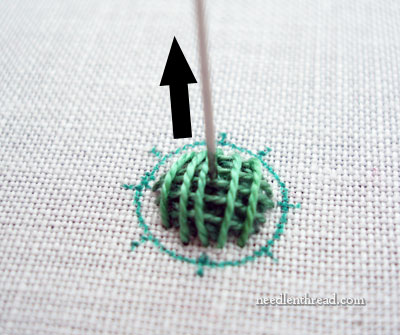
Now it’s time to build up our dome.
I started with three straight stitches in the middle of the center circle. Take a straight stitch and come up for the second straight stitch right next to where you went down with the first one. This way, you’re not building up a dome on the back of your fabric, too.
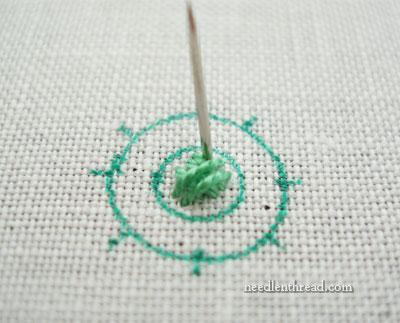
Then make another layer of straight stitches over the first layer, working this next layer perpendicular to the previous layer.
At first, you’ll only need three or four stitches on each layer, but as the dome grows, you’ll need a few more to cover each layer. Keep building the dome by working these each layer perpendicular to the one before.
Notice that, on this particular piece, I’m not working the stitches close together like satin stitches. If we were making a satin stitch dot, I’d probably work these padding stitches a little closer, but since we will need to pierce the center of this dome and stitch through it, I’m keeping these padding stitches a bit more loosely spaced.
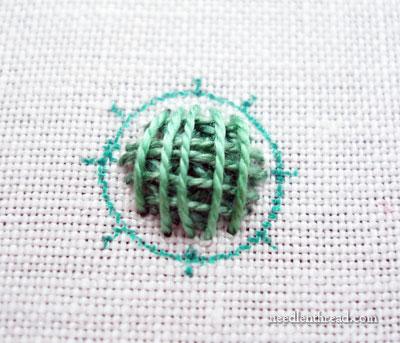
You can see how high our padded dome is. Now it’s time to work the spider daisy over the dome.
Bring your needle up into the middle of the dome, and work your “spokes” in detached chain, just as we did for the foundation of the original spider daisy, only now each chain stitch is starting in the middle of this raised dome.
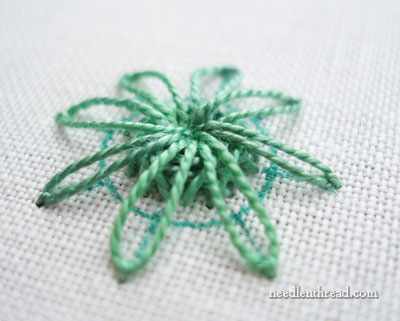
Here are my spokes in detached chain stitch. They are long – stretching out well over the dome – and they are a little loose. I didn’t pull them as tight as I would if I were just stitching a flat daisy with detached chain stitch. I want to give them room to move down over the dome.
The circle that’s still visible is the perimeter of my ribbed spider web stitch. This is as far as I will take the ribbed spider web, so that the tips of the detached chain are still visible beyond the ribbed spider web.
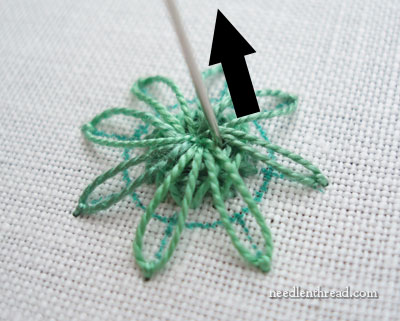
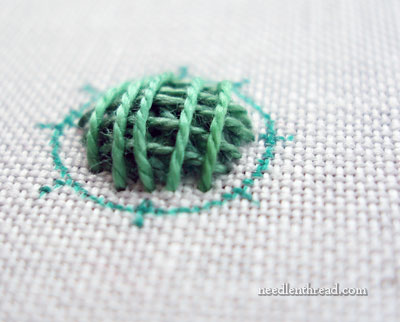
Thread your needle with the color you want to use for the ribbed spider web. For this demonstration, I used pink buttonhole silk again. Bring the needle up between two petals of detached chain stitch, close to the center.
And then go ahead and work the ribbed spider web stitch over the petals and dome, just like we did in the original spider daisy. You’ll pass under the petals, but not into the dome stitches.
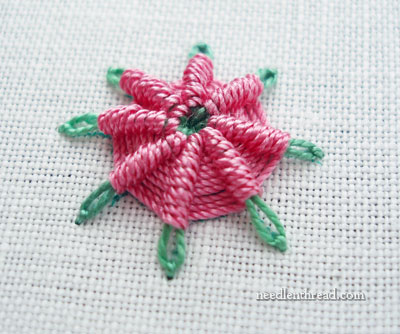
The original spider daisy…
… and the raised one.
Again, the concept of building up a dome of padding underneath a stitched element can be applied to all kinds of other stitch techniques. The domed padding doesn’t have to be circular – it can be built up in any shape. Imagine, for example, a beehive made from bullion knots. If you want the beehive to stand up from the fabric, just build up your padding stitches in the same way, working the padding in layers higher and higher, until the area you want to cover is raised up as much as you want it raised. Maybe I’ll show you a beehive worked in this technique one of these days!
Stitch Play is a relatively new series here on Needle ‘n Thread. If you have any requests for Stitch Play, just leave a comment below or drop me a line, and I’ll try to drum up something for you!

