You can never have too many options for stitching hand embroidered flowers! Today’s embroidered flower-looking-thing doesn’t necessarily have to be a flower – you can work it on curves or lines as well. But worked in the round like this, it makes an airy, light flower that’s a lot of fun.
So, for today’s Stitch Play, we’re going to stitch an Inside-Out Buttonhole Wheel Flower. You can work through the whole process shown here, or you can stop at different stages for the effect you want. This is the complete element that I’ll show you today:
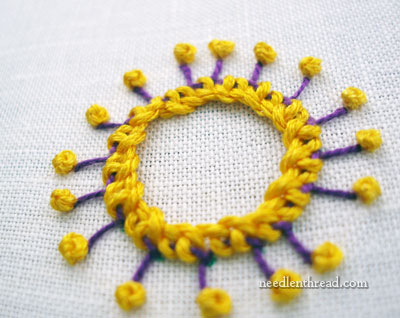
Normally, when you think of buttonhole wheels, the “spokes” go towards the inside. On this little embroidered flower, though, the spokes go to the outside. The buttonhole stitch is then overstitched with a detached buttonhole stitch (which is worked over the previous stitch, but not through the fabric), and then I touched the tips off with French Knots, just for the fun of it.
If you happen to be embroidering a bright sun floating up in an embroidered sky, this technique would work great for that, too!
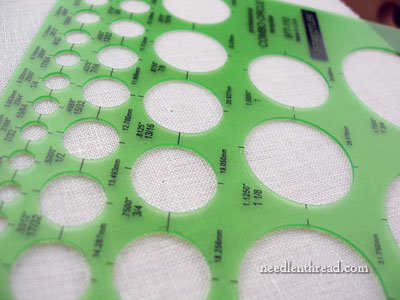
If you’re hesitant to embroider circular elements because you’re afraid your circle will be off, you might consider investing in a set of plastic circle templates, like these made by Staedtler. You can find them in office supply stores or the art sections of hobby stores. They have all different sizes of circles on them, making them quite handy for marking the outline of a circle on your fabric. I generally just “dot” the circle in, rather than draw a solid line.
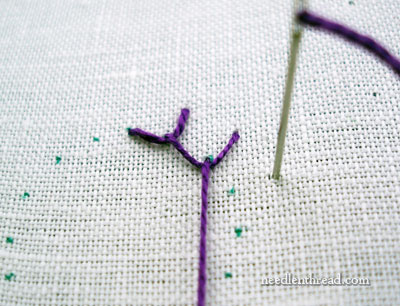
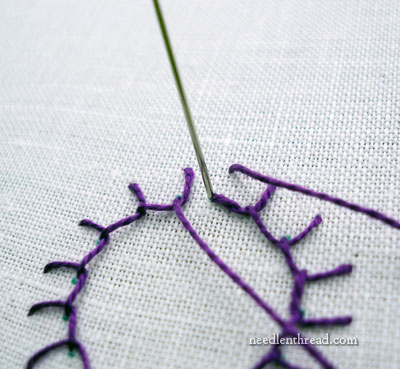
Starting on the line of your circle, work the buttonhole stitch around the circle, with the “twist” of the buttonhole stitch along the marked line, and the spokes stretching out about a quarter inch or more. The spokes can actually stretch out as long as you want them to, as long as you remember that, if the spokes are made very long and aren’t secured somehow, they will be looser and more prone to snag or catch on things.
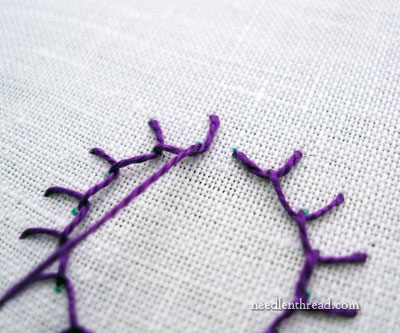
Work all the way around the circle, until you come back to your starting point. Make sure that you hold your working thread with even tension as you work around the circle, pulling the working thread in the direction that you are moving around the circle, so that the buttonhole stitch remains intact.
Take the last buttonhole stitch right up against the beginning of the first buttonhole stitch, to close the circle.
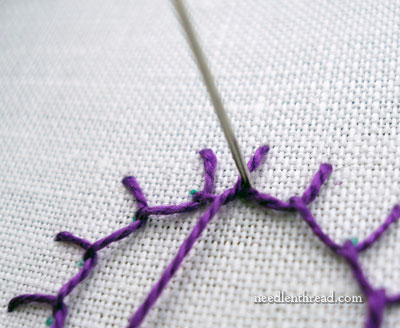
To end off the thread and secure the last stitch, take a small anchor stitch over the “elbow” of the last buttonhole stitch, right down next to the beginning of the very first stitch in the circle.
This will create an almost-invisible join, but even if the join is slightly visible, that’s ok, because it won’t be noticeable after you finish the next layer!
Thread your needle with a new color. In this sample, I started with purple #5 perle cotton and then I switched to a stranded silk in bright yellow. For the yellow layer, I used all strands, to make a nice, thick stitch. You can use any number of strands or any thickness of thread, really. But the finer the thread on this second layer, the more buttonhole stitches you’ll have to work, to provide enough noticeable coverage. I like a thicker thread for this layer.
You can begin this detached buttonhole layer anywhere on your circle of buttonhole stitches.
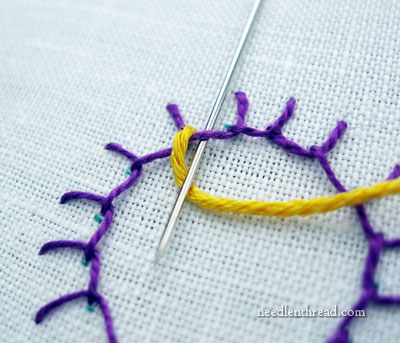
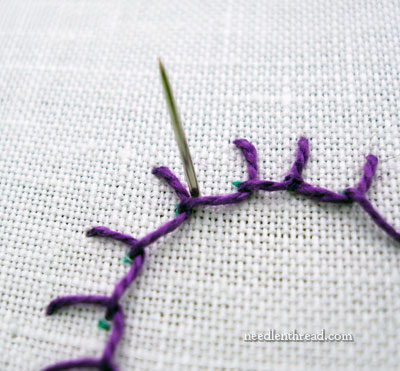
At this point, we’re buttonholing over the twist of the previous layer of buttonhole stitches, along the inside line of the circle. Pass the needle under the thread of the first buttonhole layer and over the working thread and pull through. Make sure you don’t pick up any fabric.
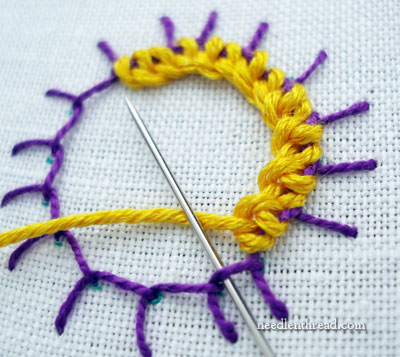
Continue this all around the circle, taking as many buttonhole stitches in each section as will fit. In the sample, I used two buttonhole stitches between most spokes, but in some sections, I only used one.
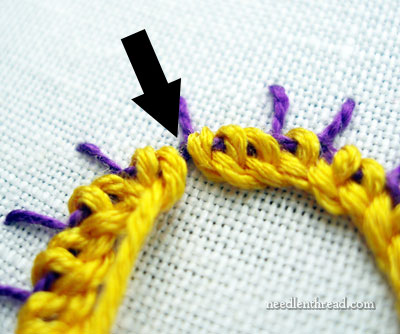
When you get to this point, where the beginning and the end of the yellow layer meet up…
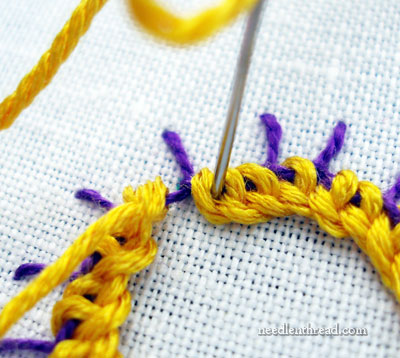
… just anchor your last stitch by taking your needle down into the middle of the first stitch.
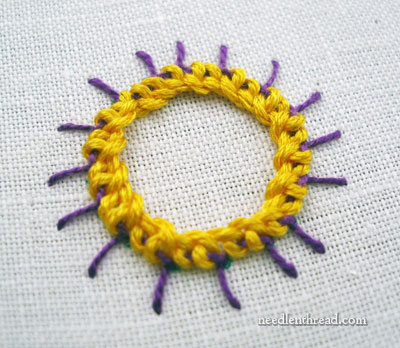
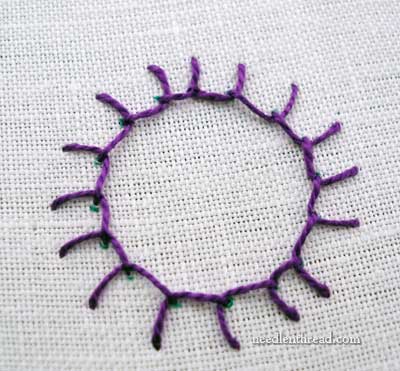
You could leave your spindly-petaled flower like this.
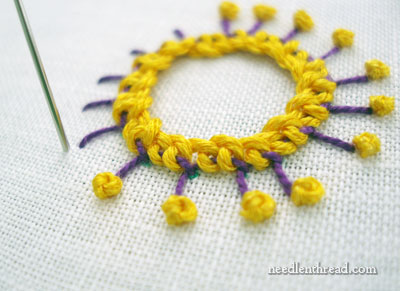
Or you could keep embellishing it, by touching the tips of the spindles with nice plump French knots.
And there we have an airy, light flower, with lots of possibilities for color combinations! You definitely need one of these in your embroidered garden!
Stitch Play is a new series on Needle ‘n Thread, in which we explore different stitches, techniques, and combinations in photo tutorials. If you have a stitch or technique you’d like to see worked out in Stitch Play, feel free to leave a comment below and let me know! I’ll see if I can work something up for you!

