Here it is, the final article on the Medallion Project, and a little how-to bit on one way to appliqué a piece of hand embroidery to another ground fabric.
Yes, I thought I was finished with the whole project, too!
Initially, I didn’t plan to appliqué the piece to the back of the vestment (called a chasuble). I expected to deliver it to the seamstress making the vestments, and that would be The End. What actually happened was a little different. When discussing the finishing with the seamstress, we had this conversation:
Her: Do you want to do the appliqué or do you want me to?
Me: Oh, if you want to, that would be great with me!
Her: Ok, that’s fine! Will the zipper foot be ok, do you think?
Me: Ummm….I’ll do the appliqué.
Sewing machines, even with zipper feet, and goldwork embroidery don’t go all that well together.
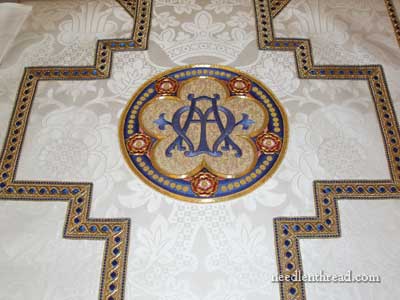
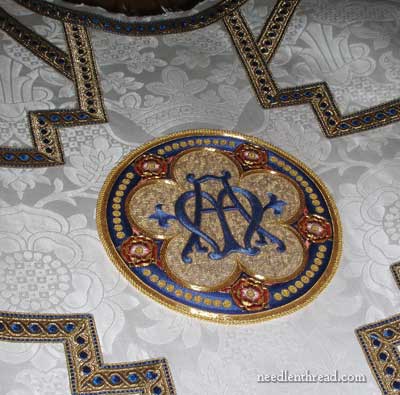
In the photo above, you can see the medallion cut out of the frame and situated on the back of the chasuble. The cross on the back of the chasuble is much larger than I thought it would be, leaving a lot of space around the medallion. At first, I thought this might be a bit of a drawback, but in fact, the seamstress was right – if the cross were smaller in the center, it would crowd the medallion and lose the focal point.
The cross on the back of the chasuble is marked out in a kind of “ribbon” or trim called a galloon. These decorative bands can be anywhere from narrow (1/2″) to wide (a couple inches). This particular galloon is 1″ wide. Along the edge of the vestment is a 1/2″ wide matching galloon.
I thought the seamstress was very clever in the way she situated the design of the fabric to work with the embroidery. The offset pattern in the fabric is a crown, and she was able to situate the design so that a crown would float just above the embroidered medallion. You can see the rose repeat in the fabric situated to the right and left of the medallion. It’s quite a large pattern, and it looks really good from a distance.
I’m going to explain here how I appliquéd the piece to the ground fabric, but keep in mind there’s more than one way to appliqué. This is the way I do it; others may have better suggestions for similar situations.
Before Removing Embroidery from the Frame
While the embroidery was still on the frame, I turned the frame over and beat the living daylights out of it. No, seriously – I did! Using a sort of weighty little soft pillow, I beat the back of the embroidery. I wasn’t overly aggressive with it, but it did get quite a bit of a pounding. This loosens up dust and particles that may have collected over the past many months while the piece was on the frame.
Pasting Embroidery and Why I Didn’t
Now, at this point, there are many different approaches to the finish work. In most old ecclesiastical embroidery books, the experts suggest pasting the back of the work lightly, using a wheat paste on the back of all the threads. Wheat starch mixed with water is commonly used to make the paste, which is rubbed on lightly with the fingertips, just over the back of the embroidery threads. The concept is that it will further secure the threads and add some stiffness to the appliqué. Initially, I was going to do this, but after reading other books that advised against pasting, I was a bit hesitant. I sought advice from some experts today (a couple RSN graduates and a textile expert). They strongly suggested I didn’t paste the back. Over the years, restoration specialists have apparently noted that wheat starch is a very tasty treat for wee little bugs. They sniff it out and eat it, and as a result, eventually the threads are weakened. Also, if any repair work on the medallion is required down the road, the paste makes it really difficult to do it. Since I had three sources who agreed with this view, I decided to skip the wheat paste.
Great way to save a step!
Appliquéing Embroidery
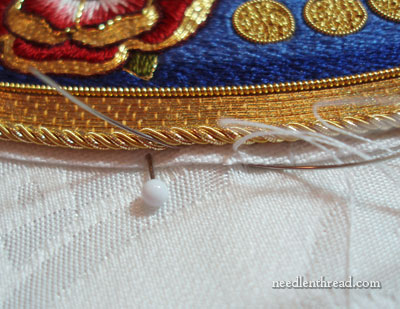
I cut the fabric from around the medallion, leaving about an eighth of an inch all the way around. I measured carefully to center the medallion, and stuck straight pins in to hold the medallion in place. The pins only enter the fabric once, straight under the edge of the medallion (you can see a pin in the photo above). They don’t “scoop” back up and come out of the fabric again. This helps avoid wrinkles.
Then, using sewing thread doubled in a curved needle, I worked a backwards slip stitch around the medallion, bringing the needle up just under the Grecian Twist on the outside edge of the embroidery. The long stitch of the slip stitch is on the back of the ground fabric, with a small straight stitch just over the edge of the linen and into the ground fabric. You can see the white straight stitches in the photo above.
Once this was finished, technically the appliqué part was done, but the edge of the linen still needed to be covered. This is called “neatening” the edge.
Neatening the Edge of the Appliqué
Neatening the edge of an appliqué worked in this manner is usually done with some kind of cord or trim, which is couched over the edge of the linen fabric and into the ground fabric, further strengthening the attachment of the appliqué and covering up the linen fabric that is visible beyond the edge of the embroidery. You can also use embroidery stitches to neaten the edge, working, for example, a stem stitch outline around the outside of the appliqué. If you do use an embroidery stitch at this point, it is best if the stitch creates a solid line. A more open stitch, like chain stitch or buttonhole stitch, would look a bit rough here. Still, the most common way of neatening the edge of an appliqué on vestments is by using a cord of some sort.
Initially, I planned to neaten the edge with a thin dark blue twist made from the dark blue silk used in the medallion. In fact, it simply didn’t look good. And of course, I forgot to take a picture to clarify the point. For one thing, any imperfection in the cord was visible, given the high contrast between the dark blue and the white ground. For another, it almost looked cartoonish, with the dark edge around the medallion. Whereas I liked it when I tested it in the finish photos, I just didn’t like it on the vestment.
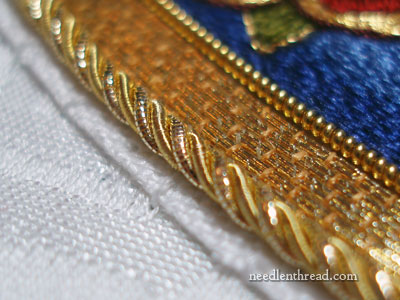
The only thing for it was to use a gold cord, and after testing a few different options, I opted for another line of Grecian Twist. This pulled the gold out a little farther and gave some more “thickness” to the outside of the medallion. I couched the Grecian twist in the same manner as before, passing through the linen and the ground fabric of the vestment.
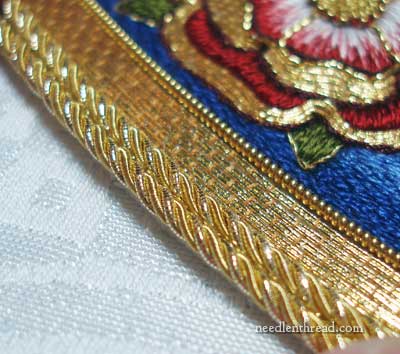
Finished Appliqué
The lighting conditions where I was working were not the best, but this is the appliqué attached to the vestment:
I never did get a full shot of the whole chasuble back, I’m afraid. The vestment will be assembled with a gold lining on the inside of it, and it will surely be quite striking. If I ever get a photo, I’ll share it with you!
And that, my friends, is the Absolute End of the Medallion Project.
Amen to that!
If you would like to read the backstory of this project and follow it step-by-step as it progressed, you are welcome to visit the Medallion Project Index, where all the articles are arranged chronologically. Within the many articles on this project, you’ll find plenty of instructional tips that can be applied to all kinds of hand embroidery projects. You’ll also find over 250 photos of the project as it progresses.

