One of the greatest aspects of hand embroidery is the unbelievable variety and sheer quantity of hand embroidery stitches and techniques out there. Thing about it: could you ever really get bored with hand embroidery? There’s just too much variety and too many possibilities to get bored with it, don’t you think? (Or is that just me? Ok. I admit to a slight obsession with this whole needle & thread thing…)
Lately, I’ve been having fun playing around with some of the stitches and techniques that are a bit off the familiarly trodden embroidery path. Feel free to jump on board and play around with these stitches, too. They’re really fun!
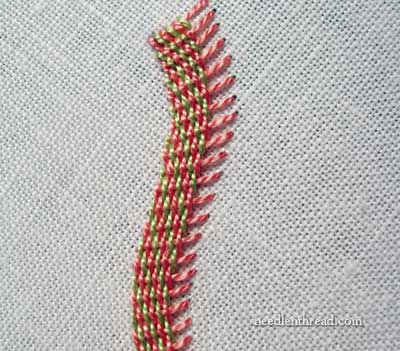
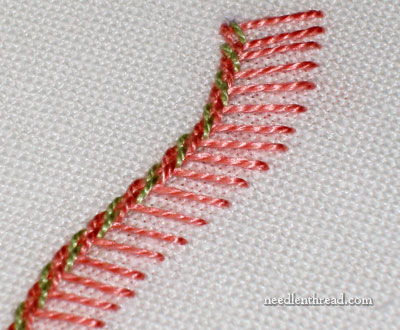
Following up on Casalguidi stitch and the raised stem stitch band, for today’s Stitch Play, I’m going to show you how to create a raised band that’s diagonally striped. It looks like this, give or take the little hairy tendrils on the right:
I like these raised band stitching techniques. They’re fun to play with, they’re not too taxing to do, and they create a neat dimensional and textural effect. I hope you can find ways to incorporate them into your own stitching! Just a hint while you’re playing with them: The threads you choose can create a complete different look or feel to the stitches, so play around with your threads, too. Mixing them up would be a good exercise in the texture and performance of threads.
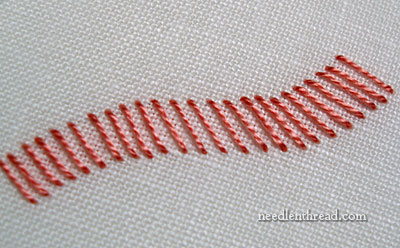
To begin this diagonally striped band of stitches, you’ll need a foundation to work on, just like the foundation used for raised stem stitch. You can work this technique over curves or straight lines (gently curves work better). If you want an equal “fill” over the width of the band, your foundation stitches should be worked between two parallel lines, with the foundation stitches all equal length.
For the sake of this sample, I stitched a slightly waved foundation between two imaginary parallel lines that weren’t parallel after all. You can draw your lines on the fabric – if you do, just make sure that the length of your foundation stitches (the “bars” seen in the photo above) pass slightly over your drawn lines, so that the lines are completely covered once the stitching is finished.
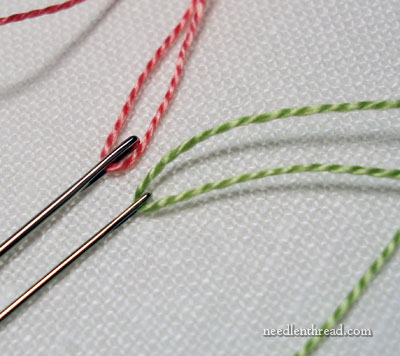
Select a second color of thread, besides the color used for the foundation stitches. I’m using perle cotton #8 in this demonstration, but any thread will do. I like the texture that more tightly twisted threads (like perle cotton) provide, but other threads (or a mixture of threads) could be interesting, too. If you use regular cotton floss, the effects will be more visible if you use several strands (or the whole bunch of six strands).
Thread up both colors in two different needles. Because the rest of this technique is simply a weaving technique, passing over and under the foundation stitches, you might prefer to use a tapestry needle. The blunt tip of the tapestry needle is best for weaving techniques like this.

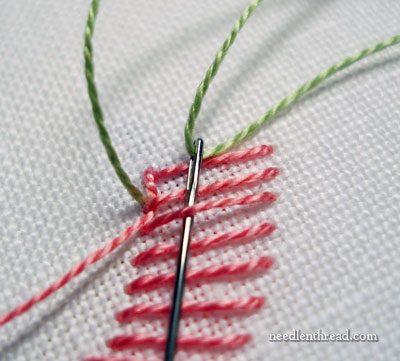
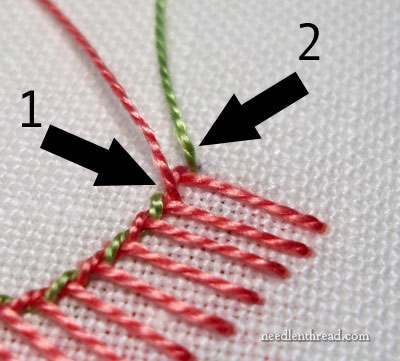
Bring color #1 up just above the left end of the first foundation stitch, and bring color #2 up just above the left end of the second foundation stitch. This is the starting position for each row, although the color placement will alternate with each row.
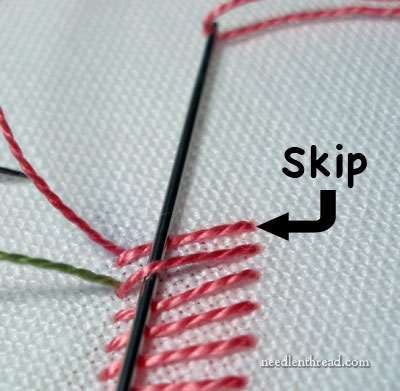
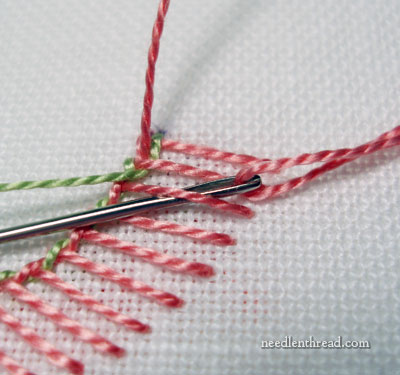
Skipping the first foundation stitch, take your Color #1 needle under the second foundation stitch and pull through, pulling over to the left. You don’t pick up any fabric here – this whole technique is worked over the foundation stitches, and not into the fabric.
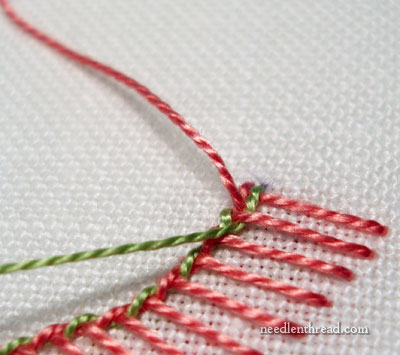
You can see in the photo above that I’ve pulled Color #1 thread through, and then off to the left to get it out of the way.
Now, take Color #2 needle under the next foundation stitch down, and pull it through and off to the left.
That’s the whole technique. Essentially, you’re just weaving over and under the foundation stitches and the previous thread, holding it to the left. Continue down the foundation stitches in this manner, until you reach the end.
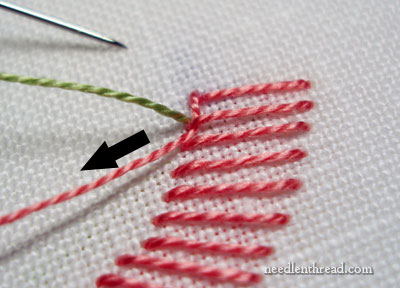
When you get to the end of your foundation stitches, take the one that’s supposed to pass over the last foundation stitch over it, and into the fabric.
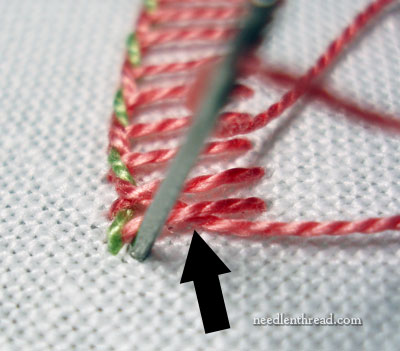
Then take the one that’s supposed to pass under the last foundation stitch (the arrow points to it passing under the foundation stitch) into the fabric right under the foundation stitch.
Pass your working threads back to the beginning position, by running them under the back of the foundation stitches on the back of the fabric. Make sure you have enough working thread in both colors to complete a whole line of “weaving” so that you don’t have to end and begin again with a new thread. If you don’t have enough thread to pass all the way down your foundation stitches again, then now’s the time to end your thread and start a new one.
Bring the two colors to the front, in the same positions as before, but this time, Color #2 should be above the first foundation stitch, and Color #1 should be above the second foundation stitch. This alternating of colors creates the diagonal stripes.
Work down the foundation stitches again, in the same manner, pulling your stitches to the left, to “pack” the foundation.
Remember to alternate the threads and always pass under the next foundation stitch.
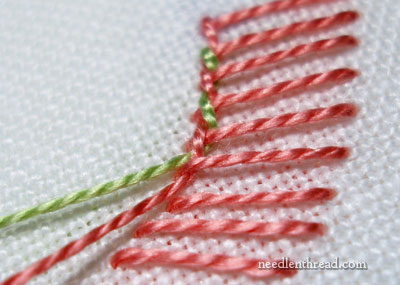
After the second row, you’ll see the diagonal stripes beginning to develop!
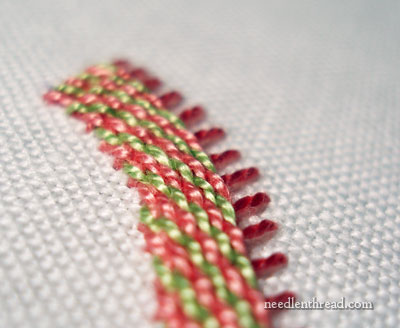
Keep going until you’ve filled up your foundation stitches, or at least as much of them as you want to fill.
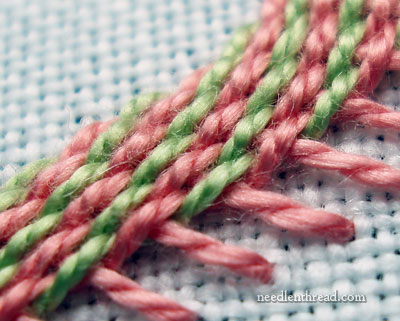
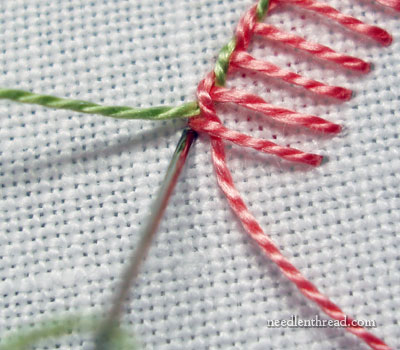
Looking at the stitches up close, you can see the “weaving” pattern more clearly.
when you step away from the band a little bit, you can see not only the diagonal stripes, but also the texture created by the horizontal “bumps” of the foundation stitches.
Now, my question: how would you employ this technique in an embroidery project? Free style surface samplers of various stitches and techniques are a simple enough way to use the technique, but what about actually incorporating the technique into a design? When I asked my niece, she said, “I’d stitch a snowman and that would be the scarf.” What about you? Any ideas?
Stitch Play is a new series on Needle ‘n Thread, in which we explore different stitches, techniques, and combinations in photo tutorials. If you have a stitch or technique you’d like to see worked out in Stitch Play, feel free to leave a comment below and let me know! I’ll see if I can work something up for you!

