Earlier this week, we looked at one way to create isolated French knots (or colonial knots, incidentally) without carrying threads across the back of the fabric.
Today, I’ll show you two other methods I use to begin isolated French knots (depending on the thread I’m using), and one method to secure practically any isolated knot after it’s made. Keep in mind that this is how I do it – this doesn’t mean there aren’t other (and probably better!) ways to start and end isolated French knots. But for those of you who don’t know how, if you try the methods suggested here, I think you’ll discover they both work.
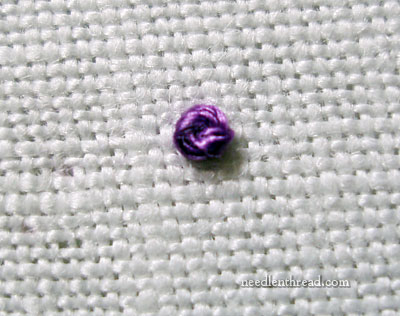
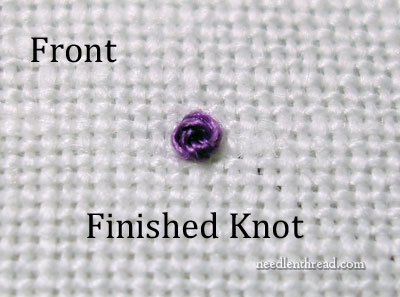
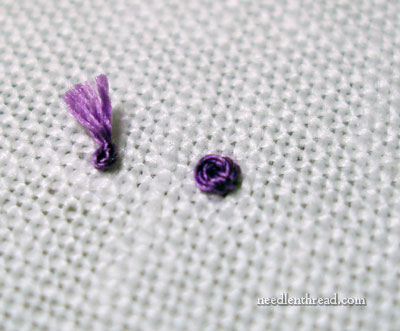
So this is what we’re going to create – a French knot (or colonial knot) that stands alone on the fabric, without any trailing threads behind the fabric.
Beginning the Thread for the French Knot
Let’s look at two different ways to start the thread for the French knot securely. The difference in the two ways depends on the type of thread you’re using and the number of strands in your needle.
Using an Even Number of Strands of Floss
When using regular stranded cotton floss, if you are stitching with two strands of floss (or any even number – four strands or six strands), you can begin your thread the following way. This is actually a common way to start a thread for cross stitch without using a knot. So it’s the same idea, if already know how to do that.
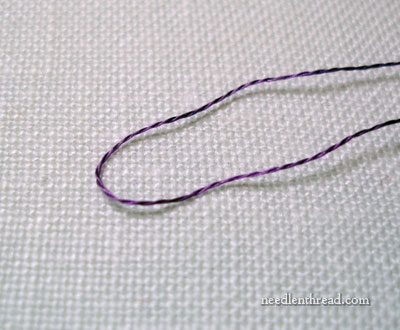
If you’re working with two strands of cotton floss (and by cotton floss, I mean stranded cotton, like regular DMC or Anchor floss), start with just one strand and fold it in half. The photo above shows you what I mean – there’s only one strand of thread there, and it’s been folded in half.
If you’re using four strands or six, you can do the same thing – separate out two or three strands (respectively) and fold those in half, to make four or six strands.
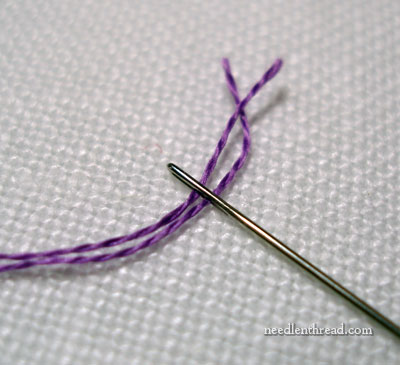
Thread the needle with the cut ends of the floss. This leaves the “fold” on the tail end of the floss.
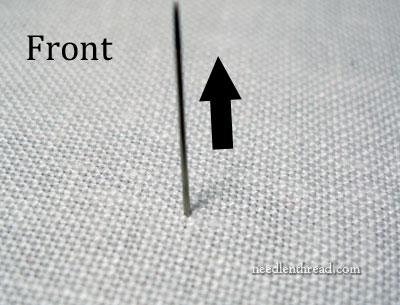
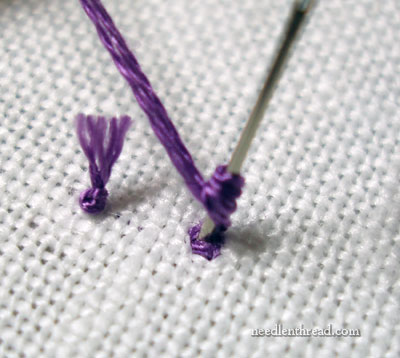
Bring your needle up into the front of the fabric, and pull your working almost all the way through – but not quite all the way through.
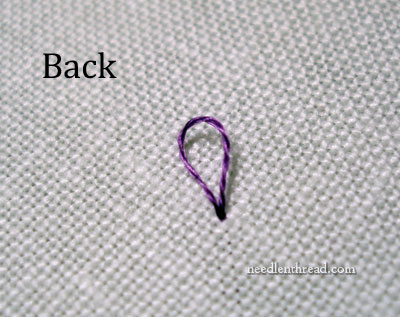
Stop pulling when you’ve formed a little loop on the back of the fabric.
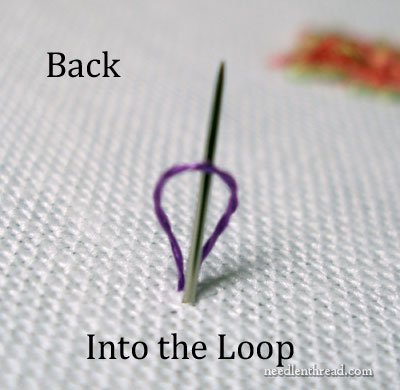
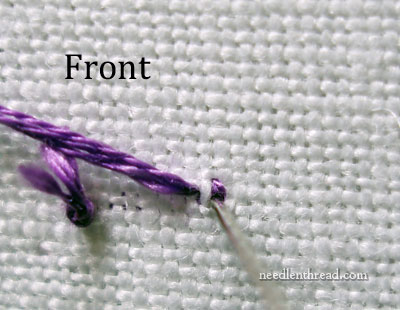
Take your needle down through the front of the fabric right next to where you entered the fabric (over just one or two threads of fabric, depending on what type of fabric you’re using) and emerge on the back of the fabric, taking the needle inside that loop as if you’re going to form a chain stitch.
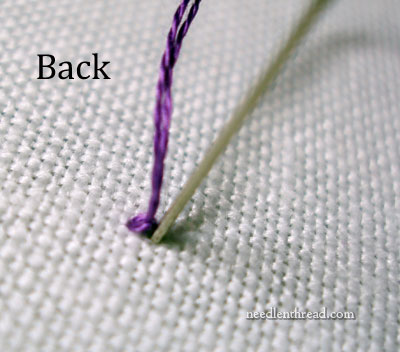
In fact, that’s exactly what you’re forming – a tiny chain stitch on the back of your fabric. Take your needle down into the back of the fabric over the edge of the loop, and right next to your stitch on the front of the fabric, so that, when you pull through….
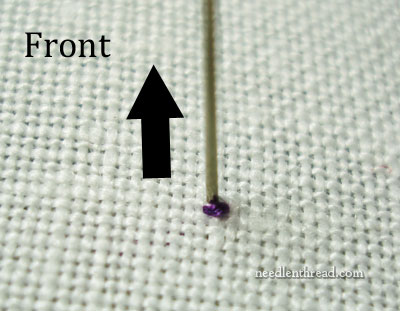
… you emerge on the front right next to the little straight stitch that has formed there. It should just be a tiny little stitch, like this one.
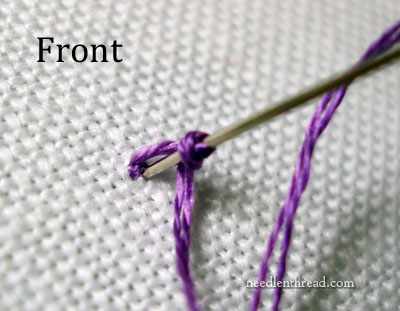
Now make your French knot over that little stitch.
When you finish pulling the knot through, you will have a perfect French knot which still needs to be secured on the back, so that the thread can be cut. We’ll look at that after we look at another way of starting the thread.
Starting with Any Type of Thread
This method of starting the thread works with any type of thread, though it’s a little tougher to do with a very heavy perle cotton, and it creates more build-up than the other methods we’ve already discussed.
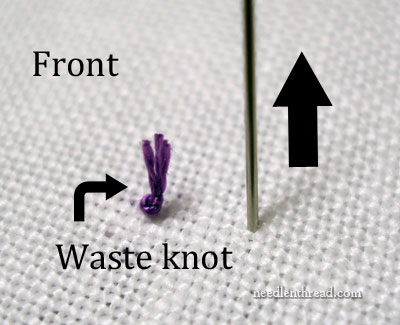
Begin with a waste knot on the end of your thread, taking your needle down into the front of the fabric, then coming up near the waste knot and pulling your thread through.
On the front of the fabric, work three tiny stitches in a tiny triangle. These are tiny stab stitches, and they should only cross over about one thread of fabric, unless you’re stitching on muslin, where they might cross over two threads of fabric. They should be Very Small, and they should all work into each other, so the ends of each stitch are touching.
Once you’ve made a little triangle of stab stitches, make your French knot, taking your needle down into the middle of the stab stitches. You can see why this would be a little more difficult with a heavier thread like a perle cotton #5 or #3. Pulling the needle and working thread into the middle of the triangle will be a little tougher if you’re using a large needle and thick thread. Still, even in such cases, this does work. And you can make your triangle slightly larger when working with heavier perle cottons, because the knot itself will be slightly larger.
When you finish pulling your French knot through, you’ll have your knot situated on top of your triangle of stitches (which can’t be seen), and close at hand, you’ll have a waste knot. You can cut that off now, or save it until a little later when you finish the thread on the back.
Ending the Thread for an Isolated French Knot
This method of ending the thread works for either of the starting methods above.
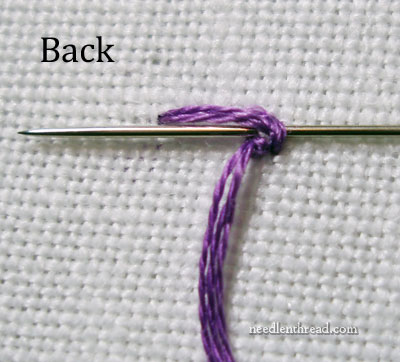
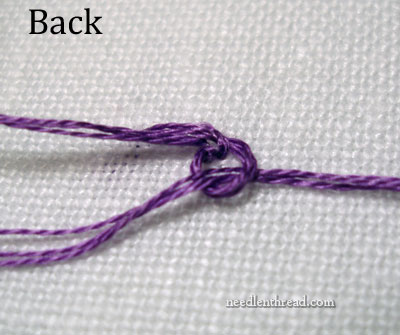
Pass your needle under the stitches created on the back when you made the little triangle of stab stitches, or, in the case of the “chain stitch” method described, pass your needle under the chain stitch.
Pull your thread through almost all the way, until you have a small loop of thread left.
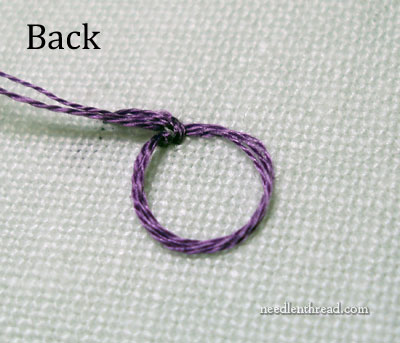
Pass your working thread through the loop, and pull the loop tight around the working thread. Continue to pull the thread through the tightened loop until…
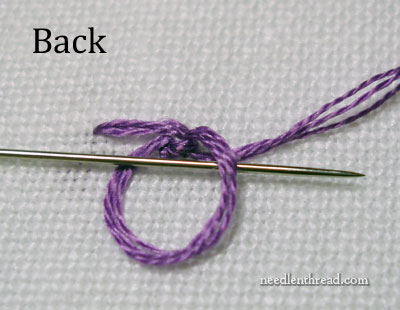
… you have a second loop on your thread. Pass through the front of this loop…
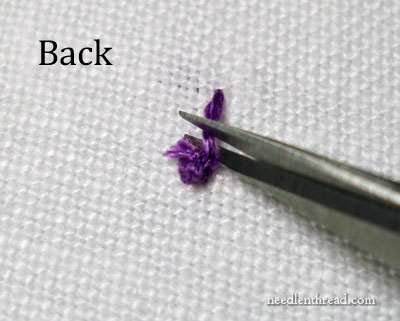
… pulling the loop tight and the working thread all the way through it.
Trim all the threads.
On the front of the fabric, you now have an isolated French knot, without any tails. The knot is secure and will hold up just fine.
And that’s the end of knotty subjects for a while!
Tomorrow, I’ll show you what I’ve been playing with lately. See you then!

