An embroidery hoop seems like a pretty basic piece of equipment, doesn’t it? Something that doesn’t necessarily require explanation? But setting up an embroidery hoop correctly is often the key to better end results in your embroidery, so I think it’s worth covering!
I often see beginning stitchers using hoops without a clear understanding of what the hoop is supposed to do for them. The hoop is not simply there to give us something to hold onto. Its purpose is to supply tension on the fabric. But how much tension is enough tension? And how careful are we to ensure that the tension does not change significantly through the course of an embroidery session?
So let’s look at how to set up a hoop, and talk about some different aspects of using a hoop for hand embroidery.
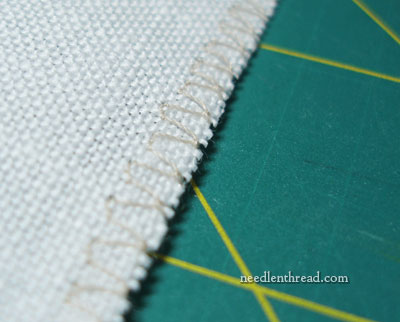
Before placing your fabric in an embroidery hoop, the fabric needs to be prepared. Most embroiderers have their own favorite method of preparing fabric for the embroidery process, so if you already have your go-to method, then don’t worry about this! This step is to prevent your unfinished fabric edge from fraying while you’re holding your work. On every embroidery project I undertake – even if it’s just free-style surface embroidery with no pattern, or even if it’s just for working up photo samples for the website – the first thing I do after cutting the fabric is run the edges through my sewing machine, using an overlock stitch (which requires an overlock foot). If you have a sewing machine but not an overlock foot, you can set your machine on a zig-zag stitch and stitch right next to the edge.
If you don’t have a sewing machine, you can do this by hand, by working a quick whipstitch around the outside edge of the fabric using regular sewing thread.
Some stitchers will tape the edges of their fabric with masking tape or similar low-tack tapes. This technique of binding the edge is often used for needlepoint, on the edge of stiff canvas, but it can be done on fabric as well. It’s not a method I prefer. The tape stiffens things up on the edges, while sewing the edges keeps the fabric supple and easier to hold. Exposed sticky parts of the tape can be a magnet for dirt and thread snippets, too.
Now, here’s where we could discuss the best types of hoops to use for hand embroidery, but since I’ve already done that here on the website, I’ll just refer you to the article, which is called The Embroidery Hoop, and in it, I discuss what to look for in a good embroidery hoop and where to find them.
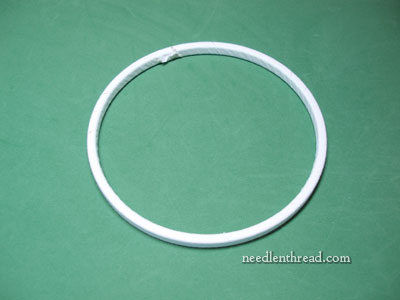
Once you have a good hoop, you should bind at least the inner ring of the embroidery hoop. It seems like a pain in the neck to bother with this, but it makes such a humungous difference in the way the hoop works, that you’ll definitely want to do it! And if you do it right and do it well, you only have to do it once.
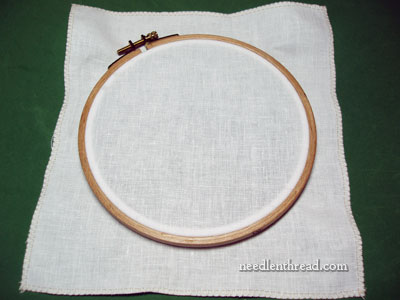
With your fabric ready and your hoop ready, lay the inner ring of the embroidery hoop on the table.
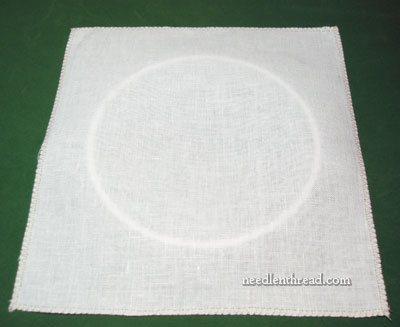
Place your fabric over it. If your fabric has a design on it (this piece is for free-style embroidery, with no design), if possible, center the design in the middle of the ring. If not possible (if the design is much bigger than the hoop), center the part of the design you want to work on.
Note: Generally, your hoop should be small enough that the fingers on the hand you are holding it with can reach to the middle of the work in the hoop. Larger hoops work best when they are mounted on some sort of stand, leaving both hands free for stitching.
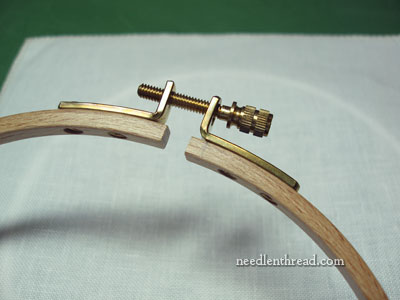
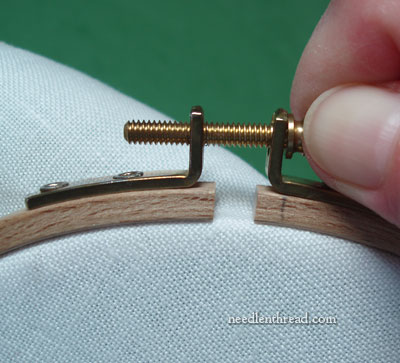
This is what the hardware on a good hoop looks like – it’s sturdy, brass hardware that isn’t going to bend and warp when the screw is tightened. For right handed stitchers, the screw head should be pointing to the right, and for lefties, to the left.
Make sure that the top ring of the hoop can be flexed open a bit, and pull it open enough to fit it over the fabric and inner ring without having to push hard to get the outer ring on.
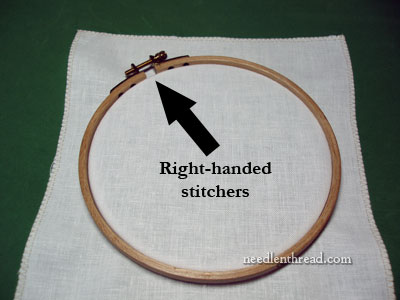
If you have a design on your fabric, for right-handed stitchers, place the outer ring hardware to the top left of the hoop, at about 10:00 or 11:00 o’clock. If you are left-handed, place the hardware to the top right of the circle, around 1:00 or 2:00 o’clock. These are the best spots to minimize catching your thread on the hardware while you stitch.
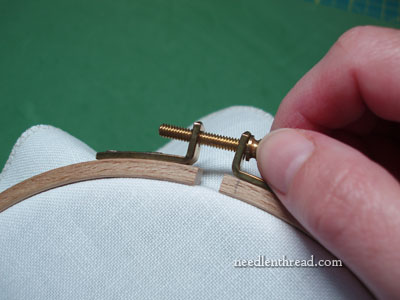
You’ve flexed open the outer ring and put it over the fabric and inner ring. Now, tighten the screw using your fingers, closing it enough to grip the inner ring and hold the fabric in place.
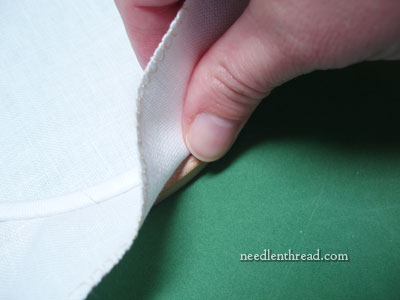
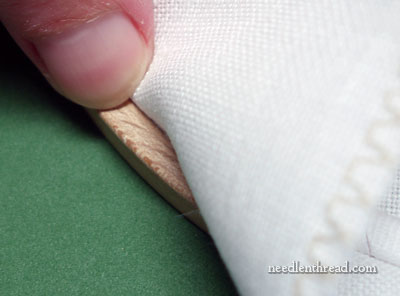
Then lay the hoop face down on the table, and using your thumb on the outside of your fabric and your other fingers on the inside of the fabric, go around the hoop, tightening up the fabric.
While you circle the hoop, pulling the fabric taut, your fingers will be pushing down on the inner ring, while your thumb and fingers are pulling on the fabric.
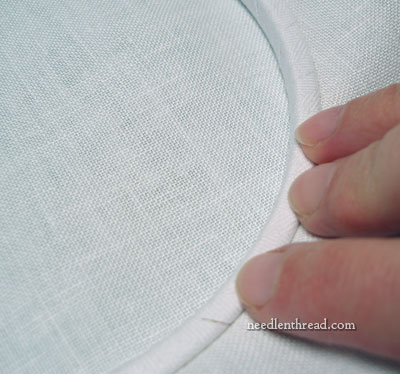
Make sure that, as you pull, you are pulling evenly all the way around the ring. You don’t want to warp the direction of the threads of the fabric towards one side of the hoop or the other.
Once you’ve gone all around the ring, pulling the fabric, tighten the screw as much as you possibly can with your fingers. You’ll get to the point where you think the screw is completely tight, because your fingers can’t tighten it anymore.
Good so far, but you aren’t finished!
Go around the hoop again, pulling the fabric taut in the same manner described above.
Tap on your fabric. It should sound like a drum. Nice and taut.
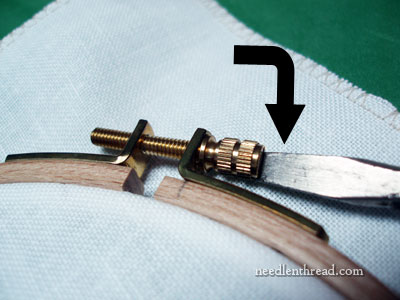
And now, because your fingers are going to be pretty ineffective against the screw on the hoop, break out the tools! You do have one of these in your embroidery tool box, right? If you’re a hoop-user, you should! A flat head screw driver is the hoop-stitcher’s best friend. It’s essential for the final tightening of the screw. Tighten the living daylights out of that thing!
If you have a good hoop, the hardware will stand up to all this, and your fabric will be delightfully taut for your entire work session.
When you’re finished working, don’t forget to take your fabric out of the hoop. It really shouldn’t stay in the hoop for long periods of time.
Ok, ok. I’ve left my fabric in the hoop for several days, and have suffered no ill effects. But if you’re packing away your stitching for a while, or if you know you aren’t going to get back to it for many days, take it out of the hoop. You don’t want permanent hoop marks or dirt rings to develop on your fabric.
What about you? Do you hoop up differently? Do you avoid hoops altogether? Do you use a different type of hoop you like better? Are you a frame fanatic instead? How do you supply tension to your stitching surface? Any input you can give will certainly be appreciated by all! Feel free to leave a comment below!

