If you’re ever stuck wondering just what stitch to use to fill a leaf and you start browsing through a stitch dictionary for a little help, you’ll find out that there’s a regular glut of filling stitches that work well for leaves. But there are two stitches in particular that I think make really nice leaves: the fishbone stitch and the raised fishbone stitch. If you have trouble creating a nice looking satin stitched leaf, never fear! The fishbone stitch and the raised fishbone stitch will come to your rescue. They both create a satin-stitch-like filling, but because the stitches overlap in the center of the leaf, you get a nice, subtle spine right down the middle of the stitch.
Today, I’ll show you how to create a raised fishbone stitch leaf.
Incidentally, the different between the fishbone stitch and the raised fishbone stitch is more than just the fact that the raised version sits higher on the fabric. It’s also created a little differently – it is stitched practically backwards, when compared to the movement of the regular fishbone stitch.
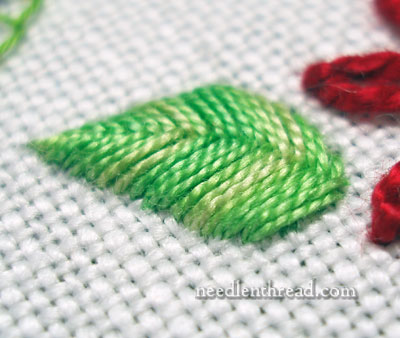
But you can see in the photo above that the raised fishbone stitch creates a nice, plump leaf that’s quite pretty!
I hope you enjoy the video! I think I sound a bit weird in it, but not weird enough to record it over again…