After showing you yesterday’s interlaced chain stitch, I thought I’d follow up with another composite embroidery stitch that involves lacing – Guilloche Stitch.
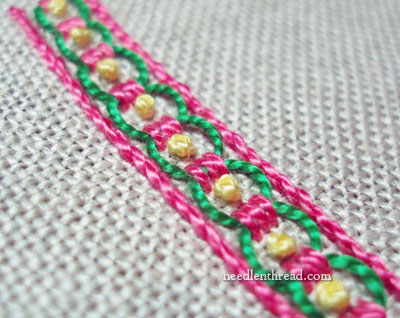
Guilloche is a term found in art and architecture for a repetitive design of intertwined ribbon-like curves that form circles on a border. Guilloche stitch, when worked with regular thread (it can also be worked with metal thread in a few different variations), is made up of four different stitches. All four stitches work together to create this very pretty stitch that is excellent for borders in hand embroidery.
Guilloche stitch can be worked on even-weave or plain-weave fabric. If you’re working on even-weave (or close to even-weave) linen, it’s much easier to calculate the spacing of the whole composite border without having to mark any lines. If you’re working on plain-weave fabric, though, it is helpful to mark out two parallel lines and to mark the placement of the little stacks of satin stitches, too. Once you read through the tutorial, you’ll see what I mean…
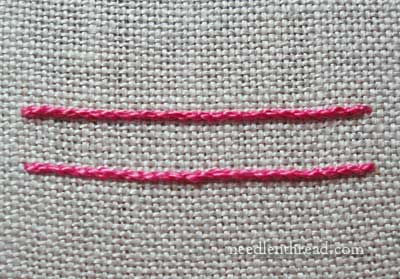
Guilloche stitch begins with two parallel stem stitch lines. Before stitching the lines, consider the spacing between them. You’ll have to fit three short satin stitches stacked on top of each other between the two stem stitch lines, with a little space on each side of the stack of satin stitches, between them and the stem stitch lines.
Since I’m working on an even-weave linen (Montrose 1750), I calculated my lines like this: stem stitch line, skip three threads, 3 satin stitches, skip three threads, stem stitch line. There are 8 threads, then, between the stem stitch lines.
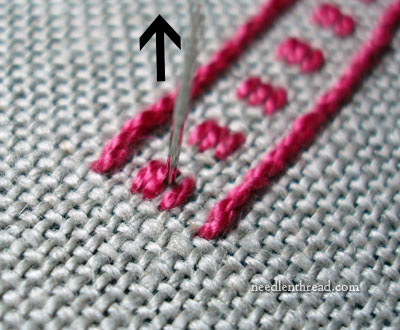
After working the parallel stem stitch lines, work small stacks of three satin stitches, evenly spaced inside the stem stitch lines. Again, even-weave fabric makes it a breeze to do this. If you’re using plain-weave, it is helpful to measure and mark the stacks of satin stitches, so that they are equally spaced down the line.
For the stitch to look nice, the satin stitches should be the same size, and they should be spaced equally. I try to make my satin stitches and the space between them about the same length.
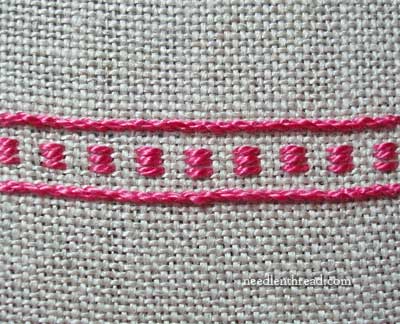
When you’re finished with your little stacks of satin stitches, this is what you’ll have. It makes a nice border by itself, but we can dress it up even more!
For the lacing part, you might switch to a tapestry needle if you aren’t already using one. You can also change the color of your thread, if you want.
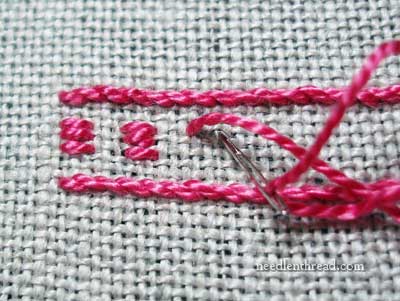
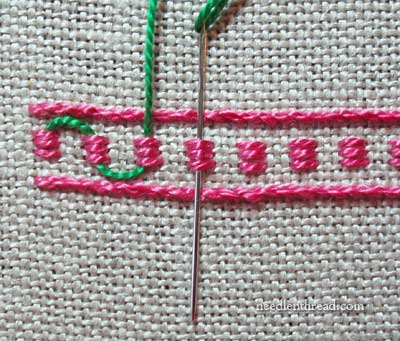
Bring the needle and new thread up behind the first stack of satin stitches, between two of the stitches in the stack (it doesn’t really matter which two, as long as it’s between two). Pull the thread through.
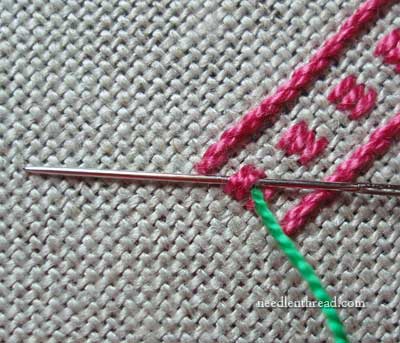
Now, take the needle up towards the top stem stitch line, underneath the satin stitches without picking up any fabric. This will hide the beginning of the lacing thread.
See how the beginning of the thread is hidden behind the first stack of satin stitches?
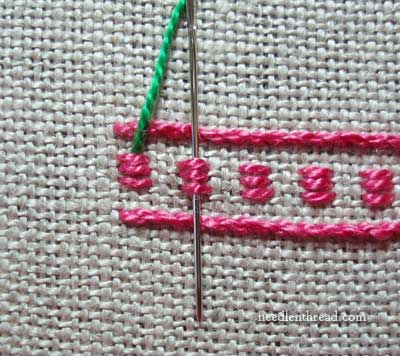
Now, take the needle behind the second stack of satin stitches, pointing down towards the lower stem stitch line. Don’t pick up any fabric – just slide the needle behind the satin stitches.
Move down to the next stack of satin stitches, and pass the needle behind them, pointing the needle upwards to the top row of stem stitch.
Then down behind the next stack…
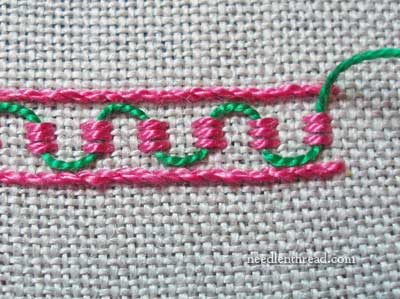
… and continue lacing in this manner all the way to the end of the line.
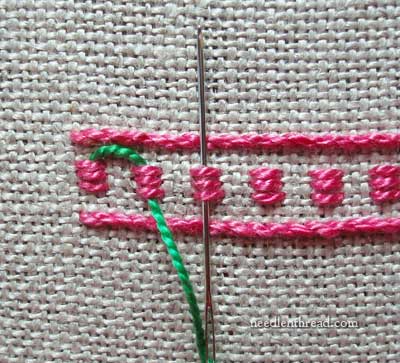
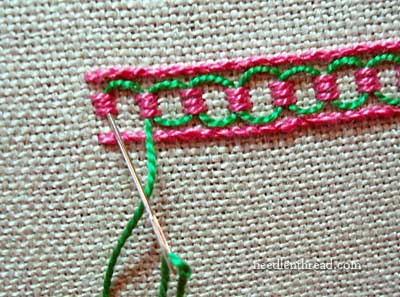
When you reach the end of the line…
… it’s time to return, lacing in the opposite direction…
…until you have formed little interwoven thread “circles” that are empty in the middle (the “guilloche” of art and architecture).
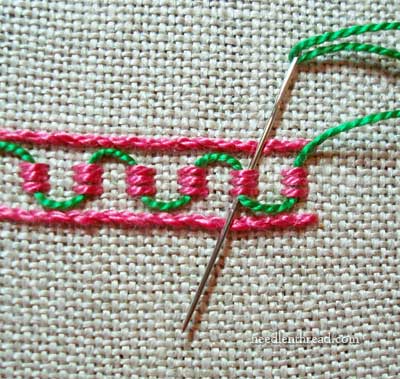
When you get to the first stack of satin stitches in the line, take your needle underneath them, and then into the fabric, hiding the end of the thread behind the stack of satin stitches!
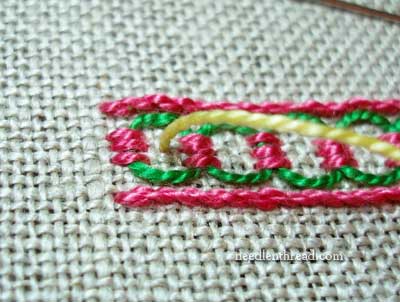
Now, thread a new thread into your needle – it can be a different color, or one of the colors you’ve already used. I went with a third color, just for the fun of it.
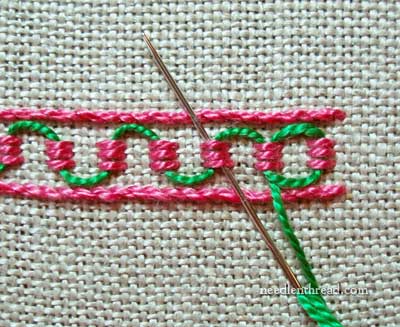
Come up in the middle of each empty circle created by the lacing stitches, and make a French knot right smack in the middle of each circle down the line. (If you don’t know how to make a French knot, check out my French knot video!)
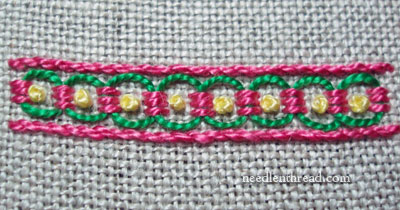
Festive, isn’t it?
Guilloche stitch, when worked with regular embroidery thread, is usually used for borders. If you’re working a sampler or something similar, guilloche stitch would be a pretty way of framing off an area of text.
Try it!! It’s fun, it’s easy, it’s pretty – what more could you ask of an embroidery stitch?
Stitch Play is a series here on Needle ‘n Thread that focuses on fun ways to use embroidery stitches. I’m writing the series in the hopes that it will encourage stitchers to try out a variety of stitches and to play around a bit with their embroidery. Developing a repertoire of embroidery stitches is an excellent way to gain confidence in hand embroidery, so … Play!! If you’d like to read previous articles in the Stitch Play series, please visit the Stitch Play Index, where you’ll find an ever-growing list of stitchy adventures!

