While playing around with silk gimp the other day, I was struck with the inspiration to embroider this tree.
Now, trees may seem like fairly mundane, unimportant things, but can you imagine life on this earth without trees? Trees may be common, but they are, at the same time, essential, and in art, throughout history, the tree has enjoyed an important representative role, symbolizing many different things across cultures.
Trees show up in hand embroidery in practically every era and every culture, in some respect or another. Therefore, I didn’t feel too odd about branching out with the silk gimp the other day and embroidering a tree.
Today, I’ll show you how I worked the trunk and branches, and while meandering through the topic, I’ll talk a bit about the silk gimp used for the tree (making some clarifications about the thread, what it is, and its pending availability), and a bit about how you can adapt the process covered here to other materials. Ready?
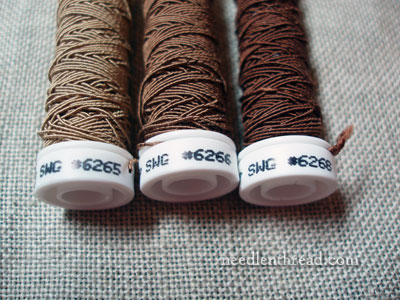
These are the threads I used for the body of the tree. This is the silk gimp I wrote about the other day. After a flurry of e-mail and commentary about where to find the thread, I thought I should clarify that point, briefly.
This silk gimp was re-created for the Cabinet of Curiosities class that Tricia Nguyen is running at Thistle Threads. The thread is made in small batches, and because it came about specifically for that class, it’s not available right now for purchase. The lucky ducks participating in the Cabinet class have first dibs on it (you’re in for a treat!). But hopefully, in the near-ish future, we’ll see it trickle out to the general market and become available for the rest of us. Wait and hope! The only reason I have this little bit is because I was given some “seconds” to try out.
But even if you don’t have silk gimp, you can use other threads to achieve tree-like results. You don’t need silk gimp to embroider a tree. The resulting tree will look different, but it will still be a tree!
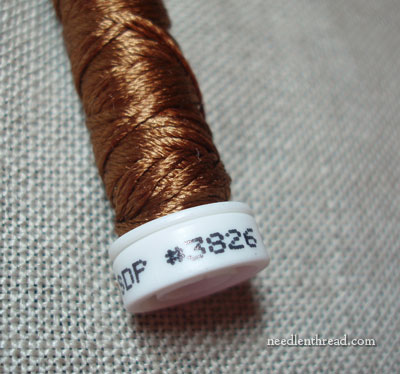
To couch the silk gimp, I used Soie Perlee in different colors of brown, light, medium, and dark. This was the “medium” brown I used. I just selected a brown that looked close enough, because, after all, there all kinds of shades of color in the trunk of a tree, and I didn’t feel the need to be too precise.
We’ll talk about substitutions as we go. Let’s get on with making the tree!
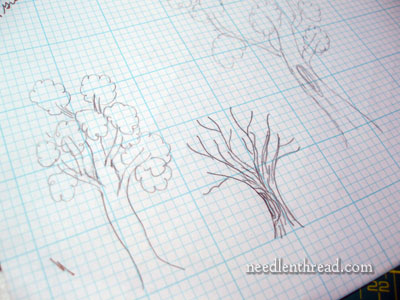
First, decide what your tree is going to look like. I just used some nearby graph paper and sketched up some tree-ish shapes. They aren’t the most attractive things in the world – but they don’t have to be. Your body of your tree doesn’t need to be perfect, symmetrical (anything but that!) or absolutely exact. It just needs to be tree-ish.
I didn’t bother transferring from any pre-drawn design. After doodling trees on paper for a bit, I just drew a basic shape straight onto the fabric. I’m using Strathaven linen here, in a natural color.
Filling the tree’s body in with couched silk gimp was easy. After all, couching is a very simple technique!
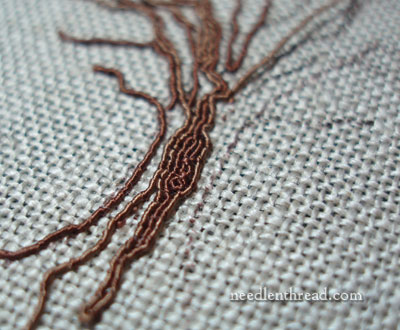
There was no set rule I followed on filling the tree trunk and branches, but to keep a continuous flow from trunk to branch at least in some areas of the tree, I started in various places at the base and worked up the trunk and up the branches in one piece of thread. Once I had the primary “paths” of the tree on the fabric, I went in and filled in between them, alternating the colors of the gimp here and there.
In the center of the tree, where you see the darkish blob, I took the path of the gimp around and over itself to make that center “knot” in the bark.
The upshot is this: you can be pretty free and random in your stitching!
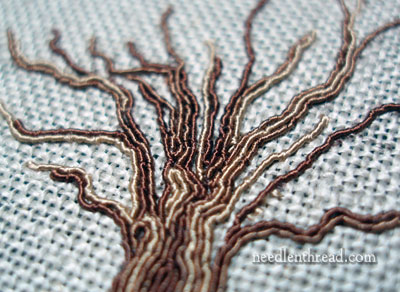
For the top of the tree where the branches fill out, I just filled away, adding a twig here, a branch there, and allowing some of the branches to bump into others and occasionally to cross over them. Symmetry is out the window here – very rarely do you see symmetrical trees in nature – so don’t bother trying to make one side perfectly even with the other. Just “eye-ball” it as you go, to make sure it looks passable as the body of a tree!
And, of course, the leaves will hide a multitude of errors, so if you find yourself thinking that a branch looks All Wrong, don’t sweat it! Chances are, you can cover it up with leaves.
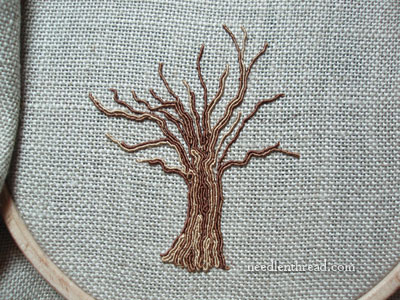
Here’s my trunk almost finished. From this point I added a few more twiggy things on the right, and I filled out the trunk a little bit as well.
The tree is 2.5″ tall, from the base of the trunk to the highest tip on the tree, so it is not large at all. Tomorrow, when we look at adding leaves, I’ll show you some pictures that will give you the scale of the tree, and talk about thread choices and scale.
Substituting Other Embroidery Threads & Stitches
If you’re using different threads for your tree, you can still couch them, or you can use various stitches to fill in the trunk and branches. Stem stitch would work great for creating lines of color and can be “thinned out” as you reach the tips of the branches. Chain stitch would work really well, too, and it would give the “bark” a bit of texture.
Crewel wool (such as Fine D’Aubusson or Appleton) or even regular cotton floss would look great stitched in stem stitch or chain stitch.
You could also try couching a thicker silk, like Trebizond, for a good effect. And you can even get Really Adventurous and combine thread types! You could couch wool threads with silk, or silk threads with wool. You could work in some “veins” of cotton floss among wool. How about some mossy patches on one side of the tree trunk, using tiny French knots out of cotton, on a trunk of wool or silk?
So there are plenty of options for stitching the trunk and branches of the tree. If you have a stash of threads, go foraging and see what colors and threads you have on hand that would fill the bill. Then work with them to see what you can come up with!
Tomorrow, we’ll look at the leaves!
Have any questions, comments, or suggestions? Feel free to leave a comment below!

