For the Hungarian Redwork project I’m currently tackling, I knew right away that the transfer was going to cause some difficulty. There are so very many different ways that we can transfer embroidery designs to fabric, and just like everyone else, I have my favorite methods. But they don’t necessarily work for Every Single Project.
To be truly content with needlework, I find that flexibility is an essential ingredient in my approach to things. Doing things Only One Way never gets me very far. I learn a lot when I troubleshoot different methods and techniques, whether in actual stitching or in the various peripheral activities that go on around stitching, like project set-ups, design transfers, finishing, and so forth.
So with the Hungarian Redwork project, I decided to try a different method of embroidery design transfer. It involves a product manufactured by Clover, called transfer mesh.
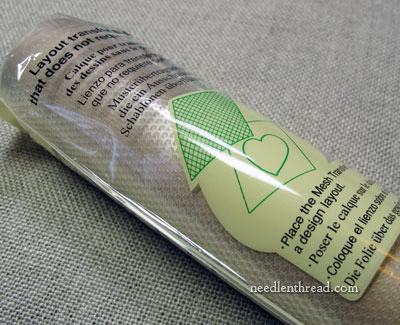
Clover transfer mesh has been around for a while. It’s used in quilting more than hand embroidery, and understandably, because in quilting, the designs are generally larger and bolder, without a lot of little details.

Transfer mesh is a thin sheet of plastic, about 12″ x 16″. It is perforated with evenly spaced little holes. They are not tiny holes – just relatively small holes. For hand embroidery design transfers, it would be nice if the holes were slightly smaller and closer together, but I don’t know if the concept would work as well if they were, because I think it would be more difficult to draw the design on the plastic sheet and get a pen or pencil into holes much smaller.
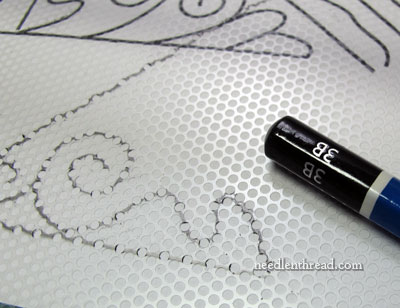
The transfer mesh has a slick, shiny side to it, and a matte, rougher side to it. The directions indicate that the matte side should be used for pencil, while the shiny side should be used for pen. When using a pencil, a softer lead works better, so I tested this with a 3B pencil.
This is what you do: Lay the transfer mesh on top of your pattern, and trace the design onto the mesh using the pencil (or, if you’re working on the shiny side, you can use a pen). You can see in the photo above that the design lines are broken up by the little holes.
Then, you lay the transfer mesh onto your fabric, aligning the placement of the design and trace over the design you drew on the transfer mesh, using whatever type of pen or pencil you wish to mark your fabric. You can use chalk pencils, regular pencils, pens, water soluble pens, or whatever!
I stay away from water-soluble pens and the like, personally, because they are iffy. The manufacturers claim that the marks from water soluble pens will disappear with water, but in fact, this isn’t always the case. Initially, they may disappear, but they are notorious for returning later. Sometimes, they return in their full-fledged blue form, and other times, they show up as yellow lines, in my experience. I prefer not to take that risk!
In any case, with this Hungarian redwork project, the design lines will be completely covered with stitching. I could use a regular pencil to transfer the lines, or my Bohin ceramic pencil, or a chalk pencil – there are lots of options. But one thing I want to achieve with this method is being able to easily see the design after tracing through the mesh.
For design transfer, I often use micron art pens, which are available in the drawing section of art and hobby stores. They’re made by Sakura, and they come in various sizes. The pens are permanent (guaranteed so on paper, though, not necessarily on fabric), archival, and ideal for creating very fine lines.
Because the pens are not guaranteed permanent on fabric, I suggest if you use them, you test them first. I always use either black or sepia, and after doing my design transfer, I iron the fabric again before I begin stitching. I’ve never had a problem with the black or sepia running when I’ve done this, so I’ve had very good luck with these pens.
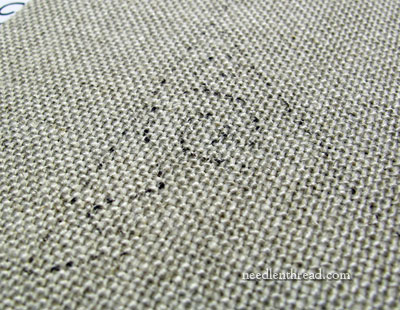
Using a size “01″ in the Sakura micron pens, I traced over the transfer mesh. I ended up with the sketchy line that you see in the photo above. It’s not “perfect” – but it is adequate. I can see it clearly.
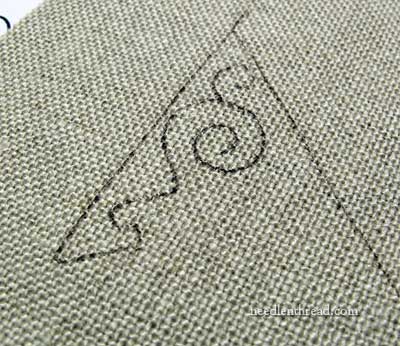
Still, since the lines are going to be covered with the stitching, and since I like to be able to see my lines very clearly as I stitch, I drew over the sketchy line with the pen one more time and ended up with a very clear, accurate transfer for my test sample.
I am pleased with it, and I may very well transfer the whole design in this way. We shall see!
The mesh is washable after use, so you can clean the design from it and re-use the mesh over and over again. If I use the mesh, I’ll trace the design for the ends of the table runner first and transfer the ends to the fabric, and then wash the mesh and trace the repeat design for the sides onto the mesh, and then onto the fabric. The design is, after all, a collection of repeats, so breaking it down into the repeated segments and transferring each repeated segment several times to the fabric will minimize the amount of tracing onto the mesh.
On the other hand, if I had four sheets of the transfer mesh, I could lay out the whole design and do it in one fell swoop! But at $8 – $10 per sheet, I’m not too keen on that approach.
Dritz, by the way, makes a similar product (I haven’t tried theirs). It is 10″ x 18″.
Pros & Cons of Clover Transfer Mesh
Pros:
1. Clover transfer mesh works well with bold, open designs that are not too detailed.
2. The transfer mesh makes transferring designs to darker fabrics (that are not easily see-through) a lot easier and more accurate.
3. It is faster than the prick-and-pounce method of design transfer.
Cons:
1. It’s a bumpy ride! Practice using the mesh first, before trying to transfer a design onto a good piece of fabric. I find it helps to hold pens and pencils at an angle, to minimize catching the tips in the little holes. Practice first!
2. It is useless on very detailed designs. The holes are too large to adequately transfer details.
3. The 12″ x 16″ is an ok size for smaller designs, but if you needed to work something large, it would be nice if the mesh were available in larger sizes. Otherwise, you need two pieces, or you need to work in pieces. This can be tricky when lining up a whole design.
4. It comes rolled on a tube, and it holds the “curl” of the tube quite stubbornly, which can make transferring a bit tricky. I put the mesh under my cutting mat for several days, and that helped.
5. For a sheet of plastic with holes in it, I find it a little expensive.
6. It is surprisingly difficult to come by in local stores. Given the relative popularity of Clover products, I’m surprised it isn’t available in any of my local hobby, craft, or fabric stores (chain stores), or in specialty quilt shops and the like in my area. I had to order mine online, which increased the price because of shipping.
So, what think you? What’s your favorite, fail-safe, all-around method for design transfer? Have you ever used Clover Transfer Mesh? If so, what’s your take? If you haven’t used it, what do you think of the concept? Is it something you would try? Can you think of any other readily available product that could be used the same way, that might be more cost effective? Any ideas, suggestions, tips, comments, or input on Clover transfer mesh? Have your say below!

