To conclude this short series of posts on transferring embroidery designs to fabric, here (in one place) are my favorite methods of design transfer.
Again (I keep making this point – covering my “six,” as my dad would say!), I am not saying these are the Only Ways to transfer embroidery designs. But these are methods that have been safe and reliable for me, that I’ve used and have confidence in. For those who are looking for alternate ways to transfer embroidery designs, these may help you. If you already have a method and it works for you, then that’s great. I’m not dismissing all other methods. As is always the case on Needle ‘n Thread, I’m just offering what works for me, and how I do things, in case it may help someone else out there.
Note: always test your transfer method ahead of time on any major project, before you start marking up an expensive piece of ground fabric.
To determine what type of method to use, I always think in terms of the end product. Is the project meant to be washed? After I finish stitching it, can it be washed? If so, I proceed in one direction. If not, I proceed in another.
Embroidery that Can Be Washed
If I’m working on a project that can and will be washed after stitching – say, whitework on linen, regular cotton floss on cotton fabric or on linen, even wool on linen – then these are the methods I use for transferring the design.
Light, easily see-through fabric: After my fabric is washed (pre-shrunk) and cut and the edges are neatened, I spray starch the fabric and iron it. I like Niagara spray starch in the pump bottle rather than aerosol cans, personally, but I doubt the kind used really matters.
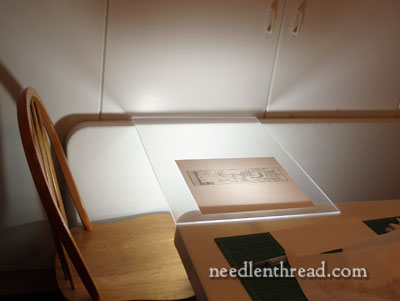
Then, using a sharpened HB pencil, I trace the design using a light box or a piece of plexiglass with utility lights underneath it, depending on the size of the project.
If I’m working on a fabric with a really smooth hand (it isn’t a bumpy fabric at all), I’ll sometimes use a mechanical pencil, but practically speaking, a mechanical pencil can be more difficult to trace with on fabric. It tends to catch. A regular pencil that’s been sharpened and that you hold at an angle, so that you’re “pulling” the pencil tip rather than pushing on it, works better for me. I don’t “sketch” with the pencil. I try to draw in longer, smooth, continuous strokes. Sketching tends to built up the marking or to make the line less precise (somewhat “hairy”).
This method above is fairly universal – anyone with a pencil and a sunny window can do it. Just tape the pattern to the window and tape your fabric over the pattern.
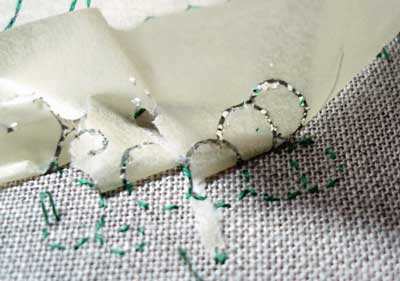
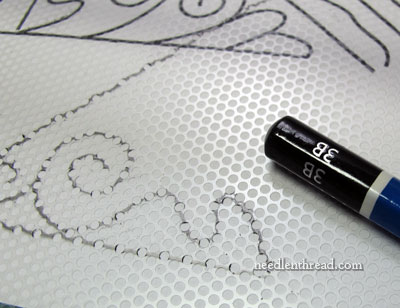
Dark or heavy fabrics: For transferring a design onto darker fabric (this is anything from a natural colored linen, for example, to black) or a heavier fabric where tracing is out of the question, I prepare the fabric as above, and then I use prick and pounce, with a light grey / white powder, made from a mixture of charcoal and talc.
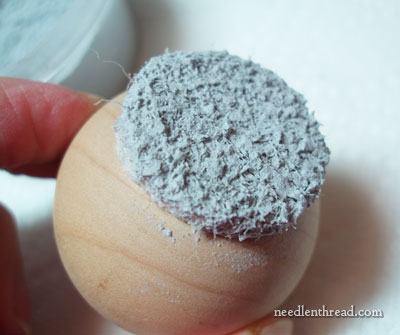
You can see how this method works by reading this tutorial on prick and pounce. With a dark fabric, I’ll use a lighter ceramic lead pencil to connect the dots, or a white tailor’s chalk pencil, depending on the type of stitching I’m going to do. The ceramic lead pencils are not as easy to smudge off as tailor’s chalk, and in fact, they are not always easy to get off altogether. So when drawing with them, I try to be as precise as possible.
Embroidery that Will Not Be Washed
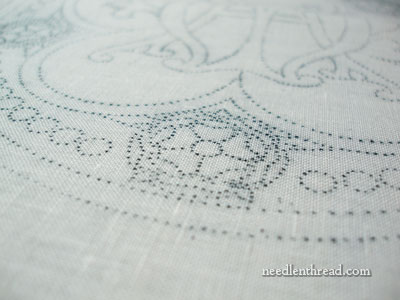
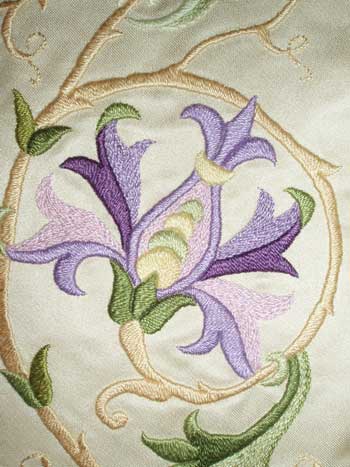
For embroidery projects that will not and cannot be washed – goldwork / silk projects, projects worked on silks, velvets, and so forth – I use one method to get the design onto the fabric (prick and pounce)…
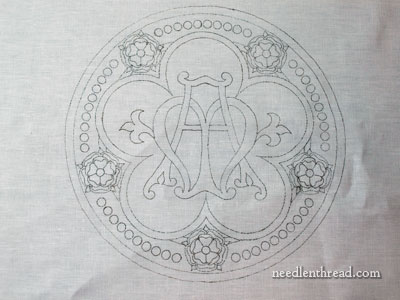
… and then I use either a micron art pen to connect the dots (like I did with the Medallion project)…
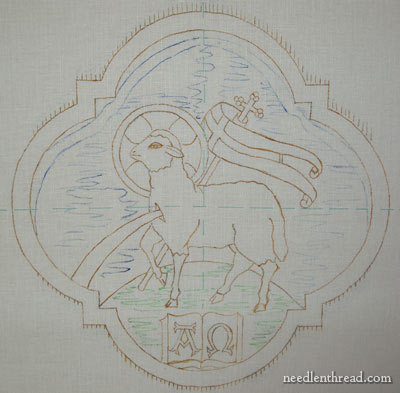
… or a very fine paintbrush and watercolor paint (like I did with the Agnus Dei project).
Other Reliable Methods of Design Transfer
Other reliable methods of transfer that I’ve used and that worked, and that, in certain circumstances, I would use again:
Tracing paper and tiny stitches – This is an accurate but time consuming way to transfer a design – but once it is finished, it really is worry-free.
This Clover Transfer Mesh that started the whole discussion this week. For bold designs without much detail, this stuff works fine for getting a pattern onto fabric. I’d use it with a pencil when it comes to getting the lines onto the fabric, or with a ceramic pencil or tailor’s chalk pencil.
Water Soluble Stabilizer, Transfer-Eze, and the like – Understanding that there are different levels of embroidery projects done for different reasons, I have used these products and would use them again for certain types of stitching. Cotton on cotton, flour sack towels, children’s blankets and the like come to mind. I would not use these with silk, wools, on good linen, silk, or other fine ground fabrics – obviously, on anything that can’t be washed or that I’m putting a lot of money and time into. But for those quick projects for fun, with cotton floss on cotton fabric, they’re fine.
Wax-free Carbon Transfer Paper (like Saral) – I’ve used this successfully on light gold-colored silk, using the white carbon, and achieved a very clear design line that was visible while stitching and that lasted through a very long project. Because it was white on light gold fabric, any “visible” design lines not covered by stitching were, in fact, invisible. It’s not my favorite method, but I would actually use it again in the same circumstances, using the white on a lighter colored silk ground fabric. I’ve also used the blue paper successfully with whitework, but it requires really covering the design lines. The design lines don’t come out easily. I’ve heard disaster stories about the red, but have never used it myself.
Undoubtedly, I’ll still play with different types of design transfer. I’m game to try anything! But I can pretty much bet I’ll always come back to the first two methods at the beginning of this article – tracing and prick and pounce.
Now, onwards and upwards! Some stitching progress next week, among other things…
Enjoy your weekend!

