Today, as part of the Stitch Play series, let’s make some perfect little stars and snowflakes – just in time for winter and Christmas stitching.
The great thing about this little stitch technique is that it is really simple. It’s just a matter of straight stitches following a specific sequence. The result? Perfect 6-pointed stars (or snowflakes).
The technique can be used for multiple numbers of points on the stars, but since I was looking for something that would serve as a snowflake as well, I stuck with the 6-pointed technique at first. Later on, I tried 8 points, and I’ll show you the results of that experiment down below.
The tutorial looks long because there are heaps of photos, but once you get the concept, you’ll see exactly how easy this is!
Let’s go!
Materials
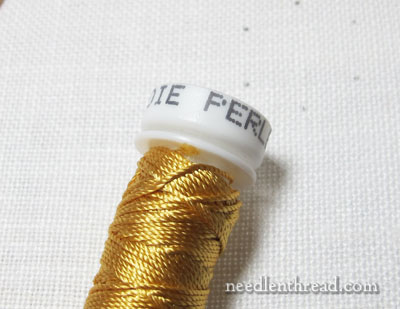
I played with this technique will different types of thread. The thread I like best for this so far – it gave beautiful results every time – is Soie Perlee. It’s a non-divisible filament silk that has a beautiful sheen. It’s perfect for stars and snowflakes! For the gold star here, I’m using color #149.
You can also use a perle cotton (#5 works well). I’m using linen as a ground fabric, and because of the pulling that goes on with this as the star takes shape, it’s helpful to have your fabric drum tight in a hoop.
Method
To start, you’ll need to mark 6 perfectly spaced dots in a circle on your fabric.
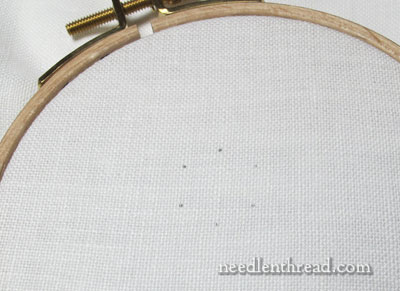
The placement of these dots will determine the size of your star, each dot being the outer extremity of a point. You can check out this tutorial on achieving perfect spacing for petals and spokes, if you need help with the dot layout.
It’s important to make your dots as light as possible, so that they aren’t visible when the star is finished.
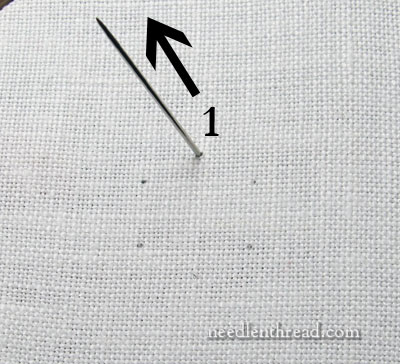
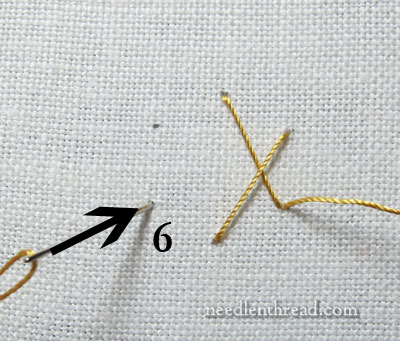
Bring your needle to the front of the fabric on any dot.
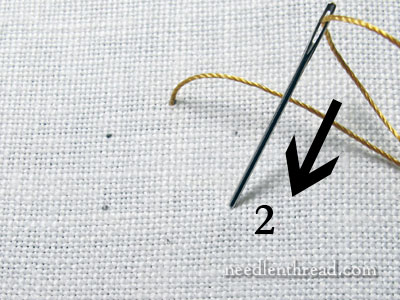
Moving around the circle of dots in a clockwise direction, skip one dot, and take your needle to the back of the fabric in the next dot.
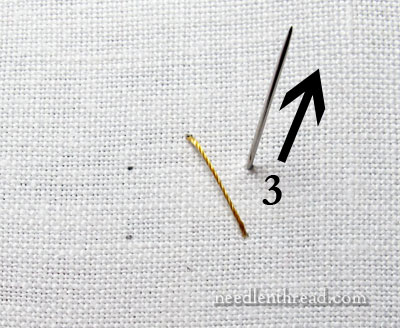
Then move back to the dot you skipped, and bring the needle up to the front of the fabric in that dot.
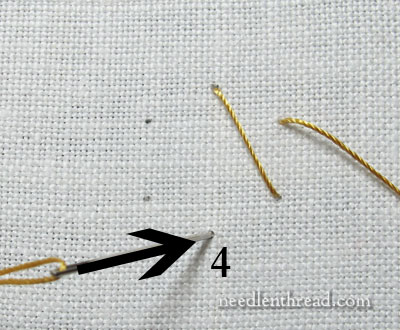
Then move forward again, skipping one dot and going down in the next, taking your needle and thread to the back of the fabric. You can see in the photo above that the dot you skipped is the one at the end of your first straight stitch.
Now move back to the dot you skipped (the end of the first straight stitch) and bring your needle to the front in the same hole.
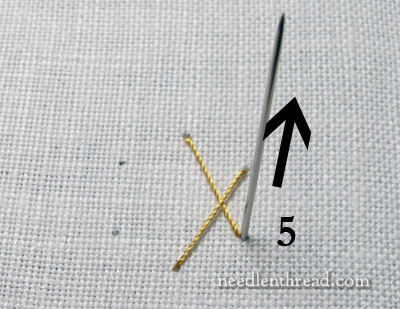
Move forward again, skipping a dot and going down in the next dot.
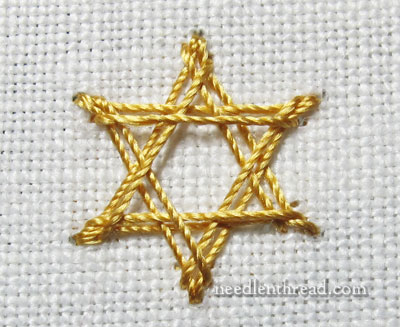
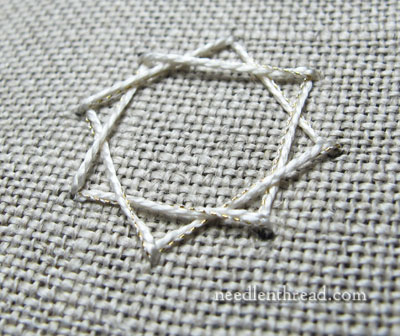
Proceed all the way around the star in this manner, moving forward two dots and back one, forward two and back one, until you’ve created the first layer of the star:
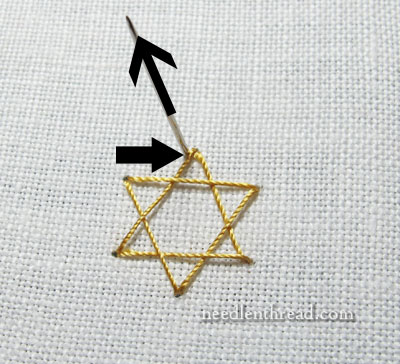
This is what the end of the first layer will look like, and once you arrive at this point, you’re ready to begin the second layer. Bring your needle up right next to where you began the very first stitch in the first layer.
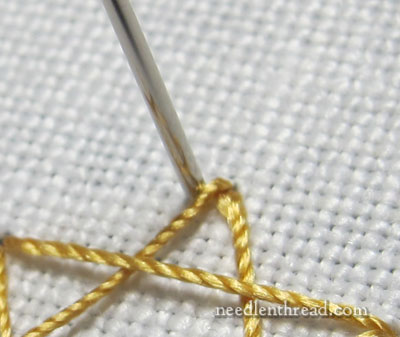
You’ll want to come up just to the lower left of the dot that marked the tip of the star. Use the “line” created by the first layer of stitches as your guide, and come up right next to (as in, touching the thread) or underneath the stitch from the first layer, angling the needle outwards so that you don’t snag the previous stitch. The needle should be coming up on the outside of the first layer of stitches, as you can see in the photo above.
Now, working in exactly the same movement as the first layer of stitches, skip one point of the star, and take your needle down on the far side of the next point of the star, as shown in the photo above. Remember to use the lines of the previous layer of stitches as your guide, and go down just on the other side of that stitch line. You can angle your needle a little bit so that you’re passing into the fabric right under that stitch.
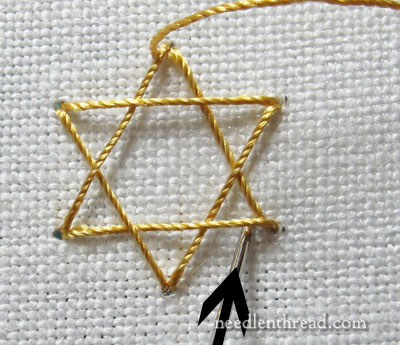
Move back to the point of the star that you skipped, and bring the needle up into the fabric on the left side of the point, and then repeat the same instructions all around the star.
The second layer of stitches will look more or less like this when completed.
Now, it’s just a matter of repeating this sequence around the star in the same manner, always moving a little way down from the point of the star and coming up and going down on the outside of the lines created during the first layer of stitching. Just remember forward two and back one, forward two and back one, all around the star.
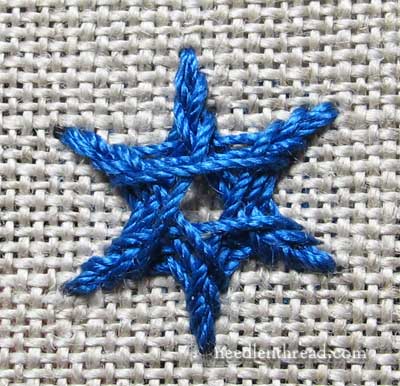
Switching to a different sample here, to show you further progress around the star. The blue star above has three layers of stitching complete. Notice that, as you move down the lines on each point of the star, the threads pull the sides of the star inwards.
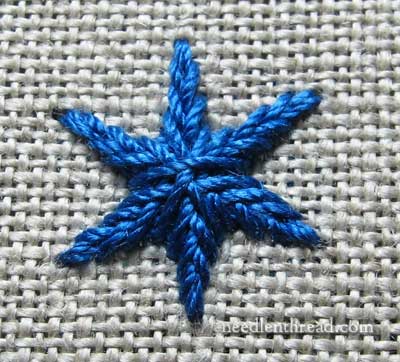
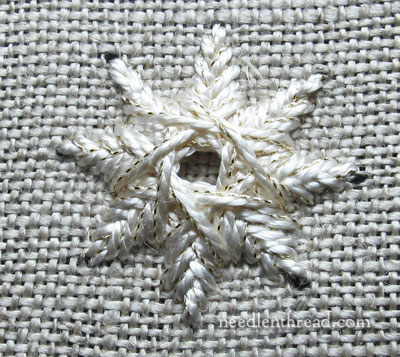
Eventually, you’ll end up with the final thread crossing horizontally over the middle of the star, and no more room to move down the sides of any of the points. At this point, the star is finished.
The blue star is made using the blue Pipers Silks silk gimp that I showed you the other day. The thread isn’t quite as plump as Soie Perlee – it’s more more tightly twisted and a little stiffer – so it doesn’t fill the star quite as nicely as the Soie Perlee, but it still looks good.
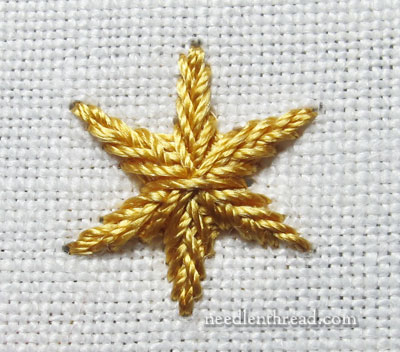
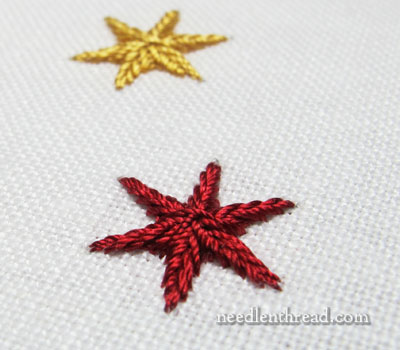
This is the star made with the Soie Perlee. I like it a lot!
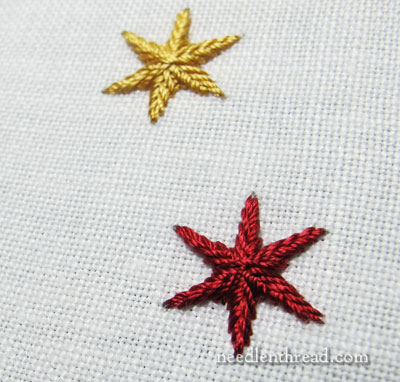
The red star is made with Soie Perlee as well. Both stars are about 3/4″ from point to point.
Trying Metallic Braid
I also tested the star using a metallic braid. This is a fairly thick metallic braid, and I found it difficult to work a star this small with it.
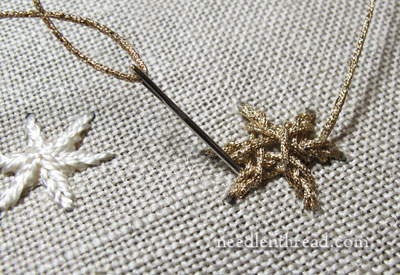
It worked out, but it would probably work better with a larger star or a much finer braid (or both).
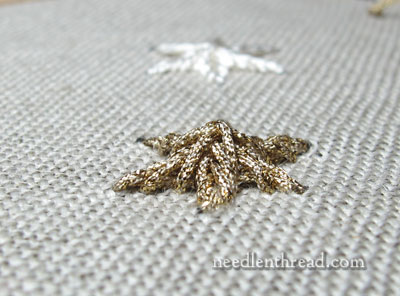
You can see how high the metallic star sits from the fabric, compared to the relatively flat white silk star in the background.
The metallic was also somewhat tough on the fabric – again, problem of using too heavy a thread in too small a space.
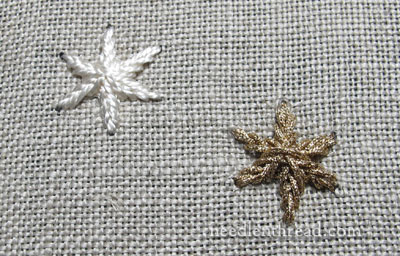
On the left, a white star (makes a great snowflake!) made from silk next to the finished metallic star.
Other Embroidery Threads and Sizes
You can adjust the weight of your threads and the size of your stars to get a different effect.
I found Trebizond and Soie Perlee worked well on these 3/4″ stars (I liked Soie Perlee best), as does a perle cotton #5, but the latter misses the bright sheen of the silk (a nice effect on stars and snowflakes!). The best threads I’ve tried so far have been non-divisible, twisted threads (Trebizond, Soie Perlee, perle cotton, and the like). Regular floss works, but it doesn’t look the same – it misses the texture that comes with a more tightly twisted thread.
If you want to go even smaller – with 1/2″ stars, for example – you might try finer threads. Fine twisted filament silks (like Soie de Paris) create flatter tiny stars with a terrific sheen.
Testing an 8-pointed Star
I also tested an 8-pointed figure, just to see how it would turn out.
For this test, I’m using a heavier white silk (like Trebizond) and one fine strand of white-core Bijoux “white gold” blending filament. Just to see, you know…

With a larger 8-point figure, the star doesn’t fill all the way!
As you move down the points to pull the sides in, the stitches end up building up on themselves – they never actually cross close enough to the middle to close it up. A good place for a large gold bead? Or you could work the 8-star shape over a shisha mirror. Hmmmm…. possibilities!
Notice that the more stitches you build up over that first layer of stitches that makes the foundation of the star, the more the fabric pulls around the points of the stars. This problem may be solvable by slackening the tension on that first layer of stitches.
I know I’m going to play with this whole star / snowflake stitch concept a little bit more, to see what other combinations I can come up with. I hope you have an opportunity for some Stitch Play, too, and enjoy making your own variations!
If you like this Stitch Play tutorial, feel free to check out my other articles in the Stitch Play series, where you’ll find instructions for a variety of stitch techniques and combinations to spice up your embroidery.
Have a terrific weekend!

