After testing the embroidery threads for the Hungarian Redwork Runner project and making up my mind about the ground fabric, the next step was to cut the linen and prepare it for embroidery.
I have my own little ritual for preparing linen for hand embroidery. Most stitchers have their own way of working through these preliminary steps in preparing their fabric, but for those of you who haven’t figured it out yet or like to see what other people do, we can go through the grunt work together here!
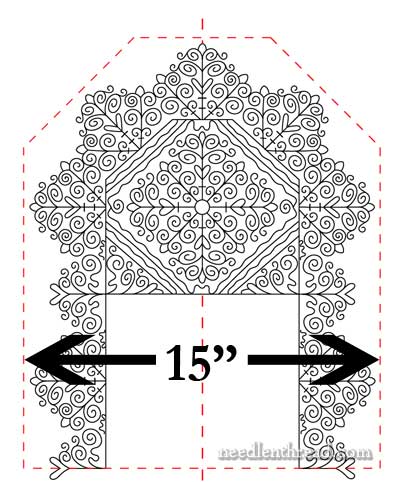
1. Measure & Cut the Linen
Using the final modified embroidery design, I enlarged it so that the design is 15″ wide, from dashed line to dashed line. This makes the length of this half of the design 18″ long. The finished embroidered area, then, is 36″ long x 15″ wide.
The fabric needs to be at least two inches larger than this all around, to provide room for hemming. If you plan a deeper hem, though, you might need to add even more fabric all around. That part is up to you. Whatever your final size, add one more inch in length and width. You’ll see why the extra inch below.
My final cutting size for the linen (which is, again, Alba Maxima by Legacy) was 41″ x 20″, giving me 2 inches all around, plus one inch extra.
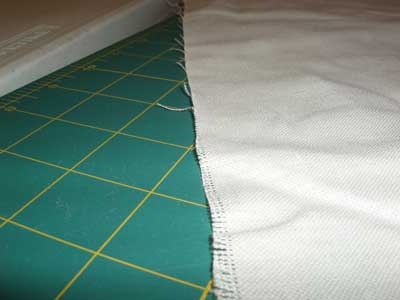
Cut the linen on the thread. To do this, first make sure all your sides of the linen are on the thread. In the photo above, you can see that the cut of the linen is not “on the thread” of the fabric – there are some shards of threads sticking out there. Remove those shards, until you have one long thread running the length of the each side of your linen.
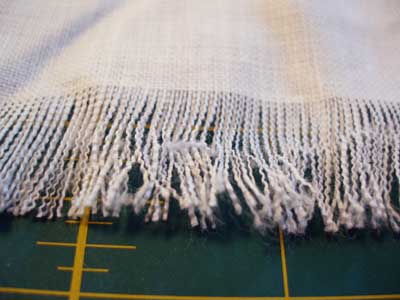
You might end up with some fringe. That’s ok – trim this off and do your measuring from the clean edge.
Then, measure the length and width of your piece and make a little pencil mark on the edge of the linen. Cut along the thread of the linen, to make sure that you are cutting the linen as square as it can be.
Neaten the Edge
Using either a sewing machine (much faster!) or by hand, “neaten” the edge of the linen. Essentially, you are sewing over the edge or along the edge of the linen, on all sides, to prevent your linen from fraying as you work.
How you do this is up to you. Some folks use a zig-zag stitch on the sewing machine. Some use a whip stitch and neaten the edge by hand. Some people use a serger. I use my trusty, rusty old lucky-I-found-it-so-glad-I-bought-it Bernina, and I use the overlock foot to neaten the edge.
However you do it, make sure your tension is right and there’s no puckering of the edges of the fabric.
Rinse and Pre-Shrink the Linen
Remember that we’re working a table runner – an embroidered linen that will undoubtedly need laundering in the future. I think it’s important to rinse and pre-shrink linen before setting out on this type of venture.
Not everyone agrees with this view, though. I know there are, for example, expert Schwalm embroiderers who insist that the linen should not be washed in advance. I suppose I prefer to err on the side of caution. I haven’t met a linen yet that didn’t have a good bit of shrinkage in it.
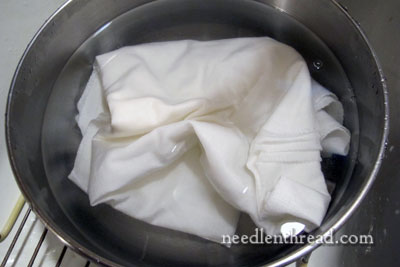
So, to rinse and pre-shrink, take your linen into the kitchen, and using a clean bowl that is large enough to hold it, run very hot (as hot as your tap will allow) water over the linen, and leave the linen to soak a bit.
Then, fill up the tea kettle with water, and set it to boil. (Alternately, you can boil a pot of water).
While the kettle’s boiling, let the linen in the hot water cool down a bit, and then turn your tap on as cold as possible. Dump out the hot water in the bowl and fill it with cold water, swishing it through the linen as you go. The linen will get very hard.
Leave it to soak in the cold, until the kettle finishes boiling. Then dump out the cold and pour the boiling water onto the linen. Use a clean spoon to submerge the linen (don’t stick your hand in there!).
Leave the linen in the boiling water for about 10 minutes, and fill up the kettle again to boil.
Dump out the water and run ice cold tape water onto the linen again, swishing it through all the linen (it’ll feel really stiff by now). Leave the linen to soak in the cold water for a bit.
Finally, dump out the cold water, and pour the new boiling water into the bowl, making sure the linen is covered. Leave the linen to soak until the water cools down to room temperature.
To recap: hot water, cold water, boiling water, cold water, boiling water left to cool. The extreme hot and cold is what shrinks the linen.
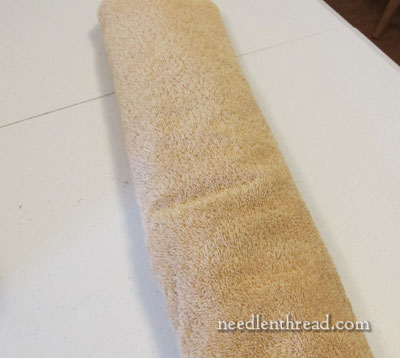
Remove the linen from the bowl. Don’t wring it. Just lay it flat on a bath towel, and roll the bath towel up, and then press on it with your hands to remove excess moisture.
On this particular piece of linen, the shrink was almost 1/2″ in one directions, and just under 1/2″ in the other. Hence, the extra inch all around when cutting the linen.
Iron the Linen
Now it’s time to iron the linen. It should still be quite damp when you iron it. Make sure your ironing board cover is clean or put down a clean cloth or sheet over it. Use a dry iron, set on the linen / cotton setting.
Iron the linen exactly horizontally and exactly vertically, but never diagonally.
Iron to remove the wrinkles, not to dry the linen. If you think in terms of drying the linen, you may end up scorching it. Don’t leave the iron in one place for any length of time or iron over the same place over and over again.
You can turn the linen over and iron both sides. Move the linen around as you need to, to fit your ironing board, but remember – don’t iron diagonally.
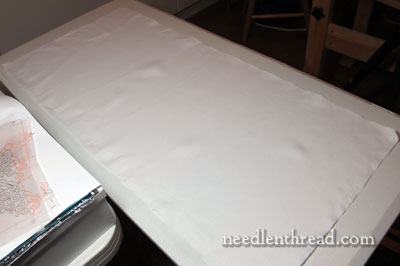
When you’ve finished getting the wrinkles out and the cloth is nice and smooth, lay it out on a table. You can see the rippled edge in the photo above, and some ripples in the middle of the linen. The linen is not completely dry all over, and the ripples are caused by the difference between the wet and dry spots. But the linen is smooth and the wrinkles are gone.
Leave your linen on the table overnight or for several hours, until it is completely dry. Then, do a quick once-over with a dry iron to smooth out any remaining ripples. You should now have a perfectly smooth, beautiful piece of linen.
Next up, the remaining preparation and design transfer!
If you’d like to follow this project each step of the way, you can find all the articles relating to it listed in this Hungarian Redwork Runner Index.

