Moving right along on the Hungarian Redwork Runner project, this is the final step before stitching begins!
After preparing the linen and basting in layout guides, I was finally ready to transfer the pattern – an ordeal that ended up being much easier than I first envisioned.
This is how I did it:
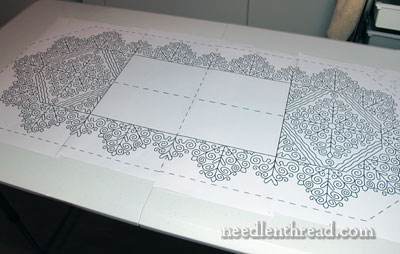
I started by taping together the enlarged embroidery design into a paper version of the full-sized runner.
When I had the original design photocopied, I had it enlarged to about 15″ wide by 18″ long. In order for the design to print at this size, I had to have each half broken into two parts, so that they would fit on an 11″ x 17″ sheet of paper. So I ended up with 4 sheets of paper with some design overlap on each sheet. I cut off the design overlap and lined up each sheet so that the design lines matched up perfectly.
I have a small fold-up table in my workroom that worked really well for laying out the whole runner design. I taped the pieces together and then taped them to the table.
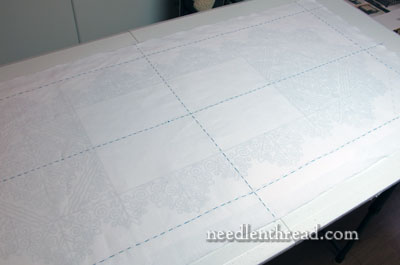
Originally, I thought I would have to use a light box for the tracing, but that wasn’t the case. Because the design prints rather boldly, and because it was enlarged quite a bit, the design lines were dark enough to see through the fabric.

You can see the design under the linen here. This was Such a Wonderful Discovery! No messing with a light box, no need for prick and pounce, no need for any complicated transfer process. Just straight, plain old tracing!
Normally, on detailed embroidery designs that are quite small, the lines aren’t this bold (they can’t be, because, if the design is very detailed, the lines would run into each other). So normally, it would be difficult to trace through this weight of linen. But in this case, there’s no difficulty at all with regular tracing.
Ohhhh, glory! This is Design Transfer Heaven!
Now, if I had gone with the natural colored linen (one of my original considerations), it would be a different situation altogether. Most natural colored linen is too dark to see clearly the design lines for straight tracing.
But with white linen… ah! Bliss.

With the design taped securely to the table on all sides so that it won’t move, it’s time to line up the linen and pin it to the design. I started in the very center of the linen, where the two center basted lines intersect. Using regular straight pins, I pinned them in an “X” formation around that intersection. Notice that I didn’t “scoop” the fabric with the pins. I just slid them into both the fabric and the paper pattern carefully, so that the fabric did not pucker.

Moving out from the center and keeping the basted layout lines lined up with the dashed lines on the pattern, I continued to pin the fabric to the pattern, two pins on each side of both center basted lines, all the way out to the edge. Then, I pinned along the outer edge, moving from the center out, and around the ends, until the whole piece of linen was firmly pinned to the paper pattern.
Perhaps I pinned more than I needed to, but I always figure better safe than sorry. It’s best to fix your fabric so that it won’t shift at all on the pattern while doing the transfer.
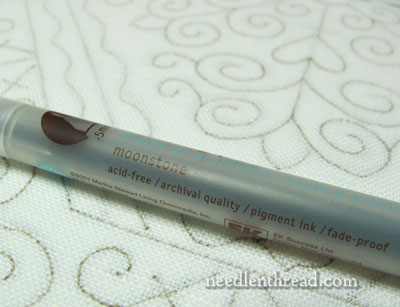
Then, I took out this pen.
I love this pen!
It’s from Martha Stewart crafts, and the color is “moonstone.” The tip size is .5mm, and the ink is acid free, archival quality, fade-proof pigment ink. The “moonstone” color is not as dark as sepia – it’s a kind of grayish-goldish-taupe color (if that makes any sense). The lines will not disappear or run when the piece is washed (I’ve tested that), but that’s ok if they will will be completely covered by the embroidery (as is the case with this project).
The tip of the pen is quite fine and makes a very clear, sharp line that’s not too dark and not too light. It’s Just Right.
You can find this particular Martha Stewart pen on Amazon, but I find the $7+ price a bit prohibitive. Everywhere else I’ve looked online, even if they run around $3, the shipping brings them up to $7 or $8! I don’t know that they are actually worth that price. Don’t get me wrong – I love the pens. But they’re Much More Affordable if you can find them at a hobby or art store that carries the Martha Stewart craft line. I stock up on them when I have a coupon. I do love them – they write wonderfully, and they are a nice color for tracing embroidery designs.

And here’s part of the design, traced onto the fabric.
The key to tracing a pattern this size (and tracing it accurately and smoothly) is to take your time. Don’t rush the tracing. Do a little bit at a time, if need be, and come back to it later.
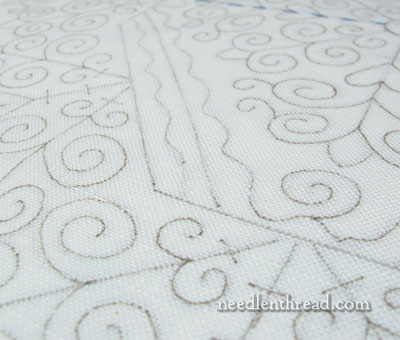
The tip of the pen should just skim over the surface of the fabric, not rest on it for any time at all. And the design should be drawn in continuous lines, not in short sketchy strokes. I find it helpful to hold the pen at a low angle, rather than perpendicular to the fabric.
It took me slightly more than half an hour to trace the whole design.
And now – I’m ready to start stitching!
My plan is to work the project “in hand” (no hoop), using a combination of Hungarian braided chain stitch and chain stitch, with perle cotton #8 and coton a broder size 25 (also called Art. 107, or “cutwork” thread), in red 321.
This is going to be my grab-and-go, sit-around-relaxing, 15-minute project (15 minutes here, 15 minutes there – you can read about my 15 Minute Philosophy here, if you want). It’s something that I want to be able to work on when lounging about in the wee hours of the morning or night sitting by the Christmas tree, or when visiting with family and friends over the holidays, as opposed to the more complex projects that are set up in the workroom on a frame and require more stringent concentration.
I’ll keep you posted on progress!
If you’re following along with the Hungarian Redwork Runner project, you can find all the articles listed in chronological order in the Hungarian Redwork Runner project index. You’re welcome to join me in stitching the project, too. All the information you need to get the project underway is available in the project index, and if you run into any snags, you can always ask questions here on the website or drop me a line.

