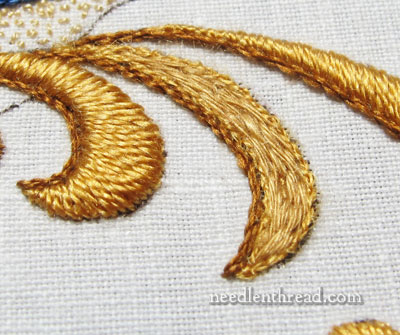
At the beginning of this month, I showed you some progress on my “secret” embroidery project that’s being worked in silk, with lots of satin stitch and stem stitch. I pointed out an element on the project that was really bugging me, and that I knew I would eventually have to fix.
I’ll show you, close up and personal, how I went about The Fix. Today, we’ll look at removal, and tomorrow, we’ll look at replacement.
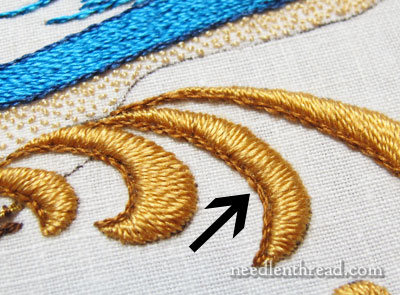
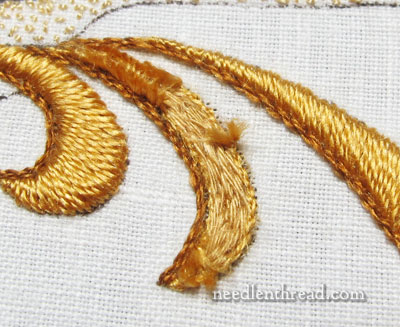
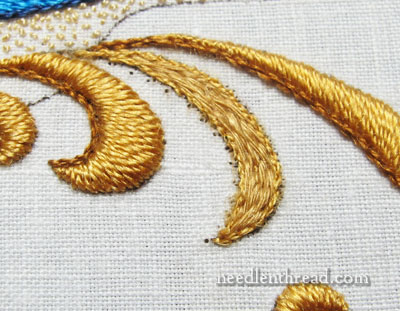
The arrow above points to the element that I want to fix. The shape of the piece is not-quite-right. It is too flat on the right side of the element. Every time I looked at the piece overall, this element jumped out at me. It was screaming to be fixed! There was nothing for it – I acquiesced.
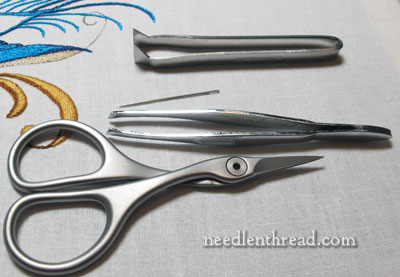
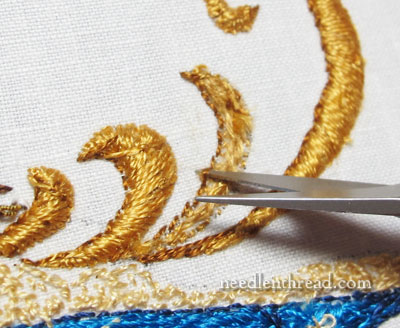
The tools! When you’re getting ready for surgery on a piece of embroidery, the first thing to do is to line up your tools – in this case, a very sharp, small pair of scissors, some tweezers (I have two pairs, depending on which one works better for what I need to do), and a needle.
Some folks like to use a seam ripper for removing stitches the way I’m getting ready to, but I prefer scissors. There are two reasons: 1. I feel like I have more control, and 2. I don’t like to pull upwards on a seam ripper. With scissors, I don’t have to put any “pull” on my fabric or stitches – it’s just a matter of taking small snips.
(I wrote about these scissors a while ago, by the way. I still absolutely love them! I’ve used them practically every day since I got them, and they are still in pristine, perfect cutting condition. They are excellent scissors for a very reasonable price.)
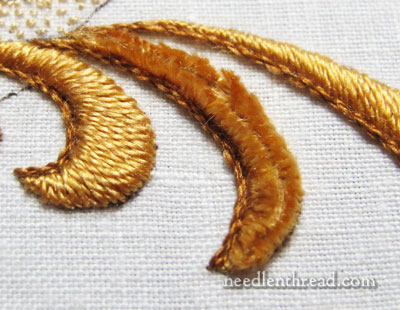
First thing’s first! We’re dealing with padded satin stitch here, and my goal, if possible, was to remove just the top layer of satin stitch and to leave the padding intact. The first thing I did was carefully cut through that top layer of satin stitches. I didn’t remove the stem stitch on the left side right away, although I could have done that first without a problem. But for some reason, since the satin stitches were the looming mountain that I needed to face, I wanted to tackle them right away.
Slicing them right up the middle like this makes it pretty easy to pull out the stitches.
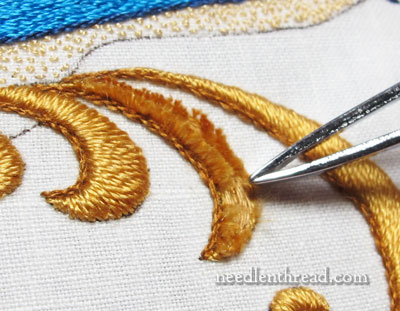
And then come the tweezers. Carefully picking from just one side of the element, I pulled out as many of the stitches as I could, one by one. It’s tempting to grab a bunch of stitches at a time and yank them out, but removing them one by one keeps the amount of fuzz down.
There were a couple stubborn spots along the way, where new threads were started or ended. These require a more thorough approach – I turned the work over and ferreted out the threads using the eye of a needle, just to loosen them so they would pull out.
Ahhhhhhhhh. All the satin stitching came out fairly well, leaving the padding intact.
Incidentally – and this is probably pretty important to mention! – when I work on a piece like this that has disconnected elements that all work together into the design, and that are all stitched with the same threads, it would be very tempting to carry threads from one element to the other while stitching. For example, if I had some thread left over from the first “curl” here, I might move on to the second curl, using the same thread. Right? Well, there’s no rule that says you can’t do that, but I always treat each element in a situation like this separately. And it’s a good thing, since I ended up having to pick one out. If my threads were connected to the other elements, it would not have been as easy!
Now, to tackle the stem stitch. Stem stitch is really easy to remove from an embroidered surface. Turn the work over, and snip the back of each stitch. They look just like little backstitches back there (because that’s what they are), and if you just slide the tip of your scissors under the back of each stitch and snip it….
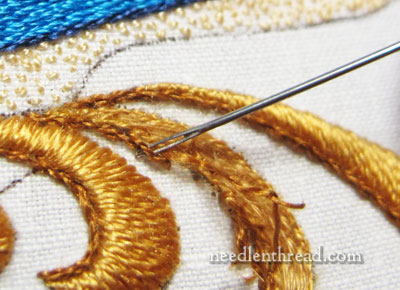
… you can turn your work over, and using the eye of a needle, slide it under the front of each stitch and lift it out. Looks messy, but it’s one of the easier stitches to remove.
And there it is, ready for improving.
You can see that the actual outline of the element is the problem – it is flat up on that right side, where you’d think it would round out just slightly. This problem is actually on the design itself. I’ll alter the design before it is used again.
Tomorrow, I’ll show you how I prepared the padding area and corrected the shape of the thing.
Any questions, comments, suggestions? Feel free to leave a comment below!

