This is as Absolute Beginner’s Tip – it’s something most embroiderers learn relatively early in the stitching game. But if no one has told you to do this and why you should, it’s good to know!
Neatening the edge of your fabric before you transfer your embroidery design is a step you will never regret. Forgetting to do it, though, can lead to lots of little irritations. And that’s the reason I’m bringing the point up today. Who needs little irritations while embroidering? None of us!
When we talk about “neatening the edge” of embroidery ground fabric, we’re talking about doing something along the edge of the fabric to secure the fabric threads so that they don’t shred during the whole stitching process.
You see, there’s nothing worse than stitching along in relative bliss, not realizing that the outer edges of your fabric are secretly unweaving themselves so that they can make their way surreptitiously to the back of your embroidery and cause knots and all kinds of other mayhem.
Another reason to neaten the edge: it keeps some fabric types from rolling or warping along the edge.
Certain types of fabric benefit from going a step further. Silk satin and similar fabrics that roll on the edges can be attached to strips of twill tape, which will secure the edges, keep them straight, make it easier to frame up, and make finishing a Whole Lot Easier.
So it’s a good practice always to neaten the edge of the fabric before you progress with other steps in your project set-up.
Neatening the edge of your fabric before you start any embroidery project is relatively simple. And if you have a sewing machine or a serger, it’s super-duper simple!
When I use a sewing machine, I use my overlock foot and run the edges of the fabric through the machine, overlocking the edge. That’s my favorite way, and it works up really quickly. You can also use a zig-zag stitch right along the inside edge of the fabric, or if your machine doesn’t have any of those settings, you can use two lines of straight stitch, one inside the other, slightly off-set.
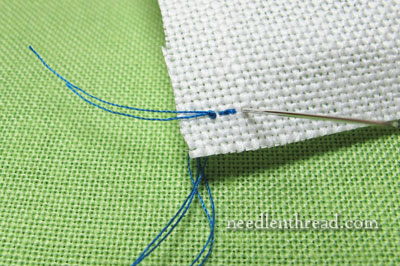
But you don’t need a machine to neaten the edge – you can do it by hand using a simple whip stitch. When I do this step by hand, I use regular sewing thread doubled in the needle. I start on one corner of the fabric with a waste knot, followed by a couple little backstitches (pictured above).
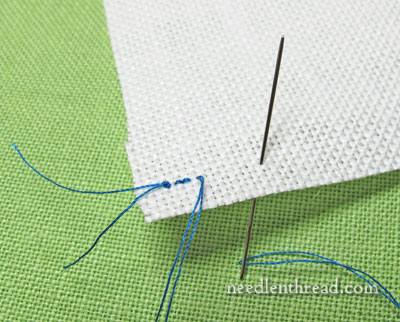
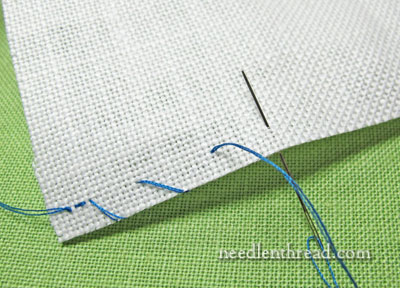
How deep you go into the fabric with the whip stitch depends a little bit on the type of fabric you’re using. If you’re using an even-weave linen, you’ll want to work about five threads or more into the fabric. If you work right along that last fabric thread or two, you may end up actually pulling those out with your whip stitching, so it’s best to go into the fabric a little way.
On plain-weave fabric, normally a quarter inch in will do just fine.
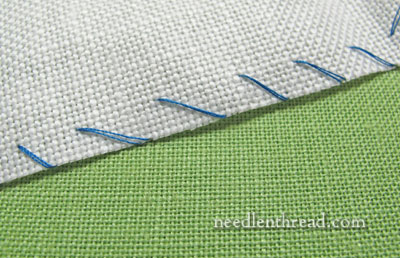
The whip stitch involves entering the fabric from the same direction with each stitch, so that the thread “whips” around the edge of the fabric.
This is what the typical whip stitch will look like along the edge of the fabric. Once you get used to doing this step by hand, it really doesn’t take all that long.
To get over any mind block about neatening the edge – that it’s a pain to do or a waste of time – just try to consider it part of the whole process. If it becomes habitual, you won’t even think about when you set up your future embroidery projects.
As they say in that world-famous maxim: A Neat Edge makes a Happy Stitcher.
Looking for other tips & tricks for hand embroidery? You can find a whole list of them under Tips & Techniques in the top menu here on Needle ‘n Thread!

