Last week, we took a look at this remnant of an old vestment adorned with goldwork embroidery, and then we began taking apart a bunch of grapes on the piece to see how it was constructed and to get a better look at the materials used.
Today, we’re going to finish taking this goldwork element apart and look closely at the foundation on which it was worked.
Lots of questions came up in the comment sections on both of the previous articles (Part I and Part II), and I did my best to answer them there. If you have questions, you might want to take a look at the previous discussions to see if they’ve already been answered.
There were several excellent suggestions, too, about how the grape domes were made and how they could be made again today, so if you’re curious about the materials involved in this element, feel free to peruse the comments on the first two articles, or to ask your own question below.
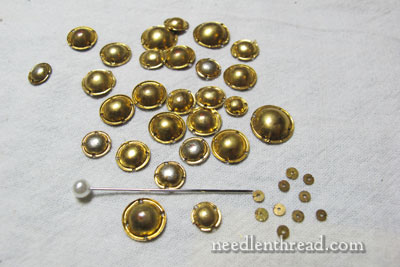
The photo above shows the collection of little goldwork “domes” and the few spangles that were removed from the bunch of grapes. The domes are made from what looks to be copper or some sort of copper alloy, plated with gold. I don’t have any expert metal analysis of that, so I could be wrong, but that’s what it looks like.
Most of the little domes are salvageable.
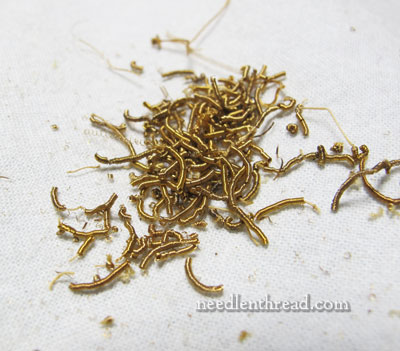
Here’s the left over purl cut from the piece. It is not salvageable.
You’d be surprised how dirty a job it is to take this stuff apart! The purls are pretty dingy, and of course, they are mangled from the removal process.
Now let’s take a close look at the foundation upon which the grape bunch was built. With this type of high-relief goldwork, the foundation is almost as important as the golden embellishment on top of it!
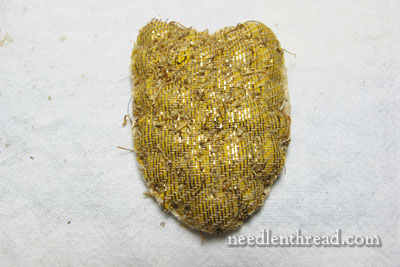
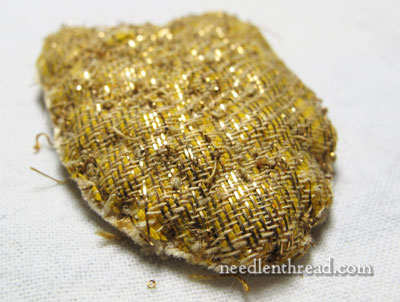
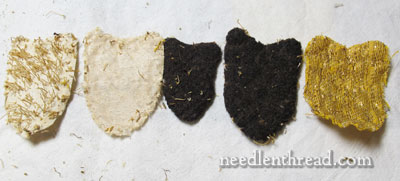
Here, you can see the intact foundation of the bunch of grapes. It looks like a shield or a patch, doesn’t it? The outside layer of fabric is a rather “open” herringbone-like weave of bright yellow shot with gold paper-like strips.
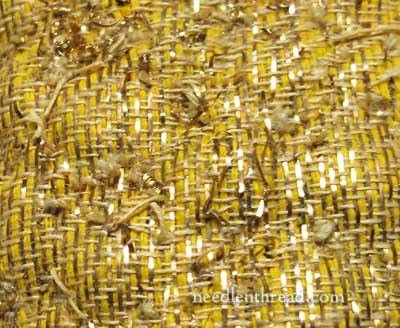
You can see it up close here.
Some questions arose about this fabric. It’s not really typical “cloth of gold” – in my experience, cloth of gold is practically solid weaving with gold threads, and the threads are wire-like, not paper-like strips.
I also don’t think that the yellow fabric here was the original ground fabric for the vestment. It is much too rough for liturgical use whenever this piece was made. I believe it was chosen for the background because it serves as a “mask” behind the goldwork, in case bits remained uncovered with embroidery and metal – the same reason that we often use yellow or gold-colored felt beneath goldwork today.
To give you some perspective on the thickness of the piece, here’s a side shot. The whole piece, with the goldwork on it, was about half an inch thick.
How would you like embroidering through that?
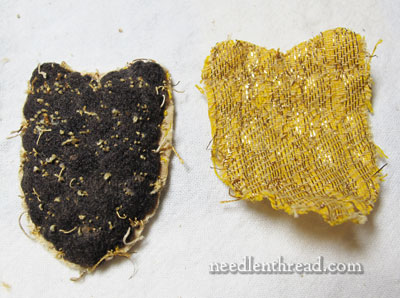
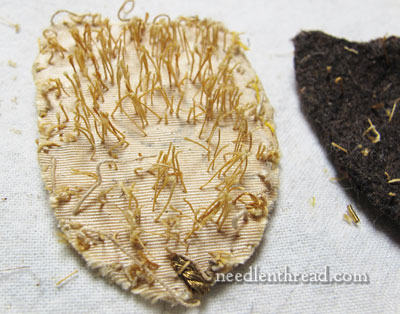
When we take the yellow layer off, we get a layer of dark brown felt. The little speckles all over that are the couching threads from the goldwork.
This layer of felt is just slightly smaller than the yellow fabric, and it is fairly thick and somewhat soft – not soft and fluffy, but softer than regular thick wool felt today.
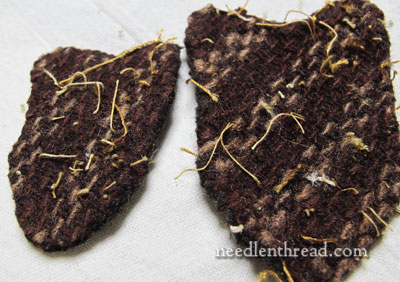
This is what the back of the felt looks like. You can see that it is woven felt.
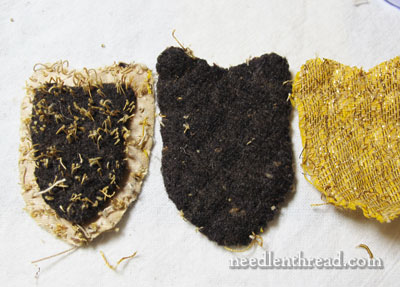
When we remove the top layer of felt, a new, smaller layer of felt is revealed. It is sewn onto the lighter fabric that is the size and shape of the original design.
This is how the goldwork element was built up to be thicker in the center than on the edges – first, a smaller layer of felt is sewn onto the ground fabric, and then a larger layer of felt is sewn on top of it, so that the padding mounds up in the center. This is the same way we do this time of raised work today.
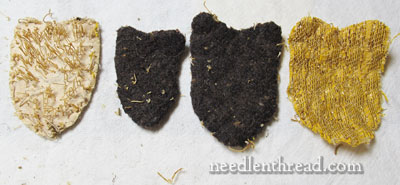
Now, if we remove the smaller layer of felt, we can see the pale ground fabric. Let’s look at that up close.
This is a relatively thin silk fabric, too fine to support the heavy weight of this kind of goldwork alone.
And so, if we peel off the layer of silk, another layer of fabric is revealed.

Backing the silk is a layer of linen, to help it support the heavy goldwork. Not unusual – this is exactly what we do today.
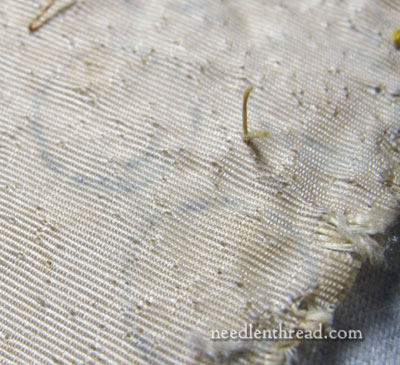
If you look at the silk layer up close, by the way, you can see the imprint of the original embroidery pattern. Those dark circles there are the grapes. Makes you wonder, doesn’t it? By the time the felt is applied to the fabric, it’s not as though the embroiderer could see the grape design.
And this is yet another point that makes me speculate that the goldwork elements in this whole piece we’re looking at (on the red fabric background) were actually salvaged from another vestment (or vestments) and applied to this piece. But more on that later.
Since my plan is to take apart each element on this piece and show it to you, I’ll be organizing an index for these articles so that you can easily find the articles and use them for reference if you wish. The next time we visit the subject, we’ll look at the lily up close.
As usual, if you have any questions or comments, do feel free to leave them below!

