Hand embroidering an egg isn’t exactly a new idea, but it is, in some respects, a zany idea.
Last year, when I stumbled upon these magnificently embroidered eggs right before Easter, I knew, deep down, that I’d have to try it.
Egg art has always fascinated me – I love carved eggs, painted eggs, Ukrainian eggs (Pysanky) and the like. And not just at Easter, either, though that’s when eggs really come into fashion. I think eggs make beautiful Christmas ornaments and even year round displays.
I like natural, naked eggs, too – a bowl of blown eggs in natural soft blues, greens, whites, browns, and speckles is so simply pretty in its own right.
But anyway, when I saw the embroidered eggs, I was bitten by a bug…
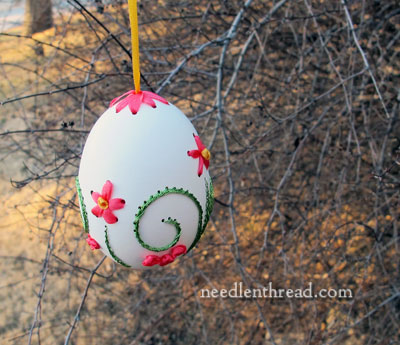
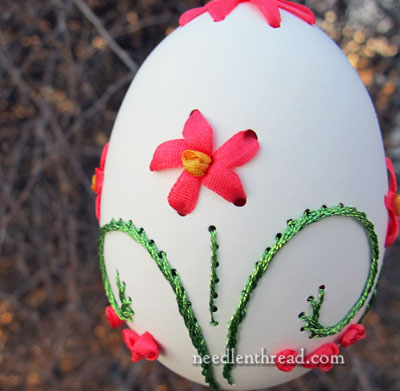
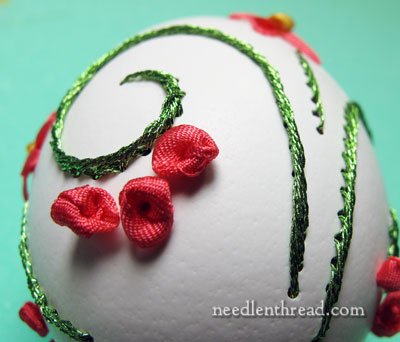
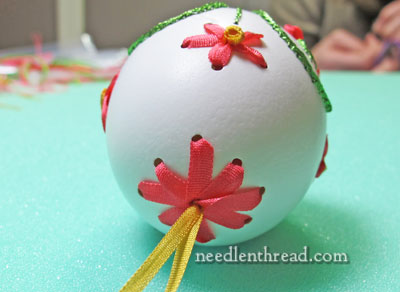
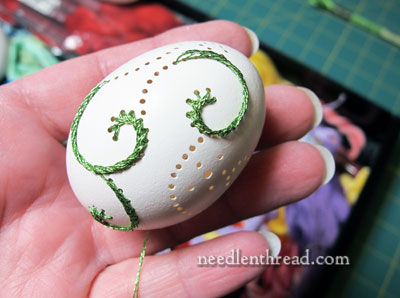
… and the result of that bite? Here’s my first attempt – a simple embroidered egg that felt nothing at all like “simple” during the process!
Once I was bitten by the Embroidered Egg Bug, I started gathering. Tools, supplies, threads, ribbons, eggs (can’t forget those) – all the stuff I would need to launch into embroidering eggs.
After rummaging around online for clear information, tutorials, and the like, I began developing a mental list of criteria, or guiding principles, for my own attempts at embroidered eggs.
I love the beautiful eggs made by Annie Garcin. (That’s a link to a YouTube video showing her at work.)
Annie’s embroidered eggs are embroidered on both sides, through the egg, without the back cut off. This, to me, is what is so “magical” about embroidered eggs – they are eggs, whole and entire. They are not just an egg surface on the front, but the whole ovoidal surface, unbroken, and the mind boggles (or at least, mine certainly did!) upon seeing embroidery encrusting a real egg shell with no large access to the back of the embroidery. It’s magic!
So that’s my first guiding principle – the eggs must be whole. I figure if the backs are cut off, or if the egg is somehow cut open and then put back together, half the magic is gone.
The next point has to do with coating the surface of the egg to harden it before working on it.
I love natural egg shells. I think they’re beautiful. I like their matt surface. I like the feel of the shell. When they’re glossed over with a hardener, the egg shell looses much of its egg-shellness.
So I decided that I wouldn’t coat the egg with a hardener – or that I would at least try to avoid doing so, and see how far I could get. My resolve on this point may change over time. There’s also the idea that a hardener would preserve the egg from breakage, after it’s finished and on display. So… I’m still fiddling with this idea.
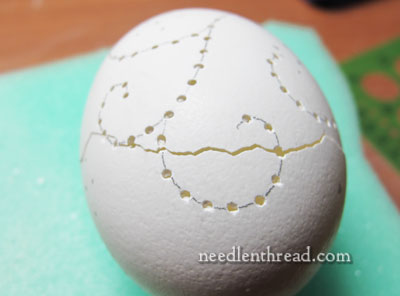
The third principle: Start with basics. Starting simply was a necessary approach. I don’t always do that when I launch into something new. Normally, it’s something complex that draws me to a new interest (kind of like Annie Garcin’s embroidered eggs!). And most of the time, I dive into the complex approach.
But with eggs, it’s a bit different. It’s really important to get the “feel” for the whole process, and I knew it would be less frustrating to do so by working from basic to more complex.
And so my journey into the embroidered egg began. And now I’m trucking along and loving it – but wow.
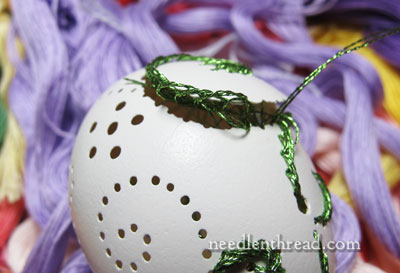
It takes a lot of time – it can’t be hurried! And it makes a mess – much more so than mounting a piece of linen on an embroidery frame.
And it takes about fourteen million tons of patience. I would say that patience is the key element to the embroidered egg. No other type of embroidery has tested my patience like this has!
…and for obvious reasons.
It broke before I even had a chance to put thread through it. This was my first attempt at drilling an egg. In fact, it was the first time I’d ever used a dremel drill. So the whole journey has been One Big Learning Curve.
And this? This was my first embroidery attempt on a bantam chicken egg, which is about 1/3 the size of a regular chicken egg. If at first you don’t succeed…
I’ve learned a lot about eggs and drills and bits and threads and needles and the relationships between these things when you try to take needle and thread to an egg shell.
And in the weeks to come, I’ll share some of my discoveries with you (and some more eggs), so that you, too, can embark upon the magical journey of creating beautiful – or just plain fun – embroidered eggs!
So, what think you? Are you keen to try hand embroidery on eggs? Is this something that enchants you, or do you think it’s nuts? I’d love to hear your perspective! Feel free to leave a comment below!

