Last week, we ventured into the subject of hand embroidering eggs by talking about the preliminary supplies you’ll need to undertake this zany operation.
If you’re keen to put your needle and thread through whole, empty egg shells to create rather unique little Easter ornaments (or ornaments for any time of the year), then you’ll also need a few embroidery supplies, one of which I find essential.
So let’s look at the supplies you’ll want to have on hand to embroidery your eggs. Most of these, you’ll probably have in your stash – in fact, embroidering eggs can be a great stash-busting project! Bits of ribbon and specialty thread that might not otherwise get used can be put to good use embellishing eggs.
Needles for Embroidering on Eggs
If you’re going to embroidery eggs, your task will be a whole lot easier with these. To put it frankly, you need these.
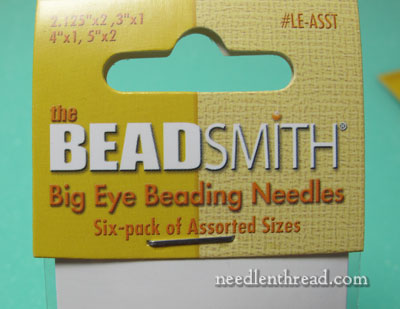
Trust me! You Need These.
These are Big Eye Beading Needles by BeadSmith. They come in different packages – you can buy an assorted pack that has several different sizes, from 2.5″ long to 5″ long, or you can pick up a 4-pack of 4.5″ long needles.
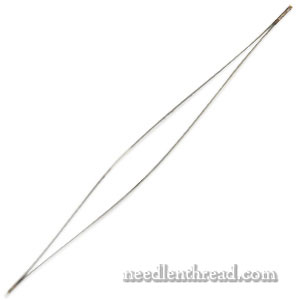
They’re wire needles, made from two wires joined to a tip at both ends, so that the middle of the needle is two parallel wires. When bowed, they look like the photo above. Normally, they just look like a really long, thin wire. They are flexible (to a degree), and though they are so long and thin, they can still easily carry rather thick threads, multiple strands, or ribbon.
Even better, though, is the fact that the “eye” (the opening where the two wires aren’t attached to each other) traverses practically the whole length of the needle. This means that you can stick the needle through the egg, in one hole on one side and out on the other side, with the needle protruding on both sides of the egg – giving you access to the threadable eye on both sides. When we look at techniques, you’ll see why this works out well.
It’s a wonderful tool, and I’d say it’s necessary. If you don’t invest in any other tool for this whole undertaking, at least invest in these needles. They will save you a wee bit of frustration!
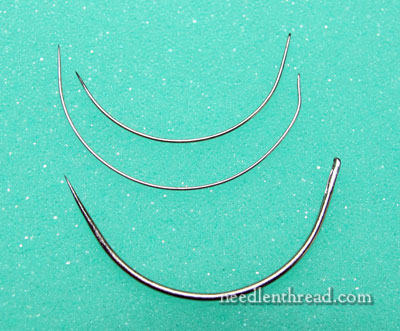
Curved needles come in handy, too. I find the smaller curved beading needles by Clover work great for single strands of thread, but the eye is too small for ribbon. The larger regular curved needles require some really careful manipulation, if you aren’t hardening your eggs. If you’re eggs have been hardened, it’s not as difficult to use them.
I’ve only used the curved needles twice, and both times, I could’ve used the Big Eye Beading Needle instead, but I wanted to try the curved ones. Again, they come in handy – but they aren’t absolutely essential (or at least, they haven’t been so far!).
So those are the two types of needles. You can also use regular needles for some techniques, too, as you need or want to.
Threads for Embroidering Eggs
The threads you use to embroider your eggs can come straight out of your stash – you don’t necessarily need any required thread.
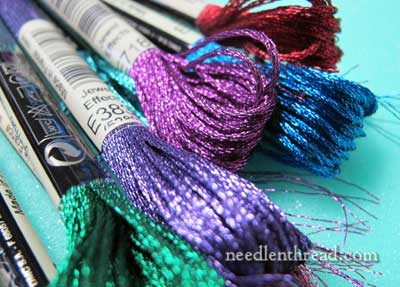
I’ve made great use of the sparkly DMC Light Effects threads. They work well on sturdier eggs. Because they are metallic, you have to work with a little care, but since you’re embroidering on eggs, you have to work with a little care, anyway. What I like about them is that they twist nicely with stem stitch, they come in vibrant (and some soft) colors, and they add a little festive sparkle to the eggs.
And who doesn’t like festive sparkle?
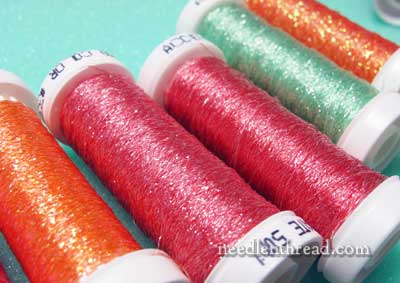
Additionally, if you want sparkle, Accentuate works well, but if you want any noticeably color from it, you have to use several strands at a time. You can also blend Accentuate with similar colors of floss (cotton or silk) for a subtle sparkle.
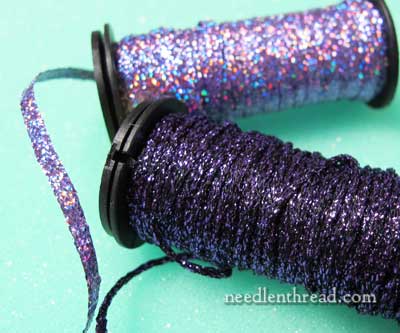
Kreinik makes some fun ribbons and braids that work well, too, with care. They’re a bit stiff to pull through the egg, but if you plan in advance and drill the holes large enough, they work. They can also be couched.
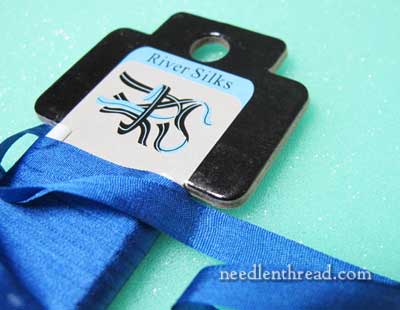
For bold flowers and decorative, bold lines, some silk ribbon is nice to have on hand. I’m using River Silks silk ribbon (really nice stuff!), but if you don’t want to invest eggstra in your eggsplorations, use what you have on hand or whatever is readily available to you at your local needlework shop or craft shop.
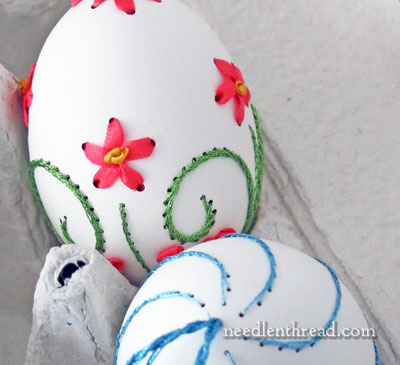
Both 4mm and 7mm are good to have. In the photo above, the first embroidered egg I showed you uses regular 4mm silk ribbon.
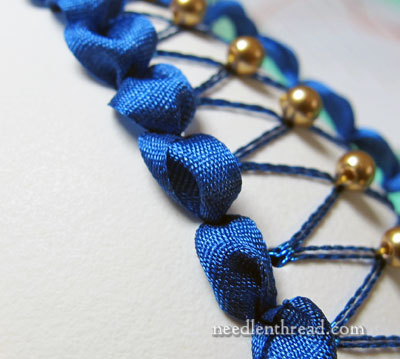
The advantage of 7mm ribbon is that you can get nice puffy ribbon petals and leaves, lines, and bows when you pull the thread into the smaller drilled holes. The holes “gather” the ribbon for you, which can be quite effective, and a nice decorative effect can be more quickly produced.
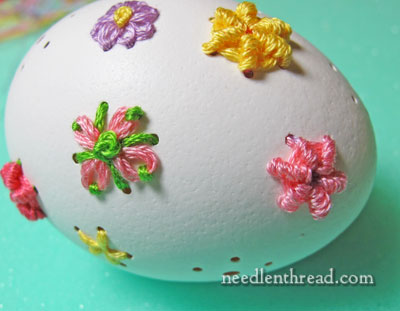
And of course, regular stranded DMC cotton floss is fine to work with, too – and the range of bright colors available at a reasonable price can’t be beat.
You can use silk floss, crewel wool, perle cottons, regular cotton floss, ribbon floss, silk ribbon, fine decorative braids, metallics, ric-rac, printed ribbon, narrow bands of lace – whatever you have on hand, or whatever you might find that entices you!
Floss and softer threads are easier to work with than metallics. The easiest thread I’ve found to work with so far is 50 wt silk sewing thread. It is strong, it has a wonderful sheen, it doesn’t wear on the edge of the egg, it slips right in and out, and it’s nice to stitch with. I only have two spools, though, and both are gold, so I’m a bit limited.
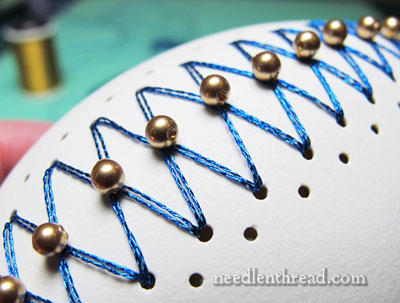
And beads! Don’t forget beads! Round beads, seed beads – whatever kind of beads your little heart desires – with the exception of bugle beads. Because bugle beads are long and straight, they don’t suit the curved surface of the egg so well.
Stash Bust!
Dig through your stash before investing in new supplies for embroidering eggs, especially when you first start out. It is likely that you’ll have a few breakages, so you might want to start with floss first, to get the feel for working with the eggs. Then, as you become more confident, progress to specialty threads and embellishments. This will save some waste.
Next time we visit the subject, we’ll explore some simple egg embroidery techniques.
Questions? Comments? Are you going to try this out? I’d love to see what you do, if you decide to venture into embroidering eggs!
You can find previous posts about embroidering on eggs here. I’ll be adding an index to the site under Tips & Techniques shortly, so that you can easily refer to the articles in sequence.

