Remember last week when I mentioned that I’d taken up embroidering on eggs? Well, it’s a mammoth subject to write about!
To make it more manageable, I’m going to divide the instructions over several articles that will appear intermittently over the next few weeks. The articles will be filed away into a series under “Tips and Techniques” here on Needle ‘n Thread, so that they are easily accessible for you.
Today, let’s talk about preliminary supplies.
Now, keep in mind, this is my approach, developed from piddling around with the concept for the past year. It’s just the way I do it – and there are always other ways to do things. So if you find a better way, don’t hesitate to use it!
Before you launch into the challenging but rather addicting practice of embroidering your Easter eggs, there are some preliminary supplies that you’ll need to gather.
Eggs for Embroidering
The most obvious? Eggs.
And this is a subject unto its own, because there are All Kinds of Eggs in the world.
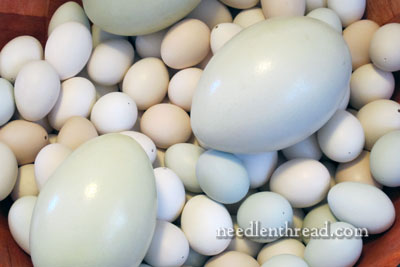
In the photo above, you can see my collection (rather vast) of bantam chicken eggs (which are about half the size of a regular chicken egg), and on top of those are three rhea eggs. Rhea’s are a South American version of the ostrich, and they produce eggs similar to emu eggs, but instead of being blackish green, they are pale yellowish-greenish-ivory-ish in color.
I don’t know if I will ever embroider those. But I have them. So I might.
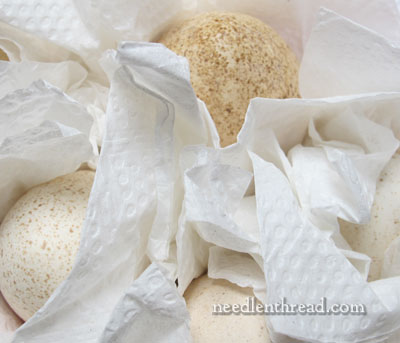
There are turkey eggs. These are royal palm turkey eggs, speckled with brown. They have a nice shell and are teardrop shaped.
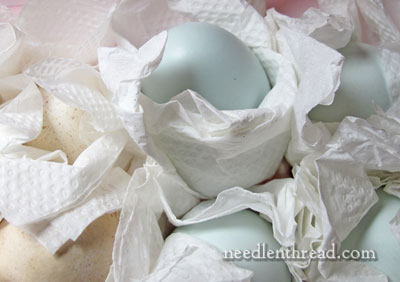
These are blue rouen duck eggs, and possibly my favorite eggs ever. They have a beautiful, porcelain-like shell that is glassy-smooth, and they are pale, pale blue.
And there are goose eggs. I have one underway right now – I don’t really like the shell as much, as it has a chalky feel to it, but it’s a tough egg shell, which is good!
And there are regular chicken eggs, which are just grand.
My advice on eggs: if you can, use eggs from fowl that are raised free-range, and not eggs from the grocery store. The shells are much stronger. (And the eggs taste better all around, too!)
Preparing Eggs for Embroidery
You will need to empty and clean the eggs. There are all kinds of ways to do this. I like the Blas-Fix Egg Blower – it’s fairly easy and painless to use. But you can also blow the eggs by mouth (clean them first) or even use a baby’s medicine syringe or a…. mmmm… can’t think of what it’s called, but in our house, we call it by the rather vulgar name of “snot sucker” – one of those squeezy bulb things you use on a congested baby.
The concept is pretty simple. If you’re using a tool like any of those mentioned above, pierce a hole in the egg, insert the tip end of the tool into the hole, and pump air into the egg. The air will displace the insides and force them out of the same hole. Do this over a bowl. And then cook me up a nice egg casserole for breakfast tomorrow morning, will you? Seriously, if you can use the eggs, do – why waste them?
Alternately, you can buy eggs, already emptied, from a variety of sources online. Check around! Pysanky supply stores often sell prepared eggs, and you can find several suppliers on eBay, too.
Once the eggs are empty, pump warm soapy water into the eggs and clean them out really well by shaking them around and emptying them and shaking them and emptying them. If you want to go a step further at this point, squirt in a bleach solution and let it swash around a bit for a while (a few minutes or so), and then empty and rinse the egg and let it dry completely. Alternately, you can save the bleaching part until after you’ve drilled your egg.
Hardening Eggs before Embroidering
The option of hardening the eggs before you embroider them is up to you. On more delicate eggs (like the bantam chicken eggs), I think hardening is pretty essential. On tougher eggs like goose eggs, I don’t use a hardener.
One reader suggested that the eggs should be hardened, because over time, the calcium will disintegrate. Many readers suggested using Modge Podge as a hardener.
I’ve talked to a few egg artists and egg embroiderers, and the most common recommendation I’ve received for a hardener is sodium silicate.
If you choose to go the route of hardening the shell, you might want to experiment with different options.
We’ll revisit this topic a little later.
Tools for Drilling Eggs
You will need something with which to drill holes into the eggs. What you use is up to you. I’ve heard of folks using hand-held push drills (that are used for making miniatures), or even using pins to prick holes.
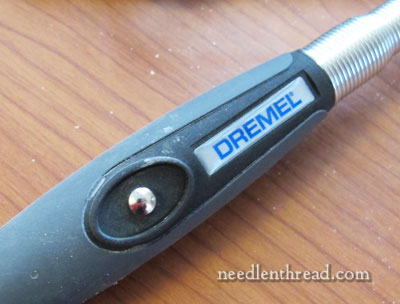
Personally, I prefer using a Dremel drill. I have learned how to wield this Dremel drill (with the flex shaft attachment) with Great Finesse this past year. You don’t actually need Great Finesse – in fact, I don’t have Great Finesse when it comes to power tools, as I’m rather a chicken and prone to accidents, but the drill was easy to learn how to use. You do need a steady hand, though.
This isn’t the place for a how-to on using a Dremel. If you haven’t used one in the past, then do some research or ask a friend. And if you don’t have one, maybe you have a friend who does and would be willing to lend it to you.
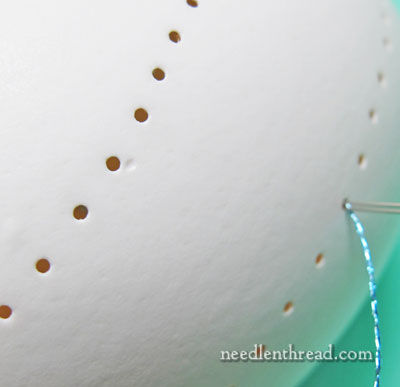
Some folks pierce their eggs with pins or small nails, but the results that I’ve seen are a bit chippy. The nice thing about a using a drill is that you get nice, smooth little holes in the eggs, without having to put much pressure on the shell. And smooth holes don’t wear the embroidery thread out as quickly, either.
Anyway, you need something to make holes in the eggs.
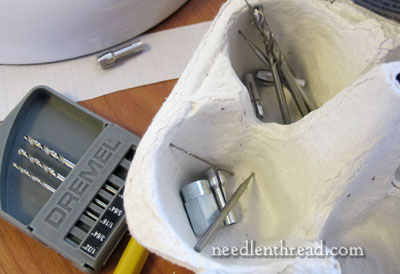
If you’re using a Dremel, you’ll also need a collection of drill bits or engraving bits. I’ve used both successfully, but I find I like the smaller drill bits best. I use the 1/32″ bit and the 3/64″ most frequently, though the 1/16″ works well for larger holes for ribbon and heavier threads. Along with the bits, you’ll need the collets that the bits fit into.
Egg Safety
As a final note on the preliminary preparation of the eggs, you might take a look at these safety tips on working with eggs, especially if you plan to drill a lot of them.
Some sort of eye protection is a must. And, especially if you are sensitive to dust (but even if you aren’t), a dust mask is nice to have.
Other Preliminary Supplies
There are a few other supplies you’ll want to have on hand, most of which you may have floating about the house already.
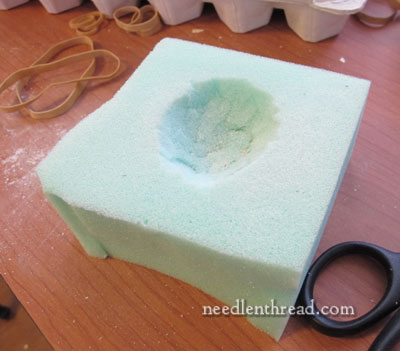
A bit of soft foam will come in handy. This is leftover upholstery foam cut into a square, with an indentation cut in the middle. I rest the egg in this while I drill it. You’ll also want a separate, clean soft something-or-other on hand for when you’re embroidering the eggs. Much better to rest them on something soft than to have them rattling around loose on a hard table.
How do I know? Well, after a few crack ups, you figure these things out!
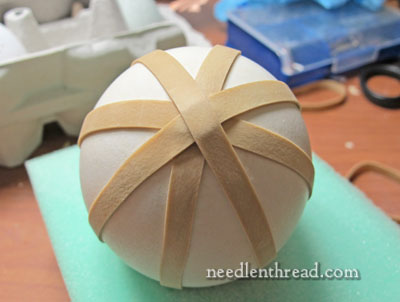
A supply of wide rubber bands in different sizes is helpful for marking out vertical and horizontal lines or dividing segments.
You’ll need a good sharp pencil for marking the drill spots on your eggs.
And of course, embroidery supplies!
Final Shot:
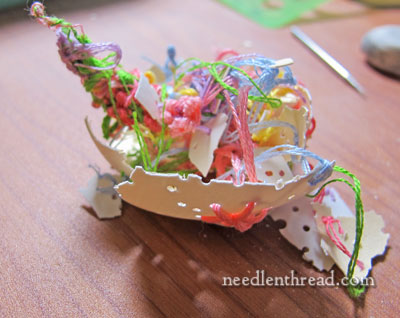
This whole embroidered egg thing has been a trial-and-error process. It’s fun, it’s a little addicting if you like slow craft, and it can be quite surprising sometimes.
Word of advice: once you’ve finished embroidering an egg, don’t try to drill more holes into the shell! There’s something rather messy about a drill running at 35,000 rpm entering an egg filled with thread…
Next time we visit this topic, we’ll talk embroidery supplies. You probably have everything you need in your stash, except for two small (inexpensive) highly recommended, downright indispensable tools.
Any questions? Feel free to ask ‘em below!

