So you want to embroider eggs, and you’ve gathered all your supplies. You have the preliminary tools necessary, you have your embroidery supplies (including some specialty needles), and you’re ready to start!
Now it’s time to sit down with your eggs and work out your designs and do your drilling. This is the process I go through, for the final egg preparation, right before embroidering it, including getting the design on the egg, drilling, and final cleaning.
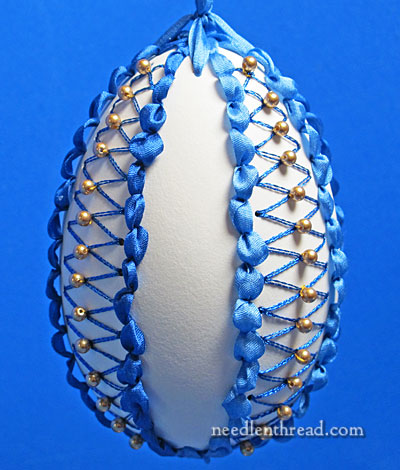
Here’s the last egg I finished. It’s a goose egg. You’ll want to start simply, and this is probably not the simplest way to start, but it wasn’t super difficult. The only hard part was adding the beads after the diamond lattice was stitched – kind of difficult to find the holes again!
Remember that there’s no “access hole” in the back of the egg – the whole egg, all the way around, looks like this. It’s divided into these four ribboned and lattice sections. Because there were holes on all four sides of the egg, from top to bottom, I was able to work the design without a large access hole. I just used the holes in the design.
So, when you design your egg, remember that the design must allow you to move back and forth with the needle from lots of angles around the egg.
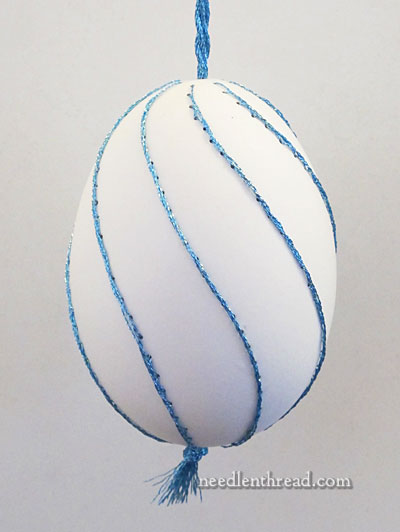
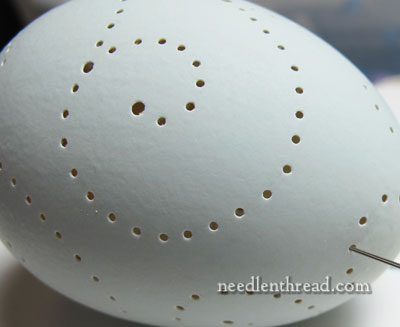
This egg is much simpler – it’s one of the first ones I did. It’s a regular chicken egg. These gently spiraling lines work all the way around the egg, so that, from all sides, I have access to holes to pass in and out of with the needle. I also have the top and the bottom hole on the egg, and these are a little bit larger than the thread holes, so they allow me to manipulate the direction of the needle a little bit more.
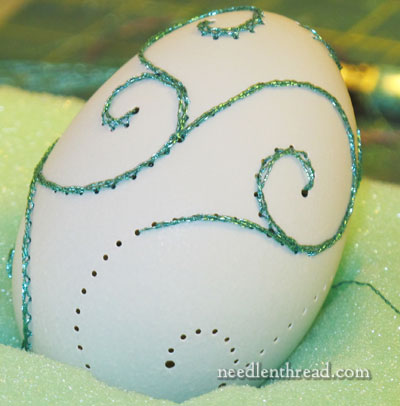
Here’s another example of a simple design. This egg – a light blue rouen duck egg – is just covered with large swashy swirlies around the whole egg, which gives me access holes all around, and from all angles.
So that’s the first thing you have to keep in mind – make sure you can access all parts of the egg from all around and from all angles, with the holes in your design.
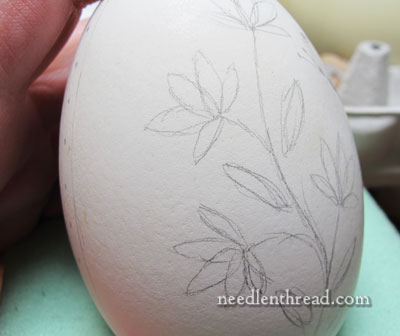
To get the design onto the egg, grab a pencil and start sketching. Unless you’re working an obvious line drawing of swirls and so forth, it’s a good idea to make a preliminary sketch in a sketch book, so that you can refer to the sketch for your layout. Once you have a perforated egg in front of you with no design lines on it, it might be tricky to remember what you intended to do!
Think in terms of the stitches you will use, and how they will work on an egg. Some stitches work better than others and are a lot easier to make than others. Fly stitches, buttonhole, chain, stem stitch, straight stitches, ribbon stitch – these all work well. Any kind of stitch that requires you to “scoop” your fabric is not so easy. Woven stitches like ribbed spider web and woven wheels work well. And detached stitches (detached buttonhole, etc.) work well, though they are a little thick-ish looking on the delicate eggs. So, keep stitches you can use in mind while you conceive your designs.
With a simple swirly design like the one above, free handing it directly on the egg with your pencil is just fine.
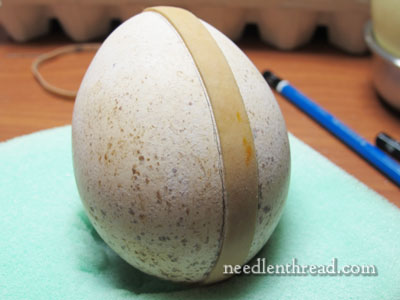
You can use rubber bands to help you mark off wide lines or center lines, like I’m doing on the turkey egg above. Just place the rubber band around the egg (it needs to fit a little snuggly). Work the rubber band into place carefully, and examine it all around to make sure it’s centered and where you want it. Then gently draw your line on one or both sides. It’s pretty easy to scoot a rubber band out of place, so make sure you’re not pushing on the rubber band when you draw the line.
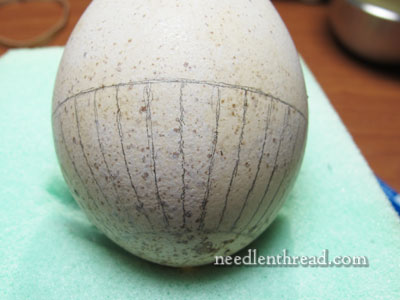
If you need to make divisions in an area, start by dividing first in the center, and then dividing the resulting to halves in half, then each of those in half, etc. This will keep your spacing a little more accurate and consistent.
You can literally sketch everything out on the egg, or your can sketch just the lines that indicate the stitches. If you sketch out things, you’ll get a better idea of how the design will fill the egg.
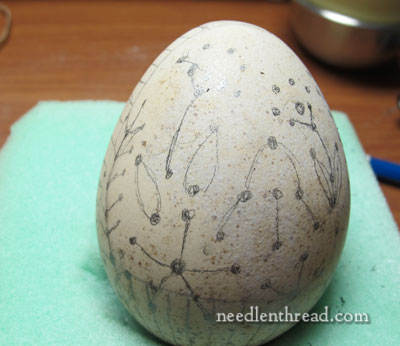
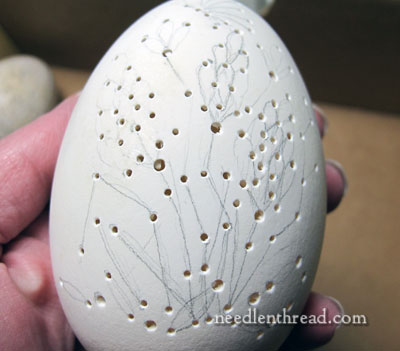
Once I’ve sketched out the basic skeleton on the egg, I go through and dot all starting and ending points of every movement of each stitch – any place the stitch would pass through the fabric gets a dot.
Wherever several stitches converge, I mark in a really big dot, because that hole will need to be larger than most of the other holes.
Also, ribbon holes need to be larger than thread holes, so as you dot up the starting / stopping points on your egg, keep all this in mind. When it comes to drilling, you’re more likely to drill accurately in the first sitting if all your threads and starts and stops are thought out in advance.

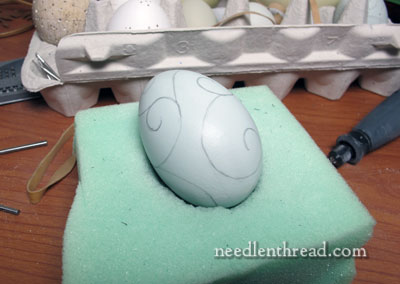
Here’s a goose egg, all dotted up and ready to drill.
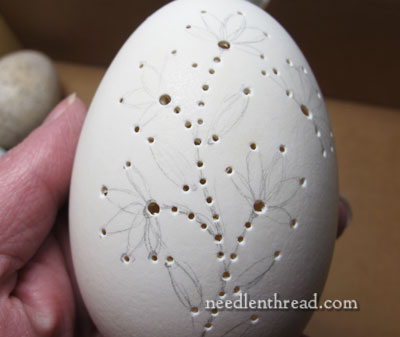
Here’s the other side of the same goose egg, with the design sketched on, but no dots yet.
Remember – you definitely want a design on both sides! On this egg, because the designs are far apart, I’m also going to do a decorative edge around the vertical perimeter of the egg, to give me holes on all “four” sides of the egg.
When I drill, I start with the large holes first. These, I make with the about a 3/32″ bit made from the Dremel. Then I switch to a small engraving bit, and enlarge the wholes with an engraving bit if necessary.
On goose eggs and other tough eggs, it’s easier to put the initial hole into the egg with a drill bit than with an engraving bit, but it’s easier to enlarge a whole will an engraving bit as opposed to a drill bit.
With chicken eggs that are not quite as tough, I find I can put holes in with the small engraving bits pretty easily, but I like the 1/16″ bit for regular thread holes.
Play around with the different drill bits and engraving bits you have, to get familiar with what they can do.
In any case, I drill the big holes first all around the egg, then I switch bits and drill all the smaller holes.
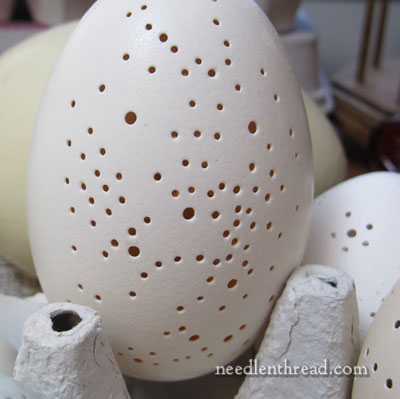
You can see that the egg looks pretty rough at this point. Up until now, it has only been cleaned with hot soapy water, so you can still see bits of the membrane in there. No worries – we’ll take care of that in a moment.
Here’s the back of the egg, drilled and ready for a final cleaning.
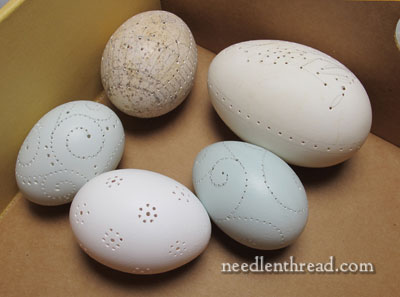
And here we have a group of drilled eggs, waiting. From the bottom, around clockwise, there’s a white chicken egg, a blue rouen duck egg, a turkey egg (royal palm turkey), a goose egg, and another duck egg.
If you’re planning on doing a lot of eggs, but you haven’t done one yet, do one first, to get the feel of the drill, of what size holes you want, what kind of alterations in your approach you’ll need to make, and so forth. Then, once you’re comfortable with the whole thing, work in batches. Design and drill and clean several eggs at a time, so that they are ready for you to embroider without having to go back to the designing and drilling table.
Clean!
To clean the eggs after drilling and to remove most of those bits of membrane that might be visible, fill up a little bucket or glass bowl with bleach. Work with rubber gloves, in a ventilated area, and dip the eggs in one at a time. Leave them for a few minutes, and then, working with your hands (hence the gloves), rub the surface of the egg while it’s in the bleach. Make sure you’re getting all the pencil marks off. Then rinse the egg in warm, soapy water and check it. You may need to give it another dunk in the bleach.
Goose eggs take a little longer in the bleach bath – about five minutes. Chicken eggs don’t take as long – about two minutes.
I end up working mine around in the bleach, then rinsing with warm soapy water, then putting them back in the bleach, working back and forth until I’m satisfied with their cleanliness.
When you’re satisfied, clean and rinse them really well with warm soapy water, and then with clear water, and set them to dry for at least 24 hours.
Incidentally, the bleach does not make the blue eggs white, unless you leave it in there for a long, long time. This is about a three minute bath in regular household bleach (straight), and the blue is not diminished at all.
The turkey egg was a little different – at first, it was mottled all over with reddish and dark brown speckles, but these were kind of like rough pigment on the outside of the egg. Much of the mottling game off, leaving just a smooth, light brown egg with some darker brown dappling all over it.
So test the whole bleach thing with the type of eggs you are working with, if you’re working with colored eggs of any sort.
Finally, you might have a different way you go about the whole clean-up, and that’s fine. This is just the way I do it, and it seems to work well.
Now we’re all set and ready to stitch – next time we visit embroidered eggs, we’ll finally do some embroidery!
You can find all the articles in this series on embroidered eggs listed in the Embroidery on Eggs index, in case you want to follow along!

