The last time we visited this old piece of ecclesiastical goldwork embroidery that we’re deconstructing, we looked at the lily on the piece and discussed the order of work.
There are several elements on the piece that deserve individual attention: the grapes (which we’ve already taken apart), the lily, the rose, the wheat ears, the leaves (all taken together), and finally, the central element, the Lamb.
Today, we’re going to look at the rose. It’s much the same as the lily, so we’ll talk a little bit about the order of work on it, the thread direction, the forms and padding, and then an interesting little clue that tells us a little more about the whole embroidered piece.
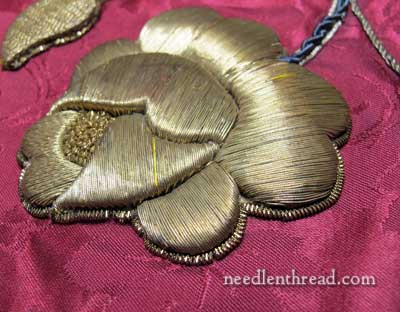
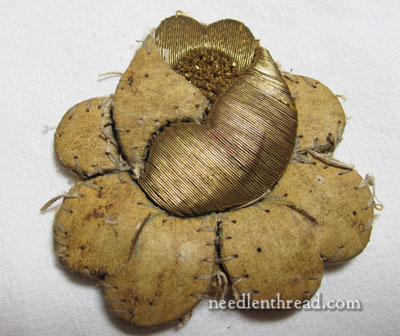
This is the goldwork rose. It’s another high relief piece, made in the same manner as the goldwork lily. The metal threads on it consist of a smooth passing thread, a roccoco thread (the wavy thread at the very tip of the rose), and some chip work (the inside sparkly bits made from check purl, which we’ll talk a little bit about).
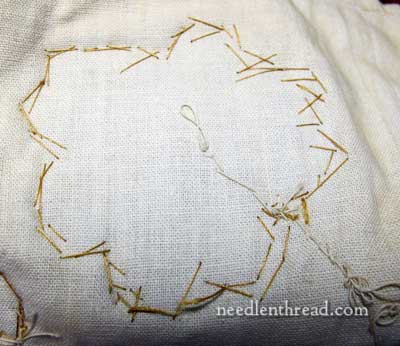
Here’s the back of the vestment piece, where you can see the threads used to appliqué the rose to the fabric. There are actually two rounds of thread here – the inside round of shorter stitches are used to hold the rose in place, and the outside round of longer stitches are the stitches used to couch the check purl all around the outside of the rose.
So, first thing, I clipped these threads on the back, to lift up the rose.
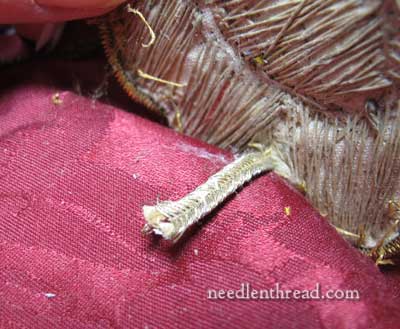
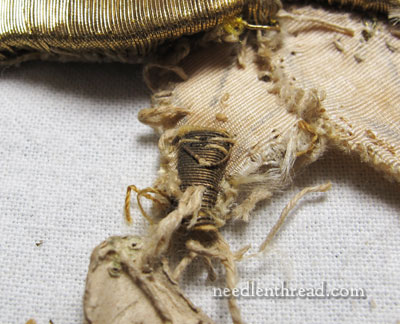
When lifting up the rose, behind it I found the tail of the “stem” that scrolls through this whole design. See it?
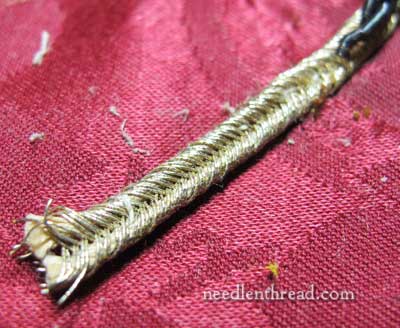
This is the base of the stem. It’s a thread that I know as Russian braid. It’s made from two parallel cords that are plaited together with the metal thread, so that there’s a “groove” running down the middle of the whole cord. It’s couched on here down the middle of the cord. Running down the center groove in the cord are purls:
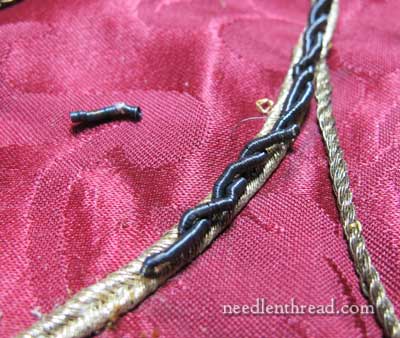
The purls are sewn in an “s-ing” method, and they have oxidized to almost completely black. On the backside of the purls (and you can see it a little bit on that stray purl in the photo), you can still find a hint of gold, but it’s barely a hint. I think this extreme oxidation points to a higher level of silver in these particular metal threads, as compared to the other threads on the piece.
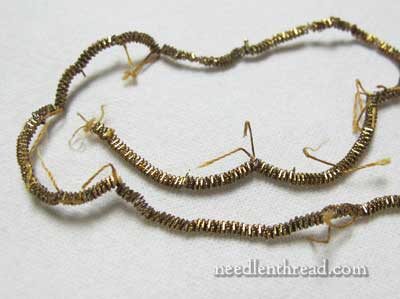
Here’s the check purl outline from around the rose. If you look closely at this stuff (we’ll look a little closer at it below, when we talk about the chip work), it’s not quite the same stuff as the “bright check purls” in the English metal threads we use today. This stuff reminds me of the check purls available as Sadi threads.
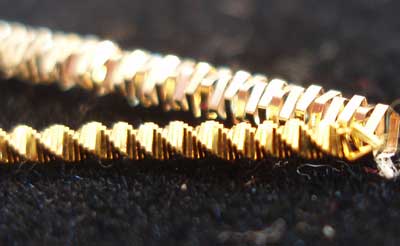
Here’s a photo comparison of English bright check purls (front) and Sadi threads. The stuff on the piece we’re deconstructing is not exactly like the Sadi thread, but it doesn’t twist the same way the English bright check purls twist.
So it’s not quite the same thread that we would use today, at least in the shape of the crimp and twist in the thread, as far as I can tell. I plan to look at it closely under a magnifier and really compare the three threads, to note the differences, but I haven’t done that yet.
Back to the rose itself. We can get a better idea of the order of work on the piece, if we look at it sideways because we can see the dimension better.
The top back petal at the tip of the rose (worked in the wavy rococco) is flat and is overlapped by the two fat center petals of the rose. The fat center petals also sit on top of the outside lower petals of the rose.
So we know that the back petal at the tip of the rose and the lower outside petals would have been worked before the two large main body petals of the rose would have been worked. The last thing to happen would be filling in with the chip work in the center of the top of the rose.
The two little side petals on the outside of the rose were worked separately. The two large petals on the outside base of the rose were one continuous pair of gold threads. The two inside overlapping petals were worked separately.
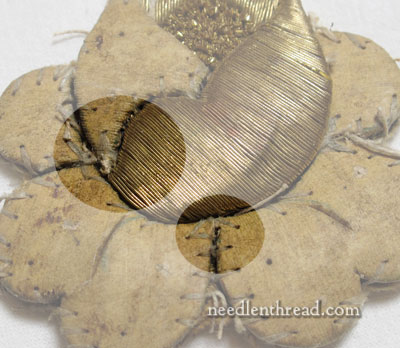
As far as the forms go, the two large overlapping inside petals that make up the “body” of the rose were actually one form at some point in time. The form is broken – whether this happened during the embroidery or later on, I’m not entirely sure. I think it may have happened during the embroidery, since the embroidery on each of those petals was worked separately. There’s no thread that carries over the base of both petals.
The form on the two lower outside petals were also one form at some point. These petals, however, were worked with a continuous pair of threads with no break in them, so I suspect the petal forms here cracked after the embroidery was done.
Strangely enough, I’m going to take a guess that the forms were made for the threads (at least on those outside lower petals) to run perpendicular to the split in the middle of the petals – but in the actual embroidery here, the goldwork threads run parallel to the split.
If the embroiderer wanted that split (or vein in the petal) to show on the top of the embroidery, the goldwork threads would have had to run perpendicular to the split. I think the rose would have certainly looked better with the splits worked on the top and visible, to give the flower at least some “life” – if you look at the original picture of it above, though it is pretty and obviously a rose, it’s rather blobby and unbroken along those two large petals.
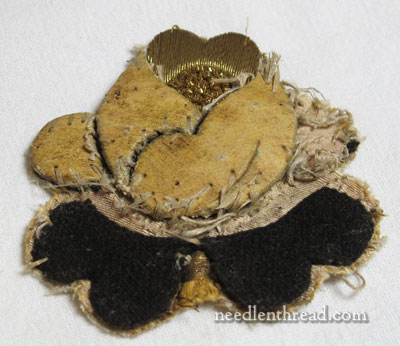
Another interesting thing – the padding on this particular element is attached to the forms (as it was on the lily) except for these two lower petals, where the padding was actually sewn down separately from the forms. Not sure why.
On this piece, the two center overlapping petals had the most padding, with very thick felt underneath them. The outside petals had this thin layer of felt that’s sewn down separately, plus a thin layer of felt attached to the form. There’s no padding under the inside petal at the very tip of the rose, except for the form.
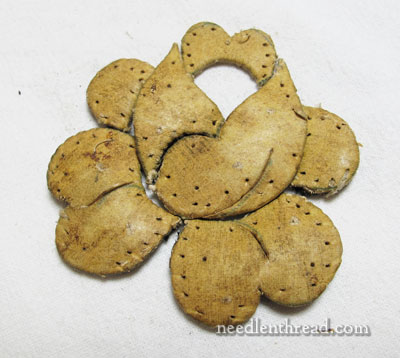
And here’s the form, all cleaned up.
Incidentally, many readers have asked if the forms could have been pre-made and purchased. This occurred to me, too, but I have scoured every old ecclesiastical embroidery book I have, and found no reference to purchased forms. There’s reference to cutting forms (card foundation), and to using forms, but no reference to “purchasing” forms. So I don’t know. If anyone else has ever come across any references to pre-made, purchasable foundations for goldwork like this, I’d love to hear about it!
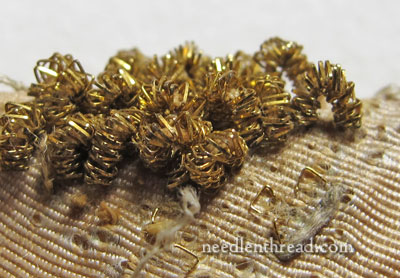
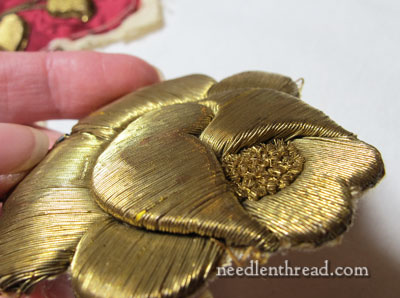
Here’s the chip work up close. Notice that it’s not cut and sewn down flat. It’s actually looped up and sewn on in the shape of an arch. Kind of like a itsy-bitsy Slinky toys!
Finally, the fun part.
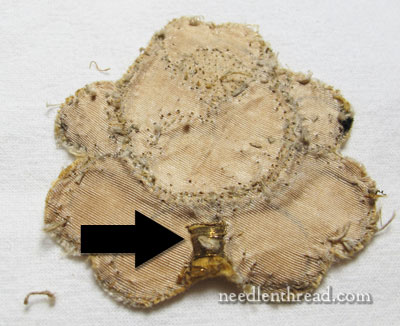
See this blob on the foundation fabric? This is gold passing thread (not the same thread that covers the rose) wrapped around a thick, dark yellow string foundation. It is trimmed very carefully to fit the shape of the rose. It was not connected to any threads on the rose itself.
This looks like where a stem would be attached, right?
But the stem – well, we looked at it above. It’s Russian braid. It doesn’t have a deep yellow string foundation, hand stitched over with gold passing thread.
Let’s go look at the lily.
Oh my goodness! Look! The lily has the same thing. Completely unconnected to the other threads on the lily (in fact, it was under the base of the lily, which was stitched with rococco), padded with a deep yellow string, covered with a different gold wire thread, and trimmed very carefully to the shape of the lily so that it fits underneath and is not noticeable.
So, what does that tell us?
I think it’s a fairly good clue that these elements all came from a different vestment and were salvaged and put onto a new ground. These thick chunks are most likely the tips of the original stems.
So that’s the rose. Next up, we’ll check out some leaves, which are all pretty much done the same way, and then the wheat ears, which are interesting little things and can tell us much, and then finally, the Lamb in the center, which is rather complex.
Any questions or comments? Feel free to leave them below!
If you’d like to read the backstory on this project of Deconstructing Goldwork, check out the Deconstructing Goldwork Index, where you’ll find all the articles related to this listed chronologically.

