The whole idea of Stitch Fun is to explore some of the more obscures stitches or to explore more obscure – but fun! – ways of using common stitches.
Today’s Stitch Fun is a more obscure way of using a fairly well-known stitch, the Palestrina stitch.
Palestrina stitch is one of my all-time favorite embroidery stitches. It creates an interesting line with texture to it, thanks to the knots formed by the stitch. It’s also lots of fun to work. It’s got a great “stitch rhythm,” and once you get going with it, it works up quickly into a really attractive line.
If you haven’t added Palestrina stitch to your embroidery repertoire, I encourage you to try it out! For even more fun and more texture, you can even try beaded Palestrina stitch.
What we’re going to look at today is the notion of using a common stitch (Palestrina stitch) as a joining stitch. We’ll be joining two folded edges of linen together.
So imagine that you have embroidered two sides of anything – say, the front and back of an ornament, for example – on linen. Or maybe you’re joining the embroidered front of a needlebook with the inside lining. Whatever the case, you can use Palestrina stitch (and several other line stitches, but this one works particularly well) to create an interesting edge that holds the two pieces together securely.
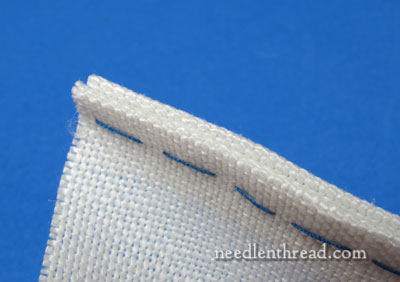
In the photo above, I have two pieces of linen, with hems turned in, basted together.
A “perle” thread – whether perle cotton, perle silk (like Soie Perlee), buttonhole silk, or any ropey, non-divisible thread – works well for this, although a good thickness of regular floss works well, too (all six strands works great!). I like the ropey, non-divisible threads because they increase the texture of the line and produce really nice-looking, tight knots.
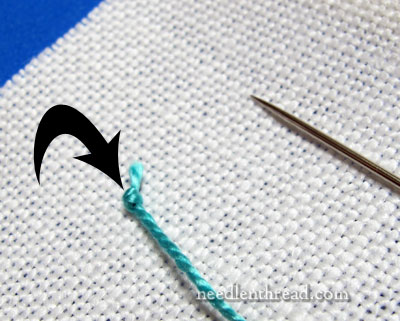
Knot the end of your embroidery thread, because you’ll be pulling that to the inside seam, where it will be hidden. Make your knot tight and small, and cut the tail after the knot relatively close to the knot, but not too close that the tail could slip through and undo the knot.
In finishing, I always find that knots are an asset, and they rarely hinder a good, smooth finish to whatever product you’re making. Normally, you’ve got some kind of padding or something between the pieces you’re sewing together, so the knot generally just sinks in and fits into the thickness of the whole thing.
If you’re wary of using a knot, you can always secure the thread by taking some tiny, invisible stitches inside the turned over parts of your fabric. I rarely bother doing that, unless the thing I’m finishing is very fine and has little or no substance to the “inside” of it. So if I’m afraid the knot will show up through the fabric, I’ll use tacking stitches inside the fabric turn-overs. Otherwise, I use a knot.
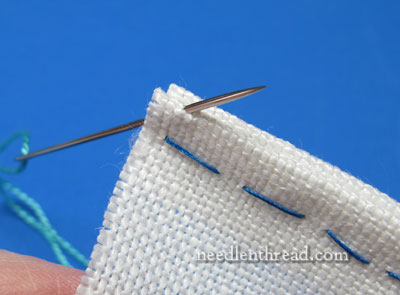
Working from left to right, begin by bringing your needle to the front of the front piece of fabric, just barely on the front side of the fold.
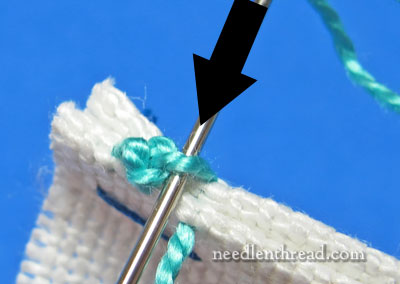
Cross over to the back piece of fabric, and insert your needle into the back and the front piece of fabric, picking up only the top of the folds of both, and keeping your needle perpendicular to the fabric, as shown in the photo above.
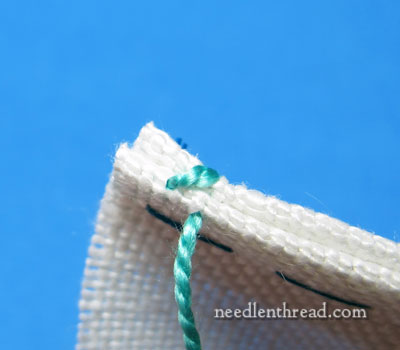
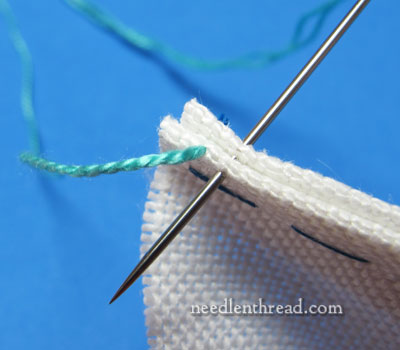
You’ll end up with a stitch that slants across both pieces of fabric, with your thread emerging on the front side of the front piece of fabric.
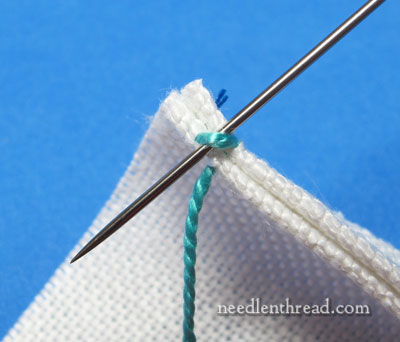
Now pass your needle underneath the slanted stitch from back to front, without picking up any fabric. Do not pass under the working thread (the loose thread still in your needle), but just under the stitch.
You’ll end up with a loop catching over the slanted stitch, and these two “arms” (like an inverted “v”) over both pieces of fabric.
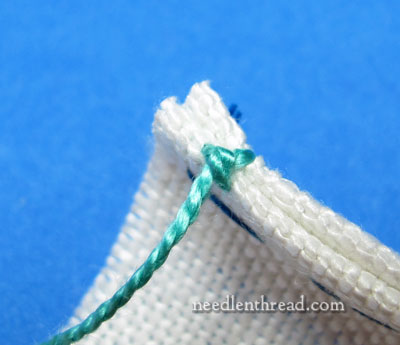
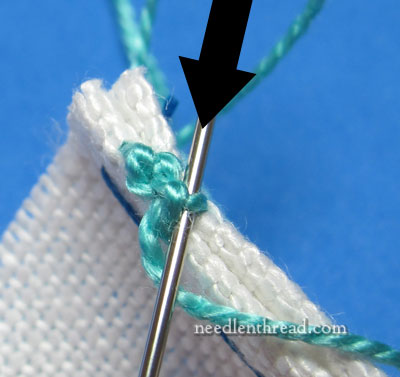
Now pass your needle underneath the slanted stitch again, so that it comes up between the two “arms”, and pass over the working thread. Don’t pick up any fabric.

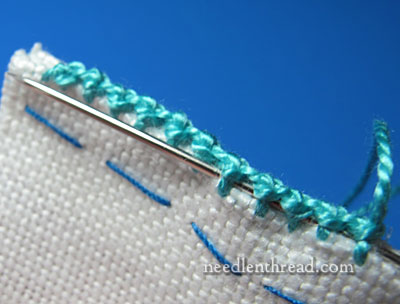
Pull through to tighten the knot, and then move forward for the next stitch, taking your needle from back to front through both folds of fabric, and keeping the needle perpendicular to the fabric folds.
Try to keep your stitches equally spaced, and make sure that, with this particular movement of the stitch, you’re picking up the same amount of fabric, so that the resulting “teeth” of the stitch on the front and back of your finished piece are even. You’ll see what I mean be “teeth” below!
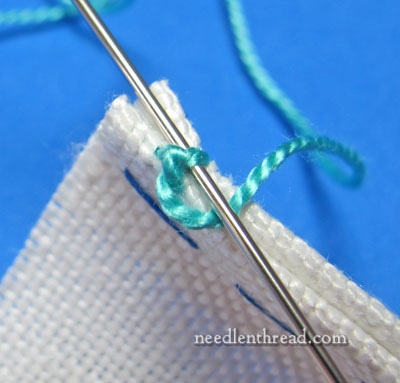
To continue with the stitch, pass the needle underneath the resulting slanted stitch, from back to front, just like before, without picking up any fabric or passing over the working thread.
Then pass under the slanted stitch again, coming out between the two “arms” and passing over the working thread, just as before, and then pull through so that the knot forms around the stitch.
Continue in this manner all the way down your seam!
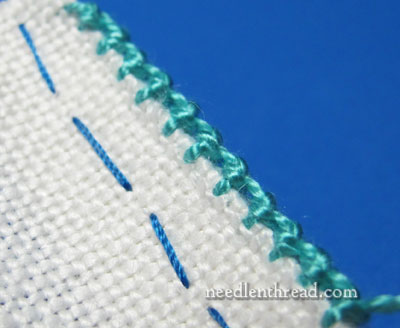
Here are the “teeth” of the stitch showing on the front of the linen. You can see why it is important to try to keep these stitches even, because they really show up if you’re using a contrasting color of thread.
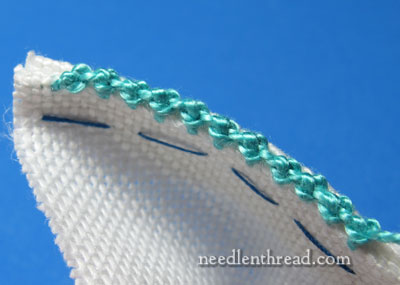
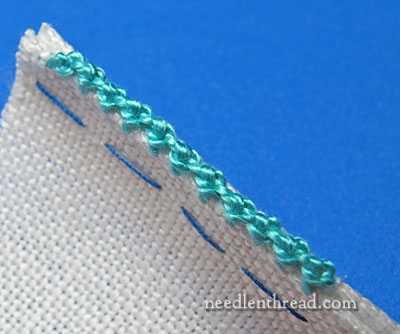
And here’s the Palestrina stitch edge along the top of the two pieces of linen. It forms a nice knotted line, perfect for a finished edge, while doing the important job of holding the two pieces of fabric firmly together.

To finish your thread, insert the needle into the fabric down inside the seams.
Pick up little bits of the inside seams of the fabric and emerge down your line between some of the stitches.
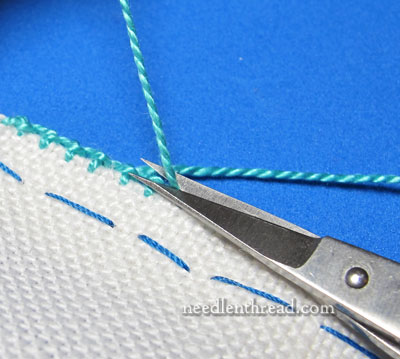
Pull the working thread and snip it close.
And there’s the seam with the finished thread – it’s hidden and secure.
You could dress the line up further by adding beads to the Palestrina stitch if you want to. Beads are always nice along an edge. If you’re using DMC’s perle cotton #5 (which is what I’m using here), make sure your beads are large and that they have a large enough hole for the thread to pass through. If you want to use smaller, more delicate beads, you’ll have to use a finer thread.
So, there’s a nice edge finishing technique for you, with a fun stitch. Try playing around with other stitches that might make nice edges, and you’ll probably find that there are many that will work for finishing the edges of your embroidered items!
Stitch Fun is a series of tutorials on Needle ‘n Thread that explores stitches, stitch combinations, and different ways to use stitches. You can find all the tutorials in this series listed in the Stitch Fun Index.

