Yesterday, we looked at the beginnings of a new embroidery project that I’ll be writing about here on Needle ‘n Thread over the next few… well, probably months rather than weeks! The project is called Mission Rose, and we’ll be working through it together intermittently, covering techniques and tips and mistakes and fixes and all that kind of stuff.
With the design for Mission Rose hammered out, and the ground fabric choices made and the fabrics prepped, it’s time to look at design transfer methods and framing up. I’ll also do my best to answer some questions that came in after yesterday’s article covering the start of the piece and ground fabric choices.
The topics of design transfer and framing up are open to interpretation. Keep in mind that this is just how I do these things. You might have a better way that works for you, and that’s just fine. In situations of embroidery design transfer, and in questions of embroidery frames, there’s no “only one right way,” so I’m sharing with you what I’m doing with this particular project, but feel free to pursue your own tack on these things, if it works better for you!
I decided to use a light box and a pencil for the initial embroidery design transfer, tracing the design onto the silk ground fabric.
The Silk Ground Fabric: More Info
This particular silk is not a slippery, drapey silk that slides away with the slightest provocation. It is a silk dupioni, a little thicker than some similar silks found on the US market in chain fabric stores. It has a definite crispness to it and good body.
So the silk is thickish, not thin. It has body and is crisp. It holds its shape when rumpled into a pile. It doesn’t slither. And there’s nothing at all “stretchy” about it, unless you’re pulling on the bias, and then there’s a little stretch, just as there is on any fabric.
Where can you find it? That’s a bit more difficult to say. Mine came straight from Japan, from (what I’m told) is a higher end fabric store. I’d check with locally owned fine fabric stores that carry higher end bridal fabrics and the like. You’ll probably find something similar in stores like these. Chain fabric stores like JoAnn’s and similar don’t often carry high quality silks. In any case, you’ll need a piece about 10″ x 14″, so even if it is expensive by the yard, it shouldn’t break the bank – you won’t need a whole yard!
I’m pretty sure I’ve said this before, and I’m pretty sure I’ll say it again: get the best fabric you can afford. Don’t skimp on quality with your ground fabric. Good ground fabric makes a huge difference in the outcome of a project. And if you’re going to spend oodles of hours of your valuable time on your project, then it is worth putting a little extra into your supplies, to assure you are working with good quality supplies.
The Design Transfer
So, considering that the silk isn’t the type to ooze away off the table while you’re working, tracing works well with it if you can get a light underneath it. I have a cheap little light box that I use for these things.
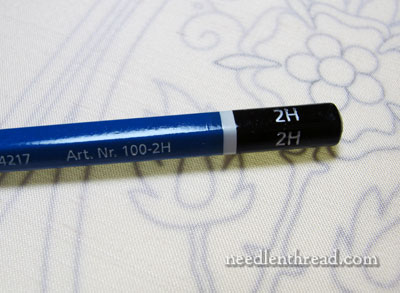
I used a 2H pencil for the initial tracing. The lead is hard, so the resulting line is very light.

I taped the printed design onto the light box, and then I taped the ground fabric over the design, making sure that I lined up the lines of the design so that they were “square” with the grain of the fabric. This is very easy to do with silk dupioni, because there’s a definite, visible linear-ness to the weave.
When tracing with a pencil like this, try not to sketch too much. Short strokes are fine, but short, hairy strokes that thicken up your lines should be avoided. You want to keep your lines as thin and crisp as possible.
The photo above shows the initial design transfer.
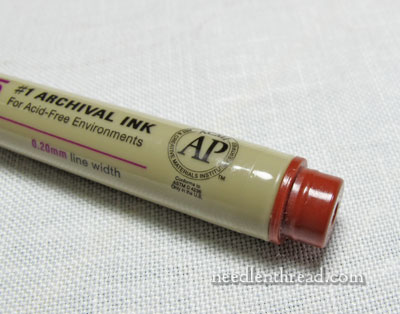
Now, the pencil design transfer would have been fine on its own, but I decided to trace over the pencil lines with a micron art pen.
I used a brown micron pen, with a .20mm tip. With the Sakura micron pens, this tip is their finest, and it is marked on the cap as size 005.
You might wonder – and rightly so – why I didn’t just trace with the pen to start with. I wasn’t really planning on using the pen at first, but I wanted to make sure that the design was quite visible, especially when taking photos, so that’s why I went over it with the pen. Also, I like to have a very sharp, darker line when I’m working on a long-term project. Pencil can sometimes smudge or fade away (though we are going to take some specific measures to avoid that, which we’ll talk about later).
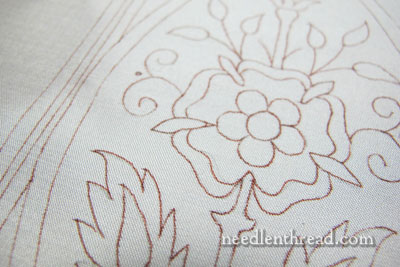
You can see that the lines are quite a bit darker! But they will all be covered, so there’s nothing to worry about. If this were whitework, I’d be worried!
A note on this pen with this project: these pens are not guaranteed to be colorfast on fabric, and I’ve heard that the brown will bleed if you wet the fabric. Since this is not the type of project that will be washed, this doesn’t cause me too much concern. If you have concerns about the pen running – if you think your project could somehow get wet – don’t use the brown. Just use a pencil.
That being said, I’ve never had a problem using the sepia or black micron pens, even on projects that I damp stretch.
The Embroidery Frame
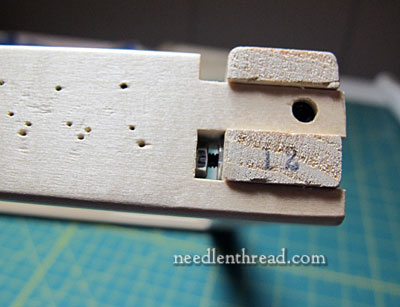
For the frame, I’m using a set of Evertite Stretcher Bars, 10″ x 12″ (my fabric is actually 12″ x 14″).
I like these stretcher bars because they are adjustable, even after you’ve mounted the fabric on the frame. I’ve used them before with silk, and they’ve worked well.
Other possible choices for good frames that would work well with this project include smaller Millenium frames and smaller slate frames.
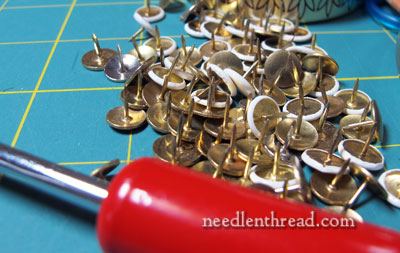
Incidentally, shops that sell stretcher bar frames often sell specific tacks to use with the stretcher bars. While I think these E-Z Tack-It Tools are absolutely wonderful when using stretcher bars, I really can’t see spending money on specialty tacks. I buy inexpensive brass thumbtacks from the hardware store, getting more than twice as many for less than half the price. They work just as well. In fact, I think they work better than the tacks sold for stretcher bars – the shaft isn’t as thick and the tacks seem to pass into the wood more easily.
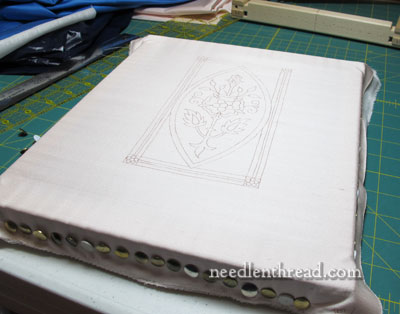
I stretched both the linen backing fabric and the silk ground fabric onto the frame at the same time. If you aren’t used to doing this, it can take some work – you might have to untack and re-tack to get it just right. You want the linen and the silk to be equally taut on the frame, so that there’s no puckering of either. In the photo above, the piece is framed up and ready to go.
You’ll notice that I center the piece right to left, but that I put the top edge of the piece closer to the top of the frame. This gives me a little more room at the base of the design to test threads and stitches if I need to, outside the design area.
With the piece framed up, you might be tempted to think it’s ready for stitching, but it’s not – so next time, we’ll cover one more step in preparing this piece for the actual embroidery.
Then we’ll talk about thread colors and choices!
Coming Up Later This Week on Needle ‘n Thread
Tomorrow, I really, really want to show you a beautiful little stitch combination that you might find handy for your embroidery projects.
Later in the week, for those of you who have difficulty seeing detail when working fine embroidery, we’ll look at a product that will help you out. It’s a special tool that I’m very excited about. I hear from many folks who say they can’t do detailed needlework anymore because they can’t see well enough. Having lived with eyesight problems all my life, I’m pretty thrilled to find a real solution to this difficulty!
See you tomorrow!

