I love chain stitch! It is So Very Versatile. From using it as a line stitch or as a filling stitch, to whipping the chain stitch and lacing it, to working buttonhole stitch across rows of it… there’s just a lot you can do with chain stitch.
When stitches work together in happy combinations, they make me happy! And this stitch combination – chain stitch + buttonhole stitch – works particularly well together, to make a sweet little scalloped edge.
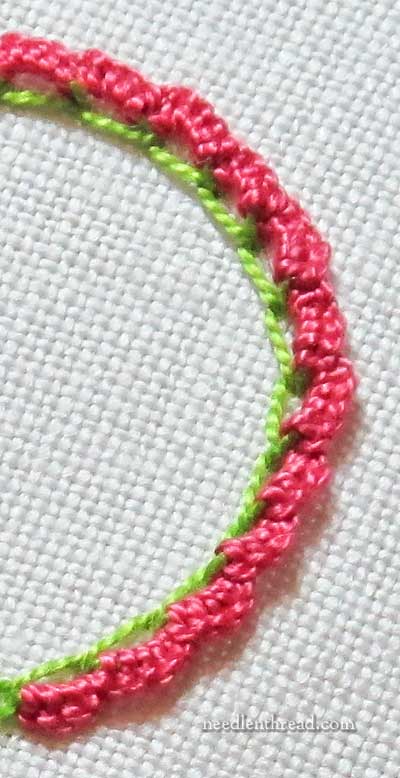
The scalloped buttoholed chain stitch is easy to work, it works up quickly, it takes gentle outward curves well, and it’s a great way to add a little dimension to borders, edges, and so forth.
Let’s see how it’s done!
The Chain Stitch Foundation
First thing’s first: embroider a line of chain stitch for the foundation of the scallops. A chain stitch circle works well for this, too, if you don’t want to practice on a straight line.
In this tutorial, I’m using DMC perle cotton #5, but you can use regular floss, too – two or three strands of regular DMC floss works brilliantly with this! You can also use silk or wool to good effect, and you can use other cottons like floche or coton a broder, too. The finer the thread you use, the smaller and finer your scallops can be.
With the perle cotton, because the thread is fairly thick, my chain stitch foundation is made of stitches that are approximately 1/4″ long. That’s a long chain stitch in surface embroidery. If you’re using a finer thread – like 2 strands of floss, or a strand of floche or coton a broder, your chain stitches can be anywhere from 1/8″ – 3/16″ in length. You can go as long as 1/4″, but with finer threads, the resulting scallop gets a little floppy.
The Buttonhole Scallops
Once your foundation line of chain stitch is embroidered, thread a tapestry needle with a new thread. This new thread can be the same color, a different shade of the same color, or a contrasting color, depending on the look you want. To make sure the demonstration here is visible, I used a bright green for the chain stitch and a bright pink for the buttonhole scallops.

It’s important to use a tapestry needle because the blunt tip won’t catch on or pierce through your foundation stitches.
Bring the needle up at the beginning of the line of chain stitches, right where the first chain stitch began.
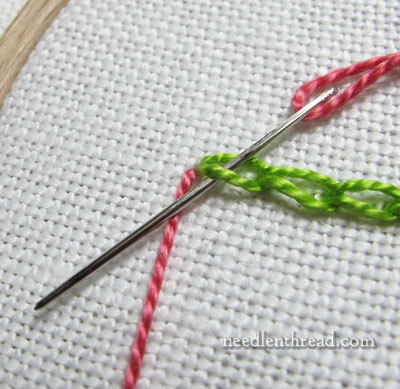
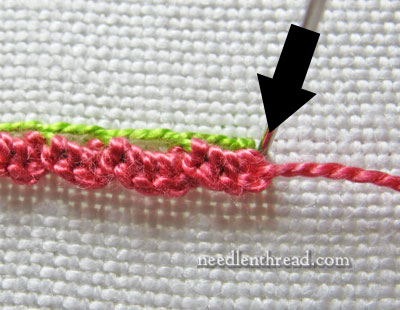
Take your needle into the middle of the first chain stitch from above, passing out underneath the lower half of the chain stitch, as shown in the photo above.
Make sure that your needle comes out over the working thread, so that you’re stitching a buttonhole stitch over the thread that makes up the lower half of the chain stitch.
Pull your needle through and tighten up the buttonhole stitch. Continue to work buttonhole stitches until you’ve covered the whole thread that makes up the lower half of the first chain stitch.
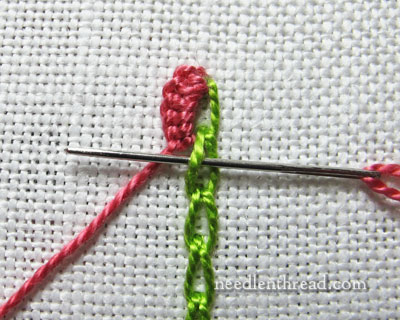
I think it’s faster to work down the chain stitch line, so I turned my work in this direction to work down the line.
Once you’ve filled the first chain stitch, just keep going with the buttonholes, moving into the next chain stitch. On the first buttonhole on the second chain stitch, pull the buttonhole stitch snugly, so that you get a clear “dip” forming the scallops.
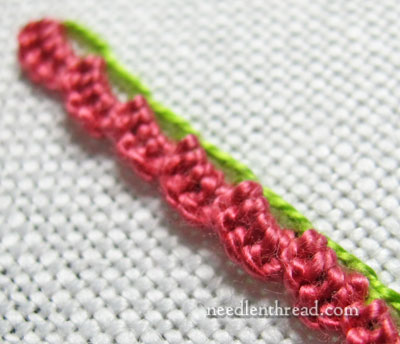
If you’ve stitched equal length chain stitches (and ideally, you have), then you should be able to fit the same number of buttonhole stitches on each chain stitch half. So, in this sample, I’m filling each chain stitch half with five or six buttonhole stitches.
You want the buttonhole stitches close, but not packed in so tightly that they ripple.
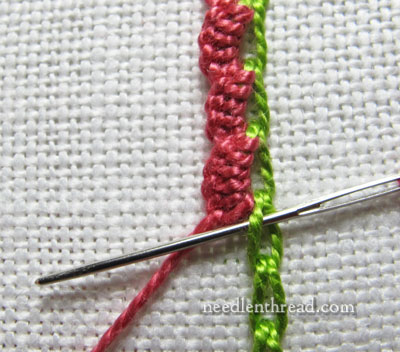
Keep working down the line, filling each half a chain stitch!
When you get to the end of your line, after the last buttonhole stitch, take your needle to the back of the fabric in the same place that your chain stitch line ends.
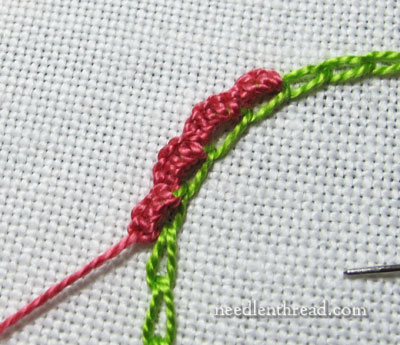
You can work the scalloped buttonholed chain stitch on gentle curves – and even fairly tight curves – as long as you’re working on the outside of the curve. If the curve is gentle enough, you can also work the inside of the curve, but on tighter curves, the inside curve gets a bit too crowded and the scallops may buckle and ripple.
Imagine all the fun things you can do with this stitch combination! If you’re a crazy quilter, it would make a nice seam treatment. If you like embroidering Sunbonnet Sues and parasol ladies and similar designs, this would make a great little “ruffle” on the hem of a dress. You can add this to Brazilian embroidery, working up ruffly stems and branches. You can edge finished objects like fobs, ornaments, needlebooks, scissor keeps and the like with it. Lots and lots of possibilities!
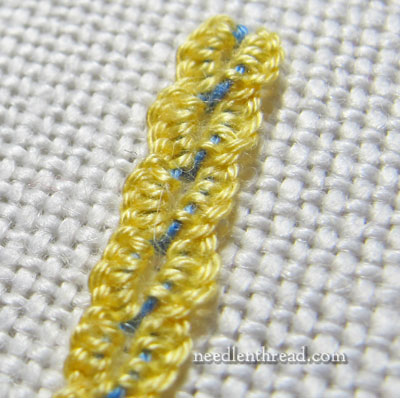
Here, I’ve worked the technique rather loosely, using a blue and yellow floche. If you buttonhole both sides of the chain stitch, you’ll end up with a mirrored scallop effect!
Then, of course, there’s the option of a bead in the middle of each chain stitch – or a big, fat French knot. There are lots of ways you could further embellish the line – it’s just a matter of playing with the stitch to see where it leads you.
Wherever you happen to go with it, have fun!
Stitch Fun is a series of stitch tutorials here on Needle ‘n Thread. If you’d like to catch up on the rest of the tutorials in the series, feel free to visit the Stitch Fun Index, where you’ll find then all listed for your convenience.
