Oh, goodie gumdrops!! I’ve been waiting all week to write this article for you!
All the preliminary work that goes into setting up an embroidery project for stitching is certainly necessary, but it’s not exactly Thrillsville, if you know what I mean.
I’ve learned to like the set-up process, but it is ever eclipsed by the anticipation of those first stitches.
Often, for me, the first bit of stitching tells me if the project is going to click. Will I like it? Will the colors work? Is the fabric right? Normally, these questions are answered with the first foray into stitching.
On the Mission Rose project, I decided to start with the large leaves on the rose. Perhaps it would have made more sense to begin with the stem, since, perspective-wise, it is the element in the design that is farthest back or underneath everything else. But I wanted to work the leaves first because I wasn’t quite sure about my choices of greens. Working a leaf would settle any doubts.
Were my doubts settled? Well, let’s work through the leaf and see!
I’m starting with the lightest green Soie de Paris silk (2211). For a needle, I’m using a #10 crewel needle from Wendy Schoen Designs. I love her needles! They’re good quality English needles and they’re available as small as size 12. It’s hard to find good embroidery needles in size 12!
Ok, back to the stitching. The outside of the leaf around the teardrop shaped center will be worked in long and short stitch. If you’re not familiar with long and short stitch shading, you might check out my long and short stitch lessons, especially this article on shading a leaf similar in shape to this one.
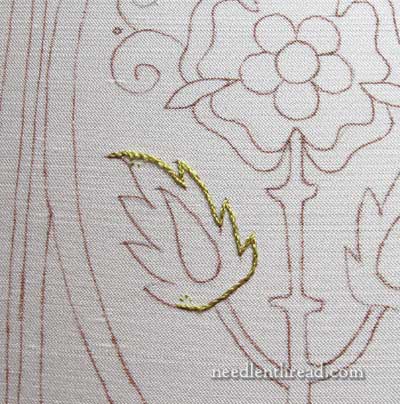
To begin, around the perimeter of the leaf I worked the split stitch, just on the very inside edge of the design line.
For the outline, I prefer split stitch to split backstitch or regular backstitch. That is, I prefer coming up into the stitch to split it, rather than going down into the stitch to split it, or just using regular backstitch.
Why do I prefer regular split stitch? Two reasons: 1. As you can see in this article comparing split stitch to split backstitch – there’s significantly less thread build up on the back of the work with regular split stitch. 2. As opposed to backstitch, which creates a “bumpy” line, split stitch creates a smooth-topped line – as you can see in the photos in this article comparing split stitch to backstitch.
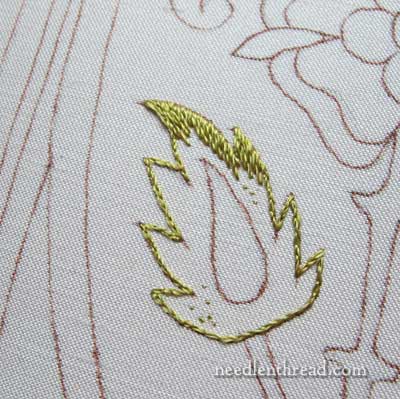
Once the outline is complete, the next step is to work the first layer of long and short stitch, from the outside of the leaf towards the inside, using the lightest green.
My desire is that the inside of the leaf, around that tear-drop shape, will be dark, because there will be a gold thread outlining that shape, and I want the contrast between the gold and the dark green.
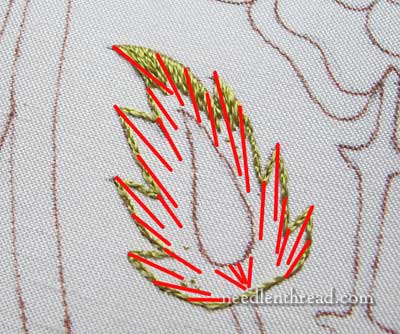
The red lines above indicate the general direction of the long and short stitch. When working something like a leaf, it’s normal to work towards the “growth point” where the leaf emerges from the stem. Thanks to the interruption of the teardrop in the middle, there’s a little section in the lower center, right above the stem area, where I’ll have to sneak in some stitches.

Here’s the first layer of long and short stitch, almost finished.
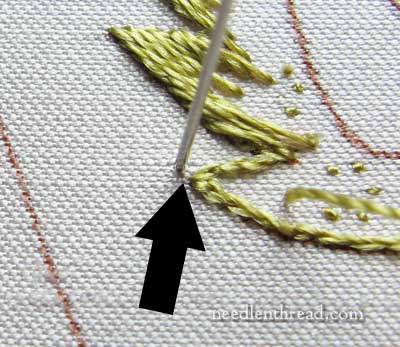
To make sure that the tips on the leaf come out nice and sharp, here’s a little tip for you:
Take your stitch down into the fabric from the inside of the leaf, over the split stitched outline tip, and slightly beyond it. The arrow in the photo above points to the small gap between the outline and where I’m taking the needle down.
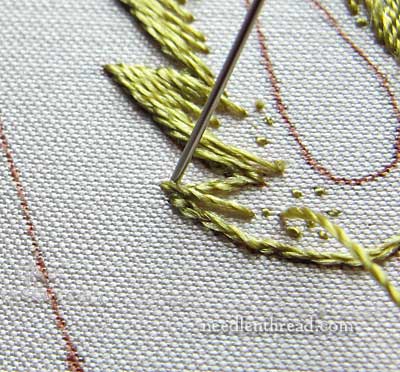
Now, with your stitches just to the right and left of that long center stitch, bring the end of the stitch just over the outline and snug up close to the long center stitch, almost tucking it just under the edge of that stitch. This will give you a nice tip on the leaves, and keep them from “rounding out” around the outline.
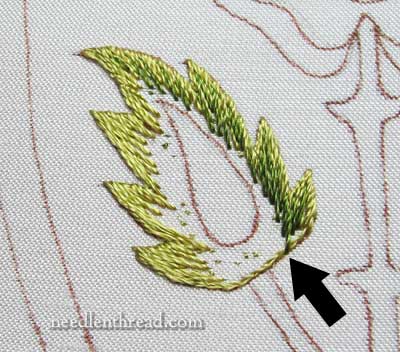
Now, it’s time to work the second shade of green. There’s not a whole lot of room in this leaf shape for many shades of green, so I’m only using three shades of green on the large leaves (out of the four selected for the project). This middle shade is 2125.
The arrow in the photo above points to where this second layer of stitches begins to extend down over the outline on the base of the leaf.
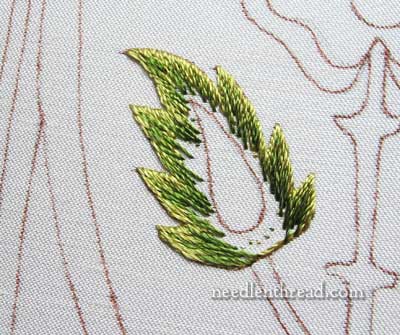
Here’s the middle shade of green (the second layer of long and short stitch), finished.
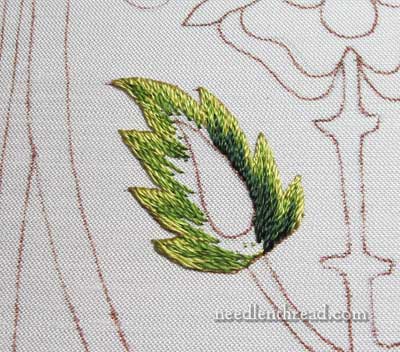
And finally, the darkest green. This is what I wanted – a real contrast, with a nice, deep green center.
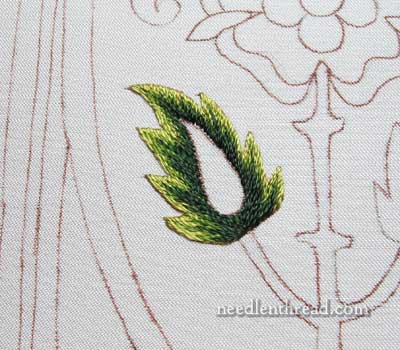
And here’s the completed silk embroidery on the outside of the first leaf.
Did it click? It did. I like this leaf so far. And I’m chomping at the bit, ready to move on!
The next step will be the second large leaf, and from there, the small inset leaves on the rose, and then the small leaves at the top of the design. I’m getting all the leaves out of the way first! Then, the stem, followed by the rose and the bud. Then the appliqué fabric on the outer corners, followed by all the goldwork.
Any questions? Comments? Suggestions? Feel free to have your say below!
If you’d like to read the backstory on the Mission Rose project and follow it along step-by-step as it develops, please visit the Mission Rose Project Index, where you’ll find all the articles relating to this project listed in chronological order.
