Today’s Stitch Fun episode is in answer to a request from a reader, who wanted some further explanation on a stitch combination found in Mary Elizabeth Wilkinson’s book, Embroidery Stitches, which is available for free download on Internet Archives.
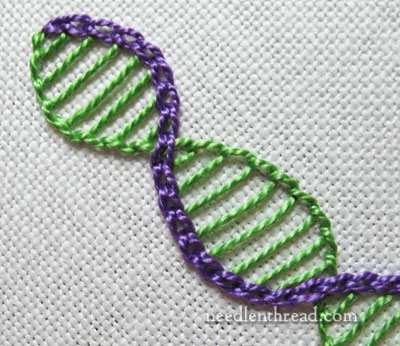
The combination involves buttonhole stitch and chain stitch worked in opposing waves so that the result looks very much like a double helix.

I’ve worked the sample here in two colors so that it’s easier to see the contrast in the two stitches. The result here is a bit chunky, since it’s worked with #5 perle cotton, but you could definitely work the combination with lighter threads for a lacy effect, and with the same color threads so that the contrast between the two edges relies more on texture than on color.
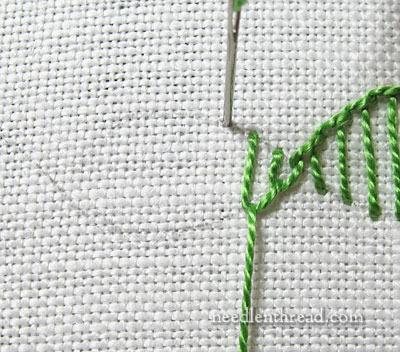
I began by drawing opposing waves on my fabric, which look essentially like this:
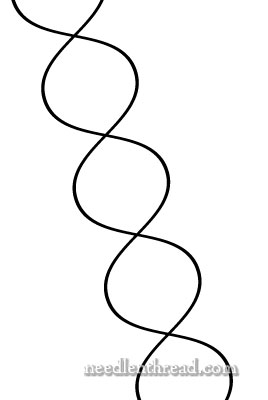
…except that mine weren’t quite as neat or quite as even!
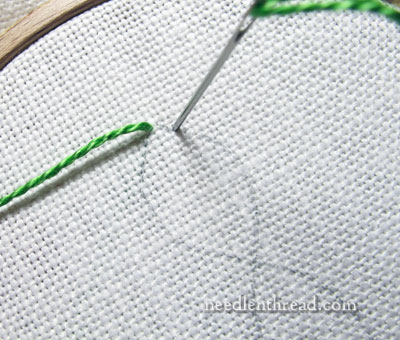
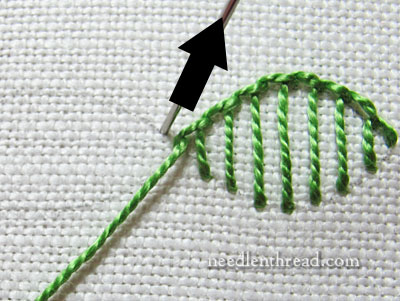
I brought my needle up in the fabric at the topmost intersection of the waves, and took the needle down into the fabric as far away as I wanted my buttonhole stitches spaced, in the top (or right in the photo) line.
When working the buttonhole stitch, the stitch always begins on the line on which you want the “rope” to form, and the needle always comes up in that line (where the rope forms). It always goes down into the fabric where you want the end of the “spokes” of the buttonhole stitches to be.
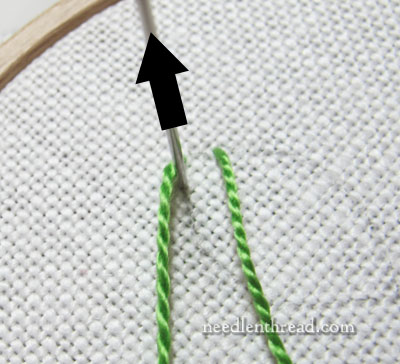
Next step, bring the needle up on the lower line, where the rope is supposed to form, keeping the working thread below the needle. This is just the regular method of making regular buttonhole stitch.
Remember, the needle comes up on the line where the rope is forming, and it always comes up above the working thread.
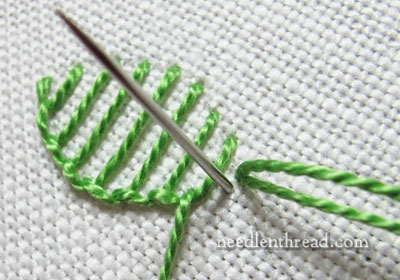
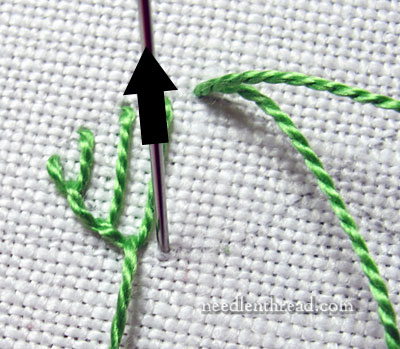
As you move in towards the next intersection on the waved lines, the last buttonhole stitch will be quite short.
Once that last stitch is taken to fill the first wave area, it’s helpful to turn the hoop so that line where the “rope” of the buttonhole stitch is going to form is the lower of the two lines.
When you’ve passed the intersection, with your hoop turned so that the rope line is the lower line on the waved lines, begin the buttonhole stitch again, to fill up the next section.
You can turn your work in whatever direction is most comfortable for you when working the buttonhole stitch. If you stab the stitch rather than sew it (that is, taking your needle and thread all the way to the back of the fabric and then bringing them all the way to the front of the fabric, rather than “scooping” the fabric), it won’t matter too much.
Once that section is filled, turn the hoop again so that the “rope” line ends up the lower of the two lines and continue filling with buttonhole stitch.
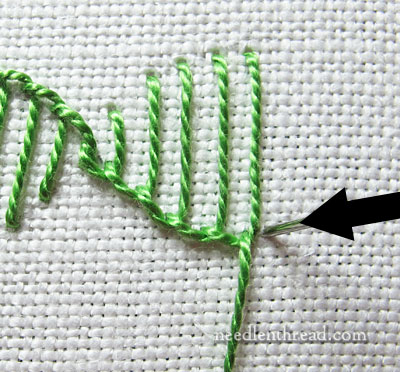
When you get to your last buttonhole stitch, anchor it by taking a little stitch over the last buttonhole stitch.
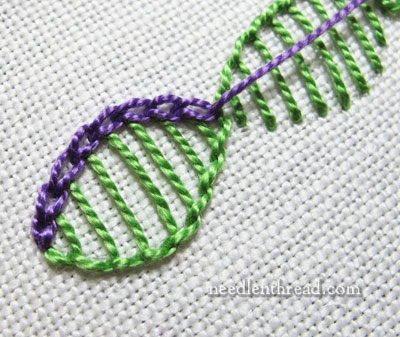
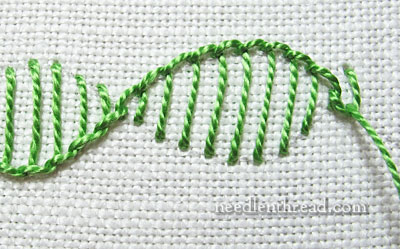
And now, it’s just a matter of working the chain stitch along the opposing wave formed by the “spokes” of the buttonhole stitch.
Stitch right over each intersection as you come to it.
And that’s it! You can vary the shape of the waves, vary the threads and colors, combine thread types, work with the same thread and colors, change the spacing on the buttonhole stitches – lots of ways to work some variety into the stitch combination.
And the whole time, you’ll have visions of biology class floating in your head!
Stitch Fun is a series of embroidery stitch tutorials here on Needle ‘n Thread, where we explore various less-common stitches or fun stitch combinations – just for the fun of it! If you’d like to peruse the other tutorials in the series, you’ll find a whole slew of them listed under the Stitch Fun Index in the Tips & Techniques section. If you’ve come across any stitch combinations or obscure or difficult stitches that you’d like to see worked out in this series, feel free to drop me a line with a photo or diagram with any questions you might have!

