Do you love the look and idea of stitching with fine silk threads, but are intimidated by working with them? Are you frustrated when you work with certain silk threads and wonder why the heck anyone would stitch with the stuff?
Today, I want to chat about silk embroidery thread, and specifically about filament silk embroidery threads, and even more specifically about Soie de Paris. Hopefully, through a discussion about these silk embroidery threads, we can allay frustrations and overcome Silk Thread Fear.

Soie de Paris is a filament silk. It’s important to know this, because, as a filament silk, it is not going to handle the same way that other threads and even other silk threads – specifically, spun silks – handle.
The Difference between Spun Silk & Filament Silk
Filament silk is reeled right off the silk cocoon, in very long, fine strands of very strong silk. Spun silk is made from silk cocoon leftovers and is spun much like other natural threads (cotton, wool).
Spun silk (Au Ver a Soie’s Soie d’Alger, Caron Waterlilies, Needlepoint Inc., Belle Soie , Rainbow Gallery’s Splendor, Kreinik’s Silk Mori, most of the “over-dyed” stranded silks on the market, and so forth) handle a lot like regular stranded cotton. They have a higher sheen than cotton – a beautiful, soft, glowing sheen – and it is a natural sheen, not chemically induced through mercerization. Good spun silk threads are soft threads that cover well and, depending on the brand, are usually quite beautiful and pleasant to stitch with. (Quality varies between brands!)
Filament silk (Au Ver a Soie’s Soie de Paris, Soie Perlee, Soie Ovale, Soie Gobelins, Soie 100/3; Trebizond; Japanese silk; Pearsall’s Gossamer silk; Piper’s embroidery silk; Chinese silks and others) have a very high sheen. They are also very strong. They are often more finicky to work with because they tend to snag on rough fingers (or anything else they can find to snag on), and they also have a certain “boing” to them – a kind of propensity to curl a bit, a predisposition towards static, and so forth. They need to be controlled.
If you’ve taken up stitching with Soie de Paris (or really any filament silk), once you understand that there is a difference between filament silk and most other threads you’ve stitched with, then you know that you have to treat the silk a little differently. You can’t treat it the same way you treat cotton floss, wool, or even spun silk.
So let’s look at some ways to treat filament silk differently, to improve the overall stitching experience.
Organization of Threads
The first consideration in treating filament silk differently is organization. By organization, I mean the way you organize yourself and your supplies while stitching.
When stitching with cotton floss, especially if sitting in an armchair or on a sofa, it’s pretty easy to drape the thread over the arms of the chair or the sofa. The threads may overlap, they might get stacked on each other, and they might even end up in a bit of a discombobulated mess. But it’s pretty easy to straighten out cotton floss in situations like this.
It’s also easy to fix pre-cut cotton floss or wool thread or spun silk on various types of thread organizers, like these thread drops, or homemade thread cards.
With filament silk, the above situations aren’t really an option. The silk will cling to furniture, it will tangle easily, and untangling it – especially with hands that are even slightly rough – can be a real pill.

Enter the work tray.
Or, in my case, the box lid. I use box lids for work trays. In the tray, I keep the things I’m using on the project that I’m stitching, including thread, scissors, needles, and for the Mission Rose project, a pair of tweezers!
Next to my work tray, I have an orts jar. Orts are the little leftover bits of thread. Getting into the habit of putting these bits into a pre-determined receptacle (rather than dropping thread cuttings onto the work tray where they can get tangled up with usable threads) will go a long way to keeping the work space organized and embroidery threads under control.

Soie de Paris is put up on spools. And I am ever-so-grateful for the fact! All the spools I’m using are in the tray.
Any threads that have been cut from the spool but haven’t been used yet are laid out neatly in the tray. While I’m working on this one project, I will keep all my cut threads lying in this tray, so that I can use them up without cutting new thread from the spools. As long as they aren’t heaped together in a bunch – as long as I straighten out the strand after separating a single thread from it – and as long as the tray is kept neat, the threads will be easy to access and they won’t get tangled.

If, however, I want to put loose, cut threads away again, I use the spool to hold them. Each end of the spool has a little base that separates slightly from the rest of the spool, opening up a small space where the end of the thread can be wrapped…

…and then the base is snapped closed to hold the thread.
I wind the excess around the spool…

…and then insert the end of the excess thread into the space on the opposite end of the spool and snap the end closed. This holds my excess thread without having to put it into a plastic bag, where it could get tangled or where it will often contract a case of Static Cling.
The spool, then, is handy for organizing left over cut thread. You’ll never have to guess the color number of the thread, you’ll have a better idea of exactly how much thread you still have, and the thread itself won’t become tangled in a bag or staticky.

Keeping the work tray clean and dust-free between stitching sessions is also a consideration. I like to cover my work tray, and when I’m using a box lid, the easiest cover is the rest of the box, upside-down on top of the tray. It works perfectly. My supplies remain neat and clean and undisturbed until the next session.
You can adapt these methods of thread organization to any filament silks, especially ones that come on spools (Soie de Paris, Japanese silk, Pearsall’s, Pipers silk, etc.). But silks that come in skeins or hanks (Chinese silks, for example) require a little more care. It’s helpful to tie a thread around one end of the loop of the silk hank, to keep it from falling apart into a heap.
Stitching Techniques
Besides keeping the threads neat and organized, filament silk may require a slightly different stitching technique.
When using filament silk, my stitching technique changes slightly. After stitching for a while and thinking about it, I’m going to try to describe how I stitch when using filament silks.
I’m sure most stitchers have their own stitching mannerisms, and if you already have a method that works, then don’t worry about this! But I do encourage you to be aware of the way you stitch while using filament silks and try making little adjustments that will help the silk behave the way you want it to.

One thing I definitely do differently when stitching with filament silk is this: when I pull the needle through on the back of the fabric, I grip just the needle between my forefinger and thumb, and I touch the eye of the needle with my middle finger as soon as it comes through the fabric.
That little touch at the eye of the needle just as the needle passes through the fabric keeps the thread in the eye of the needle. I don’t hold onto the thread at all, except right at the eye, where it rests against my middle finger.
When I put the needle into the fabric from the front to take a stitch, I hold the needle right at the eye, between my forefinger and thumb, and stick it into the fabric at a 90-degree angle to the fabric (straight in). The eye of the needle is between my finger and thumb, and the needle sticks out straight in front of my finger and thumb.
This method of holding the needle works for me. My fingers barely come in contact with the silk, except a tiny bit right at the very eye of the needle. This minimizes the silk’s snagging on any rough spots, and it keeps the stitches flowing smoothly.
Speed of Stitching
Consider, too, your speed of stitching. While you may be used to flying along when working with cotton or wool, if you’re experiencing frustration with filament silk, try slowing down a bit, at least until you get a really good feel for how the thread works.
Your Needle Matters! & Other Tools
The size of the needle is another consideration when using filament silk. With Soie de Paris, you might be tempted to think that, since it is a relatively fine thread, you should use the tiniest needle in your collection.
On the contrary! While Soie de Paris will fit in a #10 crewel needle, it works much better with a #9 or even a #8. If your needle is too small, the fabric won’t open up enough to take the thread comfortably, making it much more difficult to pull the thread through smoothly. And when the thread doesn’t pull through smoothly, knots happen. And in removing knots, we come into more contact with the thread, increasing the risk of snagging.
So, if you’re having trouble working with Soie de Paris or another filament silk floss, try a slightly larger needle. It might make all the difference!
And if the thread slips out of the eye too easily, see the above on touching the eye of the needle against your finger as soon as the needle passes through the fabric.
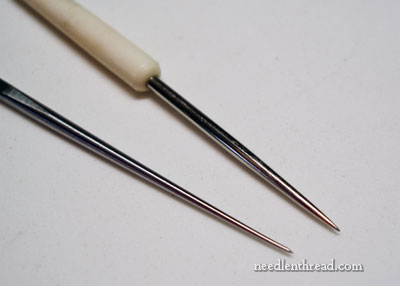
Another tool that can help you control filament silks is a laying tool. A laying tool is used to help place threads neatly on the fabric when you take a stitch, especially when using more than one thread in the needle at a time. Here’s a video on how to use a laying tool, in case you’re unsure of how they work.
If you don’t have a laying tool, they’re available at most fine needlework shops. This is my favorite laying tool.
That being said, I don’t use a laying tool if I’m working with one strand of Soie de Paris – but if you think it will help you, definitely try it!
Rough Skin & Snagging
Perhaps one of the most common complaints about working with filament silk is that it snags on even barely rough skin. When you’re gearing up to work on a project that involves filament silk, it helps to take some extra care of your hands.

I use a sugar scrub made from olive oil and sugar twice a day when I’m especially concerned about rough skin. It really does work and it makes a huge difference when it comes to minimizing snagging the silk on rough hands.
Attitude
Finally, the last point – attitude.
You know how they say horses can sense fear and tend to be jittery with a fearful, unconfident rider? Well, I’m convinced that the same can be said for silk!
Filament silk is a super duper strong thread. If you treat it like it is the most delicate stuff in the world and you are nervous and jittery about handling it, your stitching experience will undoubtedly be less than pleasant. Don’t fear the thread. Work with it, and make it do what you want it to do. You’re not going to break it (in most normal circumstances).
Your Turn!
Over to you, now! Do you have any tips for working with filament silks, or specifically with Soie de Paris, that can help other stitchers get comfortable with the thread? Feel free to share them below!
I hope these tips help you a little bit if you’re struggling with threads made from filament silk!

