Just a brief update on the Mission Rose embroidery project – enough of an update to change perspectives on proportions.
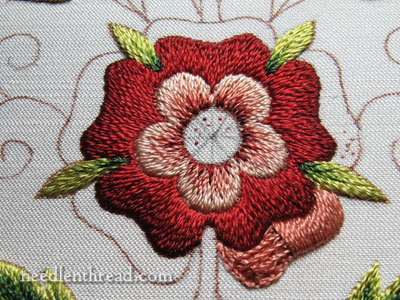
See, the embroidery on the rose so far has been a little deceptive. The long & short stitch shaded center and inner petals, now that they’re finished, give the rose a rather compact look. The central flower that’s supposed to be the focal point seems like it’s rather small and lost in the middle of those big leaves down below and that the looming bud above.
But now that the outer petal “turn overs” are underway, the perspective changes a bit. For example, the lower shaded leaves seemed to dwarf the rose before, but now, we can see that they won’t look quite as large when the whole rose is complete.
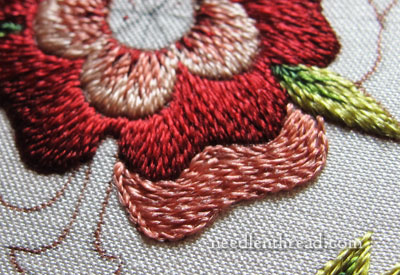
The outer “turn overs” on the petals are just about as wide as the shaded red petals worked previously.
In the photo above, I’ve completed the first layer of padding for this area. This part of the rose isn’t going to be shaded – the turn-overs are satin stitched. The height I can achieve with padding will help to add some shadow to the satin stitch to give it a sense of shading.
This is the same approach I took to the small leaves above the rose which are also worked in padded satin stitch, and I think a repeat of the technique on the rose helps tie things together.
So, this first layer is simply a split stitch outline worked just on the inside edge of the design line, and then, inside the outlined area, longer split stitches are worked to fill the shape.
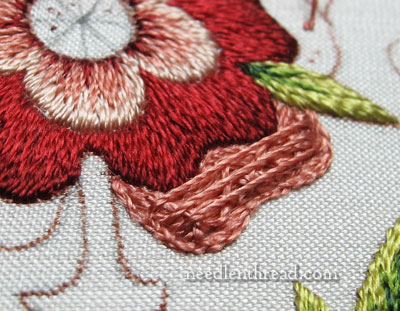
After finishing the split stitch layer of filling, I whipped over the split stitch with another thread, to give some “lift” the center of the area. I didn’t pick up any fabric or pass through the fabric while doing this, but rather worked a kind of figure-8 whip stitch over the whole area. Finally, I worked a few long straight stitches across the area to kind of even everything out and add even a tad more lift.
And then the satin stitch is worked over all the layers.
Right now the rose looks unbalanced, to say the least. But you can definitely see that this padded satin stitching is going to enlarge the whole flower quite a bit.
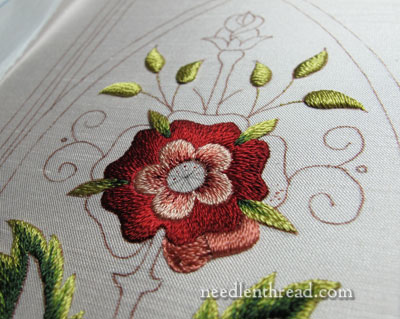
It even starts to put things into perspective with that looming bud up there. The bud’s large, yes – but it won’t look quite as large once the whole rose is complete.
So, that’s where I’m going next – finishing the satin stitch around the outside of the rose.
Questions, comments, suggestions? Feel free to have your say below!
If you’d like to read the backstory and follow along with the Mission Rose project, feel free to check out the Mission Rose Project Index, where you’ll find all the articles relating to this project listed in chronological order.

