The Turk’s Head Knot is often seen in knot-making and other cord and rope techniques, but it’s also an embroidery stitch.
As an embroidery stitch, the Turk’s Head Knot creates an intertwined knot that sits up, plump and round, on the fabric. It can be used in place of French knots and colonial knots for a little more texture. Like the French knot and colonial knot, it can be used singly, as an isolated stitch, or it can be grouped together in clusters or used as highly textured filling.
The thing is, it’s a tricky stitch. It’s definitely knot the easiest knot in the book!
The reason I’m doing this particular stitch tutorial is because I received an e-mail from a reader begging me to do a tutorial for the Turk’s Head Knot. This is what she said:
Mary, can you PLEASE help me with the turk’s head knot stitch? I’m working through some of the stitches in Mary Webb’s Embroidery Stitches book, but I can’t believe how incomplete so many of the instructions are! Are you familiar with that book? I bought it because people talked about it but the instructions are really vague. Maybe the turk’s head would fit in your stitch fun blogs? Even though it hasn’t been very much fun so far!
If you’re not familiar with Embroidery Stitches by Mary Webb, you can find the page dedicated to Turk’s Head Knot viewable on Google Books. Take a look at it, and you’ll see what she means by vague.
I checked my copy of the print version, and it is the same. The photo is what makes it vague. The loop formation is not clear in the photo, but the text assumes that it is.
So I promised I would work up some instructions, and here they are! This is a nice looking stitch, but whether or not it is worth the trouble, I’ll let you decide.
So, let’s start!
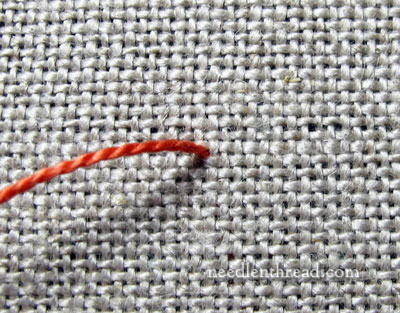
Begin by bringing your needle and thread to the front of the fabric.
For this tutorial, I’m using Montrose 1750 linen (a medium-to-heavy weight natural linen), DMC perle cotton #5, and a chenille needle.
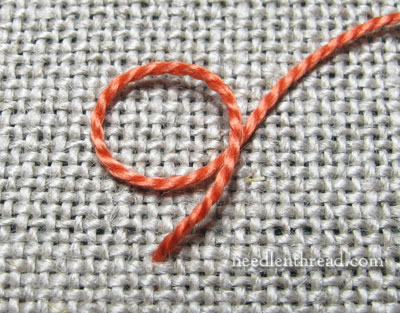
Twist the working thread into a loop on the fabric, as shown above. Notice that, when the loop turns back towards the thread, it passes under the thread, not over the thread.

The easiest way to make the second loop is to pass the needle under the working thread as shown above, without picking up any fabric.
Hold your finger on top of the first loop while you pull the needle under the thread, and only pull enough to form a second loop.
Your thread configuration will end up looking more or less like this:
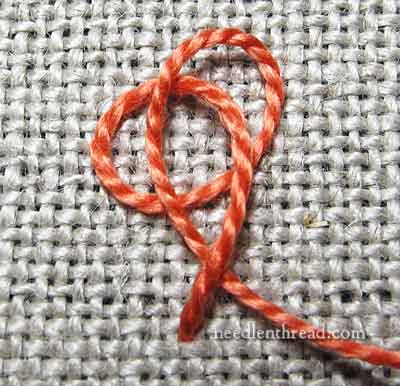
It’s easier if you keep the configuration open like this, so you can really see the threads passing over and under each other.
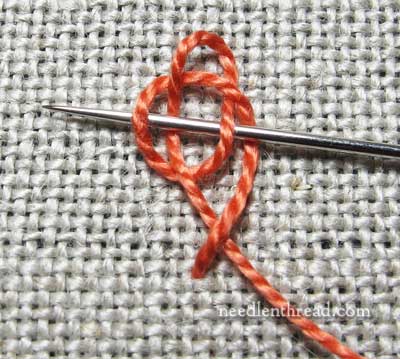
Now, pass the needle over the outermost lower loop thread, which is the first portion of the loop formed at the very beginning of the stitch, where the thread emerges from the fabric. Then pass under the next thread going into the center of the configuration, then over the next thread passing out of the center, and under the outermost loop of thread.
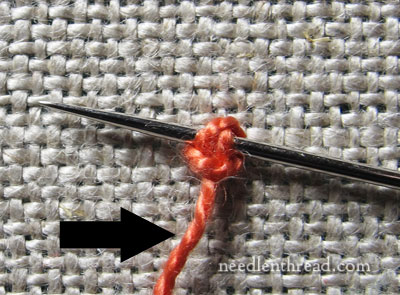
At this point, you’ll want to move this whole configuration – needle and all – down right next to where you first emerged to start the stitch.
Keep the needle in place, woven within the loops, and move towards your stitch starting point while gently pulling on the working thread to tighten that whole configuration around the needle.
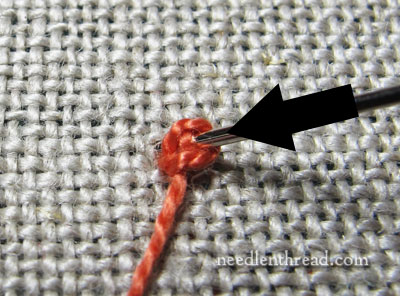
With the knot on the needle, manipulate the needle so that the tip enters the fabric right next to where the thread first emerged. Don’t go down in the same hole, but just right next to it.
This is somewhat tricky to do, and it takes some patience. You don’t want that knot to slide off the tip of the needle, but you also don’t want it to move too far up the needle, because then you’ll end up with extra thread protruding from your knot.
Pull the needle through the fabric, holding onto the working thread until most of it has passed through the knot. It might even help to hold a finger on top of the knot lightly, to keep it in place.
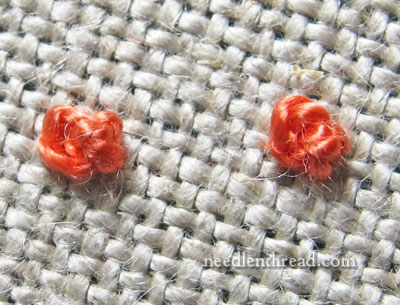
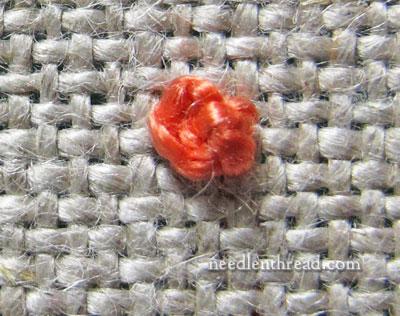
This is what the knot looks like when finished (more or less). This one bulges a bit on the left side.
The Turk’s Head Knot on the right side is better – it has a nice round shape, and it sits up round on the fabric, like an elaborately twisted turban.
So there you go! What do you think? Worth the fiddling to get the stitch right? Or stick with French knots? Opinions? Have you used the Turk’s Head Knot before, and if so, do you have any tips to share? Have your say below!
Stitch Fun is a series of embroidery stitch tutorials here on Needle ‘n Thread, where we explore more obscure stitches, different combinations of stitches, or different uses for stitches. You can find an ever-growing list of tutorials in the Stitch Fun Series Index.

