In case you have time off this weekend – and between Fourth of July celebrations for those of us in the States – maybe you can squeeze in some Stitch Fun! This stitch is particularly fun, because it’s fluffy.
When it comes to creating a fluffy finish with your embroidery stitches, there are a few options for stitches that work well. Probably the best known of these is Turkey Work, also known as Ghiordes knot.
Victorian Tufting is another method of working up some fluff on your embroidered surfaces. And in a sense, it’s a little easier than Turkey work, because if you already know one basic embroidery stitch, then you already know how to work Victorian Tufting.
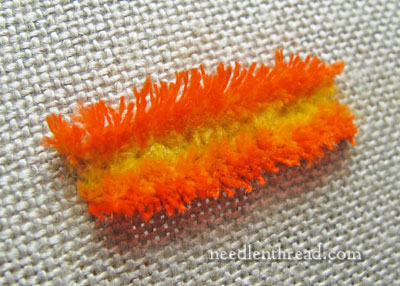
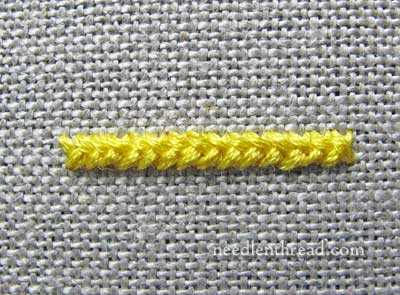
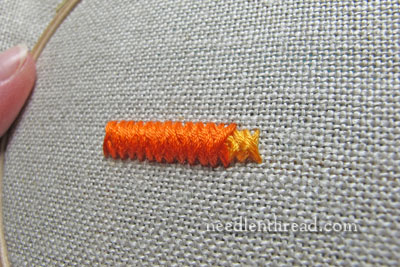
This is Victorian Tufting, or Victorian tufted stitch, before it’s been fluffed up a bit.
Ah – don’t you just love fluffy stitches? They’re so cute and hairy!
For this sample, I’m using regular 6-stranded cotton – all six strands in the needle at once – in three different colors so that you can see the layers. I’m working on a natural-colored, even weave linen, but Victorian tufting can be worked on plain weave fabric as well.
The simple stitch used to work Victorian tufting is herringbone stitch. Herringbone stitch is one of those “top 20″ stitches. By the time you’ve learned 20 embroidery stitches, chances are, herringbone will be on the list!
If you don’t know how to work the herringbone stitch, feel free to check out out my herringbone stitch video tutorial. You’ll find it’s a simple stitch to learn.
The herringbone stitch used for Victorian tufting is closed. “Closed” simply means that there is no space between the stitches. The stitches are worked side by side really close together, so that the ends and beginnings of the stitches share holes in the fabric.
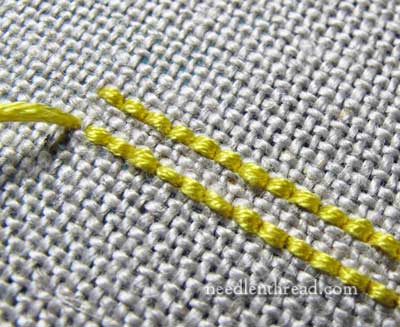
On the back of the fabric, this closeness of the stitches will form two backstitched lines.
By the way, if you’ve been hanging around on Needle ‘n Thread for a little while, this whole concept of closed herringbone stitch and backstitch lines might sound familiar. Recently, I wrote about shadow work embroidery, and showed you the front and back of some shadow work monograms. Shadow work is just herringbone stitch, worked close together, and it’s the same stitch used to create Victorian tufting.
So, to work Victorian tufting, you’ll start with one line of closed herringbone stitch, as shown. You’ll want to make this first band of herringbone stitch quite narrow.
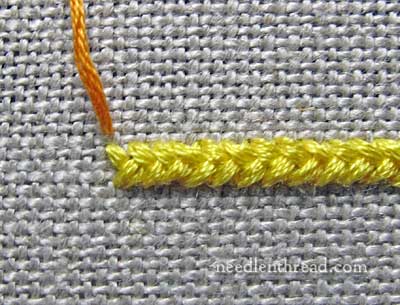
After stitching one layer of herringbone stitch, bring a new thread up just above the edge of the first layer of herringbone, to stitch a second layer right over the first layer. Leave just a tiny space between the top and bottom edges of the first band of herringbone and top and bottom edges of the second band of herringbone.
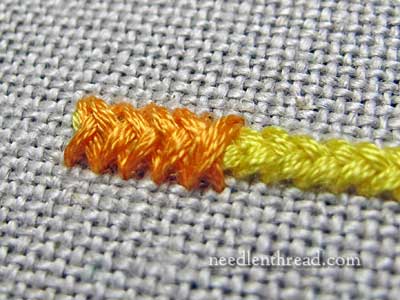
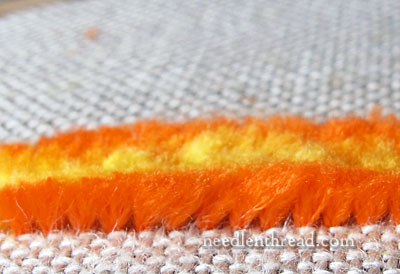
The second layer of herringbone is worked right over the first band. You can see in the photo above that it is covering up the first band quite well, making a nice padded line.
If you look at the band from the side, you can see the first band of herringbone stitch (in yellow) peeking out under the second.
You could stop at this point, but your tufting would be sparse. It looks better with three layers of herringbone.
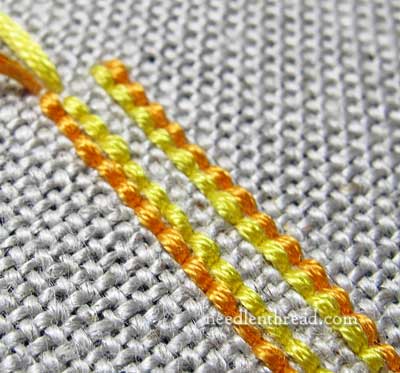
Notice that the backstitch lines on the back of the fabric are right up next to each other.
Now it’s time to start the third layer. Bring your needle up just outside the top edge of the second layer. Notice that I’ve left a little bit of space there on the fabric, but not a lot! It’s just one fabric thread. If you’re working on plain weave fabric (like cotton muslin or the like), leave just a few fabric threads between the second layer of herringbone and the new layer.
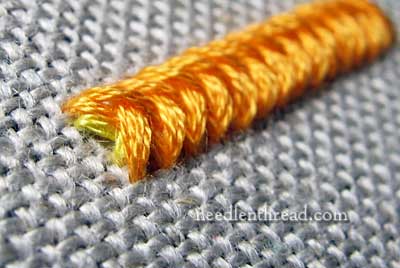
And here’s the third layer, almost complete.
Three layers will give a good amount of fluff to the filled area. You can work four layers if you wish, but normally, Victorian tufting is worked with three layers, and if more area needs to be filled, you would work another line of three layers next to this line.
If you were to continue working layer upon layer of herringbone stitch to fill up a wider space, the thread waste would be significant, because those top layer stitches would get longer and longer, just to be trimmed away when all is said and done.
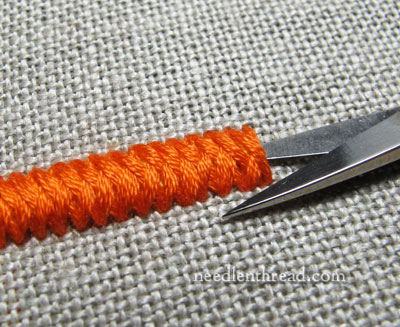
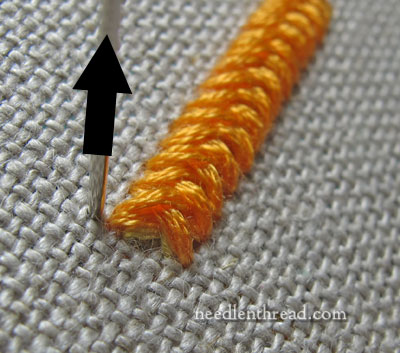
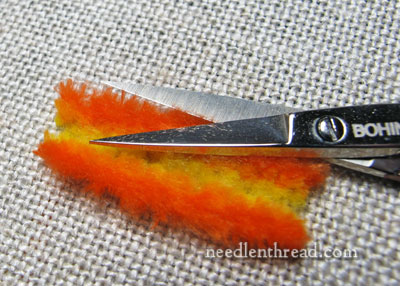
Once the layering is complete, take a small, sharp pair of embroidery scissors and slide the blade into the herringbone stitch, under all the layers. Turn the scissors so that you are cutting straight down the middle of the band through all layers.
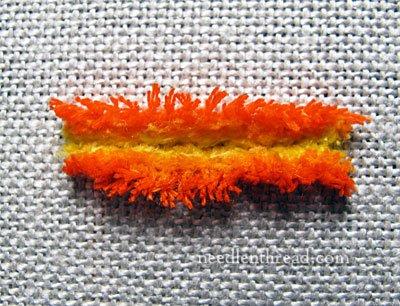
Here’s how the tufting will look right after begin cut. Depending on the look you want, you can leave it like this, or you can trim it up a bit without further fluffing, or you can fluff the stitches to create a thick, soft, velvety pile.
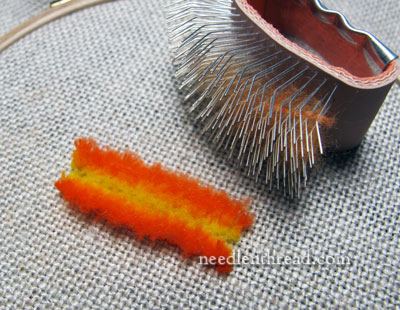
To fluff a stitch like this into a pile, you can run your needle through it and just work the stitches with your needle until the threads separate and fluff. Or you can invest in a handy little pile brush (I wrote about this pile brush here when discussing Turkey Work), and do the job a whole lot faster.
You can trim and shape the fluffy stuff with sharp scissors. Just remember to trim in small bits – it’s easy to take more off if you need to, but putting more on is impossible.
See the tufts?
So that’s Victorian tufting – a relatively easy way to fill an embroidered area with fluffy pile!
There’s one more fluffy stitch that I like, but it’s a little more complex. We’ll look at it down the road.
In the meantime, try Victorian Tufting, and add some fluff to your embroidery!
Stitch Fun is a regular series on Needle ‘n Thread, where we explore more obscure embroidery stitches, embroidery stitch combinations, or fun techniques just for the fun of it. If you’d like to view the other stitch tutorials in this series, feel free to check out the Stitch Fun Index, where you’ll find them all listed for your convenience.

