Last week, we delved into the fun of creating fluffy stitches by examining Victorian Tufting, a technique involving layers of herringbone stitch which are cut and then fluffed up to create a dimensional pile on the embroidery surface.
Today, just for the fun of it, let’s look at another fluffy stitch. This one is called velvet stitch, and although it’s more often seen in canvas work, it can also be used in surface embroidery.
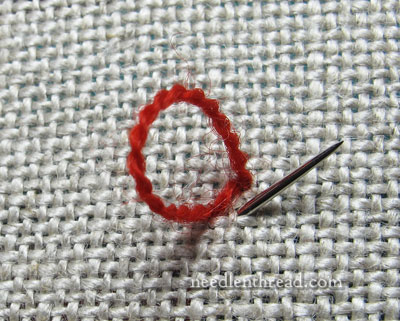
This is the velvet stitch, before the resulting loops of thread are cut. When comparing velvet stitch to Turkey work and Victorian tufting, the velvet stitch is more complex. And although velvet stitch isn’t really my go-to stitch when I want something fluffy on my embroidery surface, it’s still worth knowing.
So, let’s look at how it’s done…
For this tutorial, I’m using 32 count linen and one strand of Fine d’Aubusson wool thread, with a tapestry needle. Velvet stitch is easier to work on an even-weave fabric, although it can also be worked on plain weave. It just takes a little more concentration on plain weave.
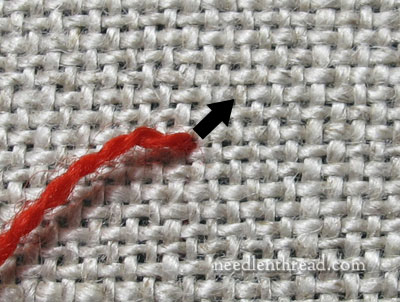
Bring the thread to the surface in the lower left of the area you want to fill. Velvet stitch involves a kind of cross stitch, so we’ll begin the stitch by taking the first part of the stitch from lower left to upper right, in the direction of the arrow indicated in the photo above.
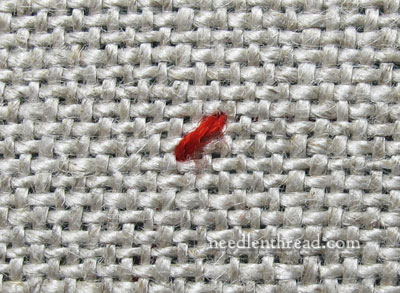
And there’s the first part of the stitch – a straight diagonal stitch taken from lower left to upper right. Not too complex so far! As with any stitch, if you take it one step at a time, you’ll overcome any complexities!

The next step of the stitch is to bring the needle to the front again in the same hole where the stitch began, so you’ll have to nudge the thread aside to come up right next to it in the same hole.
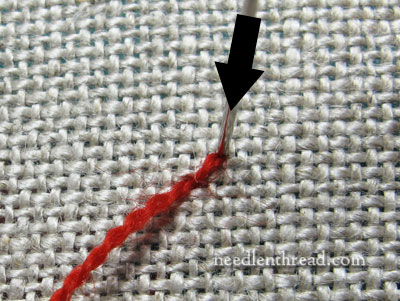
Now, head back down into the same hole, upper right, where the first diagonal part of the stitch ended. Pull the needle and thread through most of the way, but not all the way! Pull through until you’ve left a loop that’s the length of the pile you want to create.
Leaving a loop from this last movement of the stitch on the surface of the fabric, bring the needle to the front of the fabric directly below the end of the previous stitch and across from the beginning of the previous stitch. This would be the lower right corner of an X, if you are thinking in terms of cross stitch.
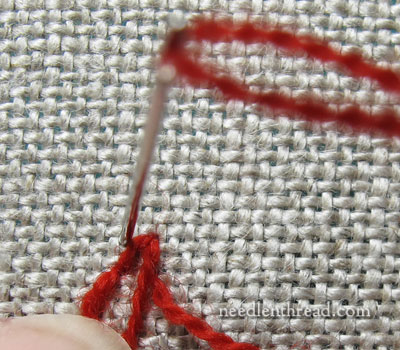
Now, holding the loop down onto the surface of the fabric, cross over the top part of the loop, moving diagonally from lower right to upper left, and take the needle down into the fabric. At this point, you’re making the crossing stitch in the cross stitch, but you’re crossing over a loop rather than over a straight stitch.
Pull the thread all the way through, so that it secures the loop in place.
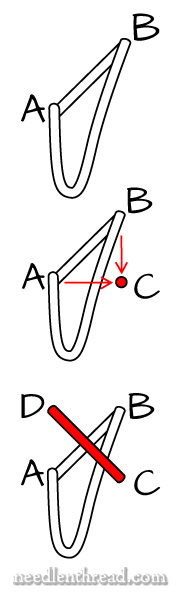
To clarify the whole movement of the stitch, here’s a diagram for you. In a nutshell, the directions:
Come up at A, go down at B to form a diagonal straight stitch.
Come up again at A, go down at B, but leave a loop of the working thread on the fabric surface.
Come up at C, directly below B and across from A, and cross over to D, directly above A and across from B, over the top portion of the loop.
To work subsequent stitches, move down the line to the right, bringing the needle up at the starting point, which is the lower right corner of the previous cross stitch, and continue working across the design area.
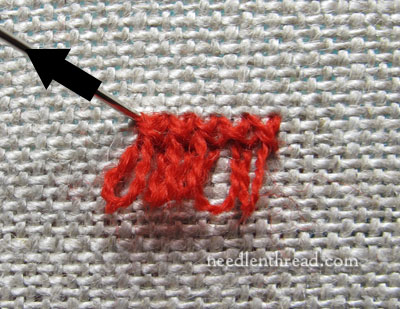
Work subsequent rows above previous rows, to fill the shape.
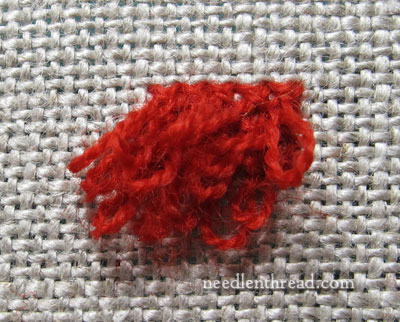
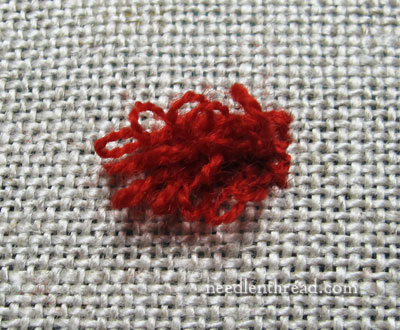
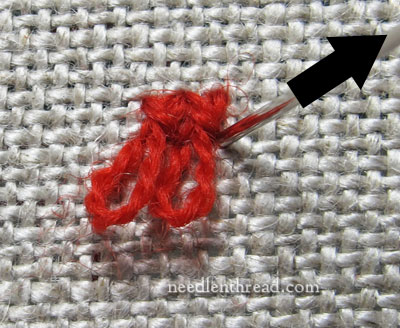
Velvet stitch will form a pile of loops (long or short, depending on how long you want them). You can choose to leave the loops uncut, or….
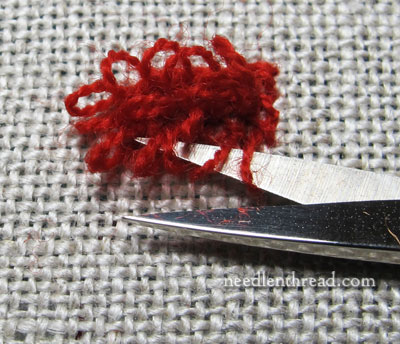
…you can slide the blade of your scissors inside the loops and cut them, and…
…leave the pile cut but not combed out, or…
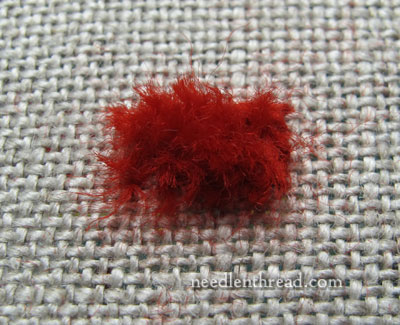
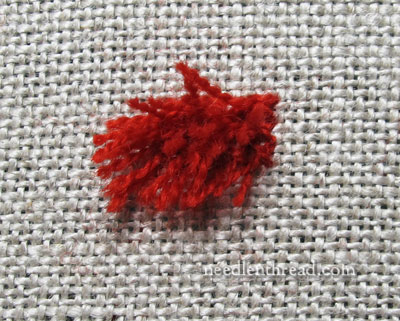
…you can use a pile brush or needle and comb the stitch out and make it fluffy-fluffy.
You can see that, comparatively speaking, there’s a lot more work involved in velvet stitch than there is in Victorian tufting or Turkey work. But it does create a very secure surface of loopy or fluffy stitches on your embroidered surface.
Of the three fluffy stitches – Turkey work, Victorian tufting, and velvet stitch – I prefer Turkey work for fluffy surfaces when filling a shape. It’s quicker to work than the other two, and it creates an even, full filling.
What about you? Have you tried any of these fluffy stitches yet? If so, what’s your favorite? Have your say below!
Stitch Fun is a regular series on Needle ‘n Thread, where we explore more obscure embroidery stitches, embroidery stitch combinations, or fun techniques just for the fun of it. If you’d like to view the other stitch tutorials in this series, feel free to check out the Stitch Fun Index, where you’ll find them all listed for your convenience.

