Yesterday, when I mentioned the tip on using spray starch when transferring embroidery designs, one thing I didn’t expect was an influx of email asking about the last picture in the article:
So, today, I’ll clarify how I organize future embroidery projects.
Categorizing Embroidery Projects
First, I drum up embroidery project ideas that fall into different categories. These include projects to blog about, projects to teach, and projects to convert into e-books or kits or what-have-you (maybe for publishing proposals for magazines or whatever – things that I wouldn’t go through step-by-step on the website).
Now, at some point, it’s true, all these categories could overlap, or the projects themselves could completely jump category.
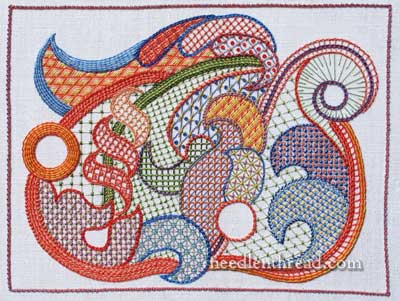
For example, the Lattice Jumble Sampler was a blog project first, and then, due to popular request, it became this e-book.
This is the same case with the Marian Medallion Project – blog project first, then e-book.

But then there are the projects like all the Little Things (which will be available this Friday), which were never a blog project. That whole concept from the beginning was planned as an e-book.

Projects that are solely for the blog (like the Mission Rose project) tend to develop organically – they change a lot, and the changes are recorded here on the website. I don’t normally kit them up in advance. I just make sure I have the stuff I’m thinking of using on hand… though the ingredients can always change as I go!
Gathering & Preparing Materials
Once I’ve conceived an idea and developed it to the point that it becomes inevitable that I will do it (I have lots of ideas, but they don’t necessarily ever reach this point!), I start to gather and prepare materials.
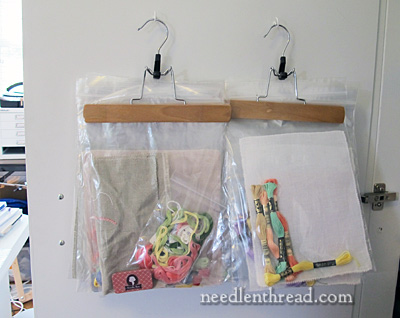
The “future embroidery projects” you see hanging inside my cabinet doors come into play only if I’m preparing something for instructional purposes – for example, right now I’m preparing some projects I plan to use for an online class here on Needle ‘n Thread. I know that I will need lots of photos of the many different stages and stitching circumstances of the projects involved, and many different approaches to the projects. So I will have to work several versions of the projects several times.
So, I put together kits. The kits include fabric, thread, and needles – everything I need to work the project samples.
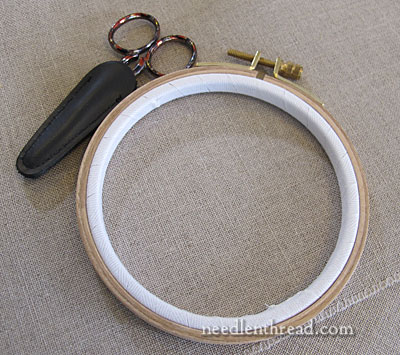
The only things the kits don’t include are scissors and a bound embroidery hoop, because I move those with me from kit to kit.
This is pretty much the order of preparation and gathering, assuming the designs are already prepared:
1. Decide on ground fabrics or all possibilities of ground fabrics and get them.
2. Narrow down choices of ground fabrics.
3. Prepare the ground fabrics by pre-washing (I usually work with linen), cutting, evening up, neatening the edge.
4. Transfer the design to the ground fabric samples. Sometimes, this means transferring the design several times – or, up to 52 times, with the project I’m working on now! I may not stitch all of them completely – sometimes, I only stitch part of a sample, to test an idea, a stitch combination, a color combination, and so forth.
5. Select threads, and this includes possibilities of threads, even the “maybe’s”. If necessary, order any threads that are missing.
6. Individually bag each sample in a zip-lock with fabric, needles, threads, copy of design, and any notes I may have made for that particular sample.
7. Stick all the bags in the clamps on skirt hangers in the order in which they will be approached, and hang the hangers on the hooks inside my cabinet doors.
8. Finally, I close the cabinet doors, and forget about them until I have time to approach them. And when that time comes, everything I need is there and ready…
…until I start making changes…
…which are inevitable!
Hooks on Doors for Hanging Kits
I use regular screw-in hooks on the inside of my cabinet doors to hang anything hangable on.
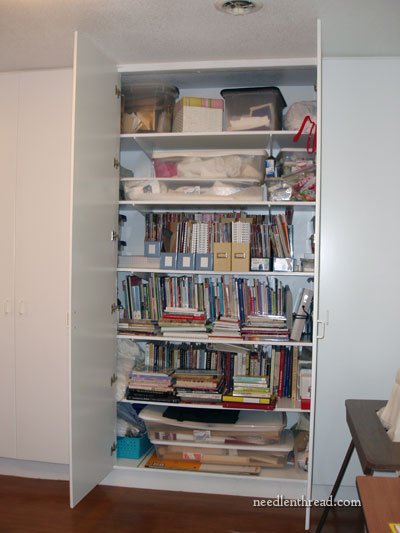
These are the cabinet doors – they’re pretty much floor-to-ceiling. But there’s a good 8″ of space between the doors and the edge of the shelves, and all that space would be wasted without those hooks. Anything that can be bagged up can be hung on a hook. And all kinds of tools can be hung on hooks, too. So the hooks are great space savers.
So there you have it – probably much more than you ever wanted to know about how I organize future work, and what those bags hanging inside the cabinet are!
What about you? How do you organize your future projects or your works in progress? Do you have a specific system? I’d love to hear about it! Feel free to leave a comment below and let’s exchange some ideas!

