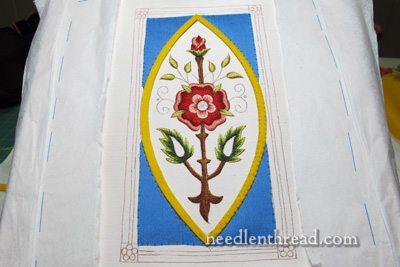
The other day, we looked at the finished blue silk appliqué on the Mission Rose, and I introduced you to another color of fabric that would be added to the piece next – a yellow felt.
The felt is the foundation for the goldwork frame on the piece.
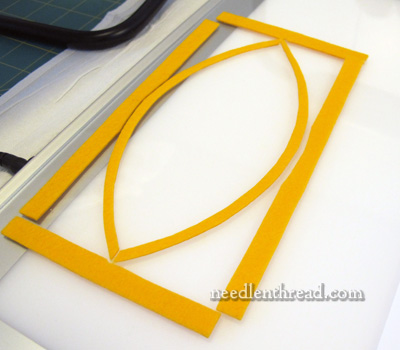
Here’s the felt, cut out and ready to be sewn onto the Mission Rose ground fabric.
Whenever I use felt padding for goldwork, it’s always 100% wool felt. Why? Several reasons: it’s a lot easier to cut cleanly, for one. It’s not as fuzzy as acrylic craft felt or blends. Good wool felt is generally consistent in thickness across the whole slab. In short, it’s just much nicer to work with.
Wool felt is slightly more expensive, but when you’re putting this kind of time into a project and using these types of materials, the difference for the wool felt is really a negligible expense, especially when balanced against the difference between working with it or with lesser-quality acrylic or blends out there.
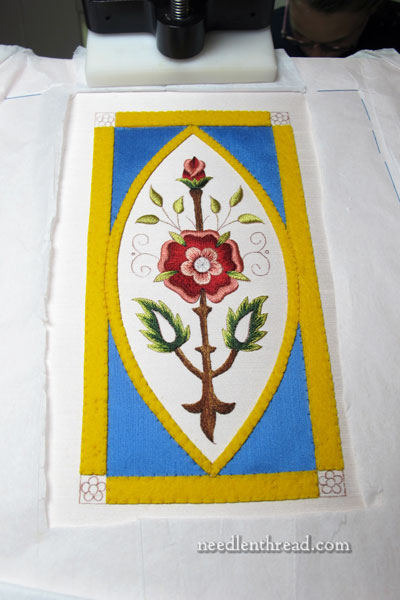
Here’s the marquise-shaped frame, with the right side sewn down and the left side in place, ready to sew.
Cutting Shapes for the Goldwork Foundation
Goldwork embroiderers have their own preferred ways of cutting out the felt shapes for goldwork foundations. So you’ll find different methods explained in books or kits. This is just the way I do it, because I think it’s easy and because it always gives a clean cut.
1. Invert your pattern. Normally, if you’re tracing with a light box and your pattern is printed on a piece of paper or vellum, it’s simply a matter of turning your pattern paper over.
2. Trace the inverted pattern onto the paper side of paper-backed lightweight fusible web or interfacing (“Wonder Under”). Make sure it is the lightest weight fusible web possible.
3. Iron the fusible web onto the felt. The paper pattern side is uppermost, with the fusible web underneath it, and then the felt.
4. Once it’s good and stuck, cut out your felt pieces along the pattern lines.
5. Peel the paper off, revealing the interfacing stuck on the felt. The interfacing-side goes down on the ground fabric, and the plain side of the felt goes up.
The advantages of this method:
1. It makes the pattern transfer part of the process very easy – eliminating drawing on the felt with a Sharpie or the like.
2. It makes the cutting part of the process very neat – the edges of the felt come out sharp and precise.
3. It makes holding the felt in place on your ground fabric a little easier – the interfacing creates a non-slip surface.
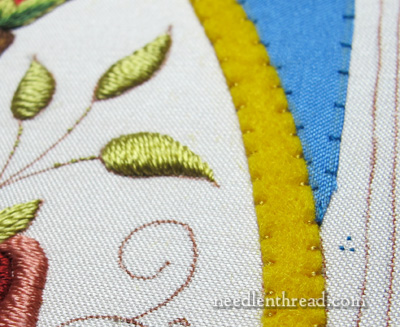
To sew down the felt, use a gold-colored sewing thread. Lay the shape onto the embroidery piece, exactly where it should be. Start your thread with a waste knot and a few little anchor stitches either in your ground fabric where it will be covered up, or straight through the felt and the ground fabric, but you have to make sure you don’t shift the shape while working the waste knot.
Sew down the the corners or, if there aren’t any real corners, sew down the ends and halfway points of the felt piece – just enough to tack the piece into place.
Then, stitching from just outside the felt edge to a tiny way into the felt, work around the shape, securing it to the ground fabric.
One outside edge finished…
…and all the edges finished!
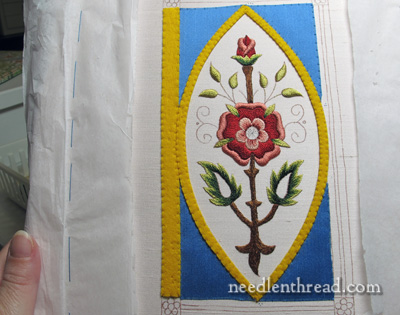
Suddenly, the frame looks much thicker, doesn’t it?
Next time we meet over this project, you’ll see the beginnings of the goldwork! Can’t wait!
Questions? Comments? Suggestions? Feel free to leave a comment below!
If you’d like to follow along with the Mission Rose project from beginning to end, you can find all the articles relating to it – including pattern, materials, and all the nitty gritty details – listed in chronological order on the Mission Rose Project Index.

