Last time we visited the Mission Rose project, I was almost finished with the goldwork on the central rose. Well, I haven’t moved ahead as much as I’d like, as Life keeps interrupting in unpredictable ways.
Still, I always figure Some Progress is better than No Progress. No matter how little, progress is always progress, and it keeps us moving towards an eventual completion, right? 15 minutes here or there, squeezed in whenever you can, might be all the time you have to work on something, but those short bouts of stitching add up!
(Yes, I’m just trying to make myself feel better for not having more to show you!)
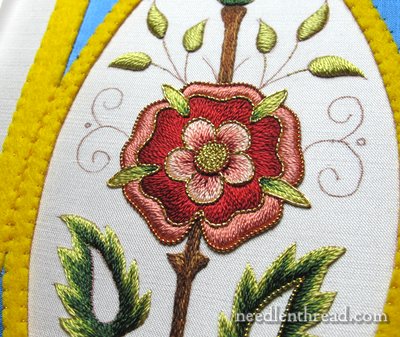
As far as progress goes, I’ve finished all the goldwork on the central rose. The center area is filled with gold chip work, using gilt wire check (bright check purl) #10. Tiny chips of the thread are cut from the main piece and sewn down like beads to fill the center. Again, this is exactly what I did in the center of the goldwork & silk Tudor-style rose last year.
Originally, I planned to explore “heaping” the check purl in the center, like in the original piece:
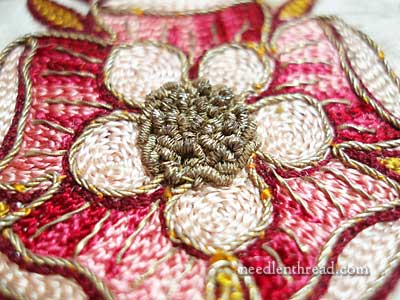
Do you see how the chips of metal threads are randomly sewn, kind of heaped over each other like a little mass of goldwork worms? The outer edge of the center circle in the photo above is worked in a technique called s-ing, which is a lot like working stem stitch with chips of gold purl. Then, inside that, the chips of purl are sewn very randomly, with some overlapping each other, causing the center to heap up.
I started to work the chips in a heaped way like this, but I really didn’t like the result. It looked messy, it caused the center to stand out more than I wanted it to, and it didn’t cover the fabric as well. Since I had started and ended many of my threads in that center area, it was really necessary to cover the fabric well.
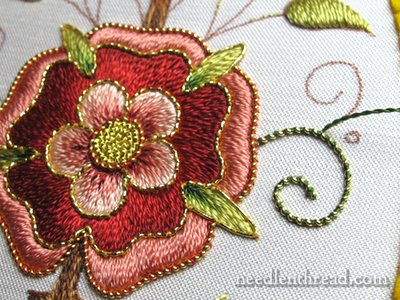
Once the goldwork on the rose was completed, I was going to move back to the large leaves. But then I had a hankering to begin the curlicues and see if my plan for them would work out. I’m using pearl purl (size “super”), stretched and wound with the medium green used in the leaves on the project, and couched down with the same green. I love using pearl purl in this way! And I believe I will keep the curlicues like this, as the technique is echoed throughout the project and it helps tie the piece together.
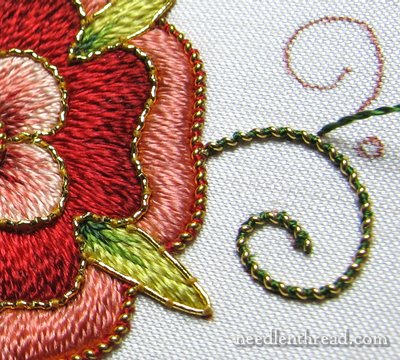
Here’s the curled stem up close. I started couching the thread at the outer tip and worked towards the rose. The thread coming up on the little “branch” curl above is the couching thread for that curl. You can read about stretching and wrapping pearl purl and couching it down in this article, if you want more information on the technique.
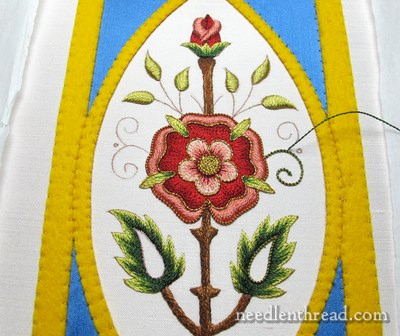
Do you know what I’m looking forward to most on this project? Covering up that garish yellow felt with beautiful gold threads!
Forge on, forge on!
If you’d like to follow the Mission Rose Project from beginning to end, you’ll find all the information and articles in this series located in the Mission Rose Project Index. They’re listed in chronological order, so that you can watch the whole project unfold, from what inspired the project, to creating the pattern, to selecting materials and stitching.

