Today’s tip on separating (also called stripping) embroidery floss is handy especially for beginners, because stripping your floss first makes a huge difference in the look of your stitches, whether you’re doing surface embroidery, cross stitch, or any other kind of stitching.
Any type of divisible thread for embroidery benefits from stripping or separating before stitching with it. Stripping floss is simply separating the individual strands from the larger bunch of strands. With regular DMC embroidery floss, for example, there are six strands in one “bunch” or main thread as it comes off the skein, and each of those six strands can be removed singly from the bunch. Usually, you remove the number of strands you’re going to stitch with one at a time, and then you put them back together again when you thread the needle.
The advantage of this exercise? It untwists the individual strands from each other, so that you get fuller and more consistent stitch coverage from your thread.
Here’s how I separate my floss. I know others do it differently, so this is just one way that’s always worked for me without any hitch.
First, you cut the length of thread you’re going to use from the skein.
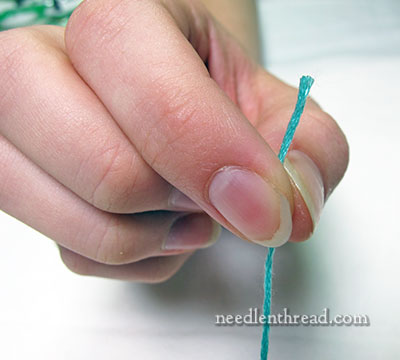
Then, you grip the thread between your finger and thumb, leaving a little bit above your gripping point. I always think of this part as holding the little piece of thread right at the neck, leaving a little head of thread protruding.
At this point, if need be, pat the little piece of protruding thread right at the top of the head. This will separate the threads clearly from each other.
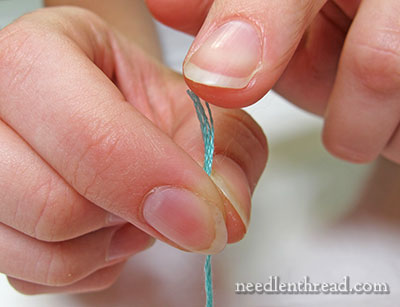
Grab one strand from the bunch. Even if you’re planning on stitching with two or three strands, just grab one at a time. Otherwise, you may knot up your thread, and it’s a lot easier to do this whole stripping thing two or three times than it is to fiddle around, trying to remove a knot.
Without letting go of the neck, pull the one strand straight out. You don’t have to pull it super slowly, but don’t yank it out, either. Just pull it out.
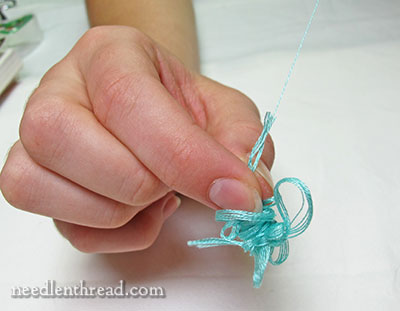
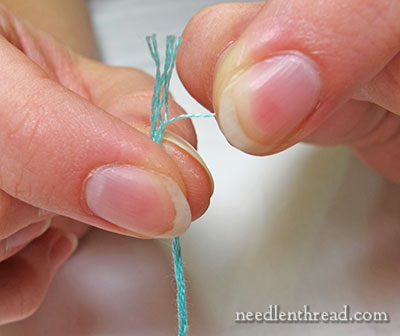
As you pull, you’ll notice that the rest of the thread bunches up below the gripped neck. This might look alarming, as if you’re going to end up with a huge knot of thread there….
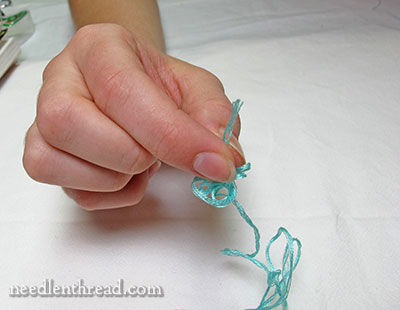
…but, in fact, as soon as the one strand comes out, the bunch will fall out.
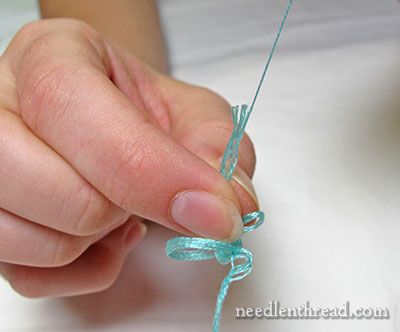
Now you’re ready to remove the next strand.
Of course, in photos, with accompanying text, this might all seem like a really long and complicated process, but once you get used to doing this, it only takes a second or two to separate out the number of strands you need.

And here we are, ready to separate the next strand….

As you separate each strand, lay them out right next to each other on a surface (or hold them in your hand). You can see that the threads are no longer twisted around each other. When you thread up your needle with whatever number of strands you want to use and start stitching, those threads will tend to lay next to each other, rather than twist around each other, as long as you don’t allow the thread to twist up as you stitch.
You can keep the thread from twisting up by letting your needle and thread dangle freely towards the floor now and then. The thread will untwist itself while it’s hanging there.
And that is how you strip or separate embroidery floss. Once you’re used to doing it, you don’t really even think about it anymore, and it takes practically no time to do it.
But it does make a huge difference in the look of your stitches, so it’s definitely worth doing!
It’s hard to believe that in seven-plus years of writing articles on Needle ‘n Thread, I’ve never covered this basic embroidery tip. The reason I’m bringing it up now is that I came into contact last week with a strange embroidery tool that had me completely baffled and somewhat amused. I didn’t want to discuss the tool until I had discussed this very easy way of separating embroidery floss. Later on, I’ll show you the tool!
Any personal tips on stripping floss that you’d like to add? Feel free to have your say below!
If you’re looking for other tips and techniques for hand embroidery, feel free to visit the Tips & Techniques page here on Needle ‘n Thread, where you’ll find all kinds of embroidery hints categorized and listed.

