Since leaves are often featured in hand embroidery projects, I’ve been dedicating a few articles lately to different ways to work hand embroidered leaves, beyond the simple daisy stitch.
It’s always fun to add a little variety to hand embroidery projects by using different stitches for common elements. So far, we’ve looked at leaves embroidered using a combination of twisted chain and fly stitch, and leaves embroidered with cretan stitch.
Today, we’re going to look at nice, simple leaves embroidered with buttonhole stitch. These leaves are what I call “ground leaves” – they’re a nice shape for ground foliage, and the buttonhole stitch works well for them.
These itty bitty buttonhole stitch leaves are among my favorite way of created tiny ground sprays of flowers. You can see buttonhole stitch used on this sampler of little embroidered flowers worked with floche. The second photo down in that article shows another example of buttonhole stitch leaves. There are different ways of working the leaf and drawing it, to get different results. And the “fluffier” the thread you use, the more “fill” you’ll get on your leaf. So, feel free to experiment!
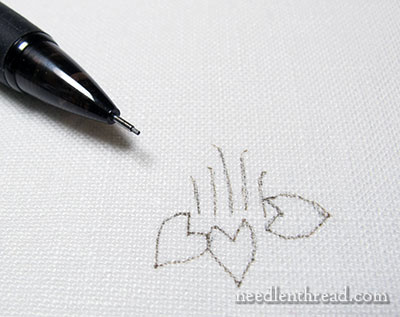
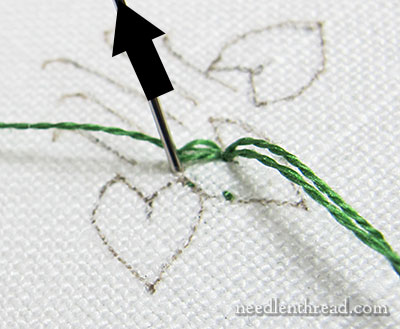
In the photo above, you can see that the design I’ve doodled onto the fabric is just three simple, broad leaves (the tip of the mechanical pencil gives a bit of perspective on size), with some stems coming out of them. The broad leaves form the base of a ground spray – something that you might stitch in a garden, or stitch isolated for a tiny motif.
Notice that the leaves are somewhat heart-shaped. This shape works well for broad, buttonhole stitch leaves.
For this massive, monumental embroidery project, I’m using a #9 crewel needle and one strand (from the six) of DMC cotton floss.
I’m working on Alba Maxima linen by Legacy – it’s my favorite all-purpose linen ground fabric, and I happened to have a nice little scrap already cut, perfect for the demo.
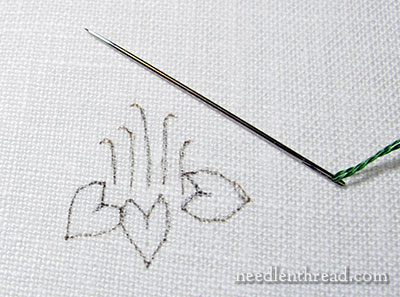
To start, I’m using my favorite method of a waste knot on top of the fabric, and three tiny backstitches to anchor the thread. I worked the backstitches on the design line, because they will be covered by the outside “rope” edge of the buttonhole stitch.
Once the anchor stitches are worked, bring the thread up in the center cleavage of the heart to start the stitching, and go ahead and snip the waste knot.
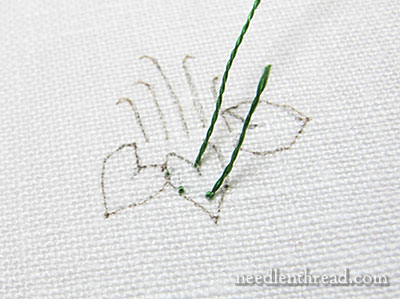
When I’m filling an odd shape like this with buttonhole stitch, I often start as if I’m making a regular detached chain stitch, without anchoring the detached chain stitch. This provides me with two spokes of the buttonhole – the outside one covering the design line on the left, and the next filling spoke.
For right handed stitchers, you’ll find it easier to stitch around the heart shape, turning your design in the direction in the photo above, and working from left to right. Left handed stitchers will find it easier to turn the design the other direction, and work from right to left.
At this point, if you’re not familiar with the buttonhole stitch, you may wish to watch my buttonhole stitch video to see how it’s worked. I won’t go into detail here, because it is a fairly common stitch that most embroiderer’s already know, and if you don’t know it, you can watch the video and learn it – it’s quite simple!
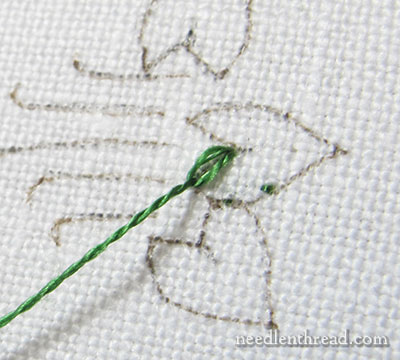
As you work around the leaf, you’ll always be bringing your needle up on the design line, inside the loop of your working thread. As long as you’re bringing your needle up on the design line and going down in the middle of the leaf, you’ll end up with your rope-like edge on the outside of the leaf.
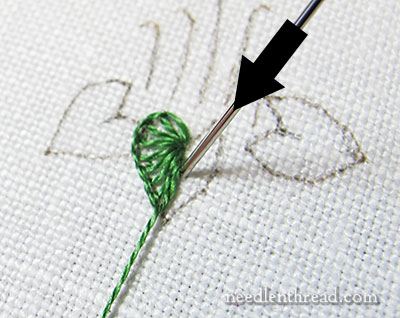
Nearing the tip, when you take the needle down into the fabric, you can tuck the stitches underneath the end of previous stitches, if necessary.
When you bring the needle up at the tip, go just beyond your drawn line, in order to obtain a sharp point on the leaf.
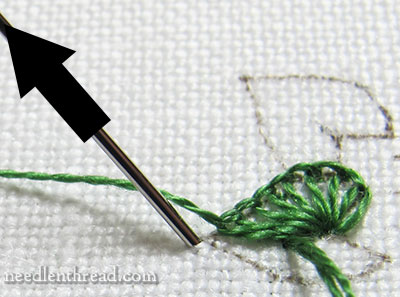
For the next stitch, move up the outer leaf line, back towards the top of the leaf. Make sure to come up inside the loop of the working thread to continue the buttonhole stitch up the leaf outline.
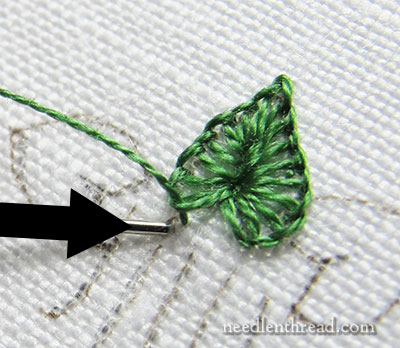
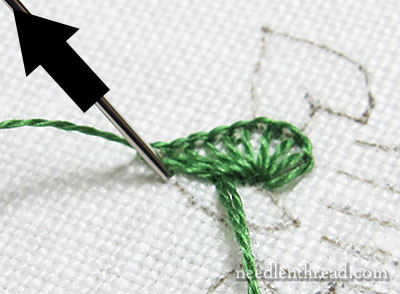
Continue to fill this side of the leaf, and when you get to the last buttonhole stitch that covers the design line, take the needle down just on the outside of the stitch to anchor it.
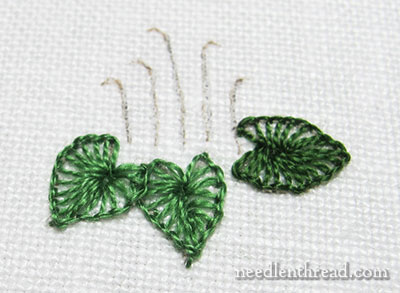
When working a bunch of ground leaves, you can mix up the shades of green for a little variation.
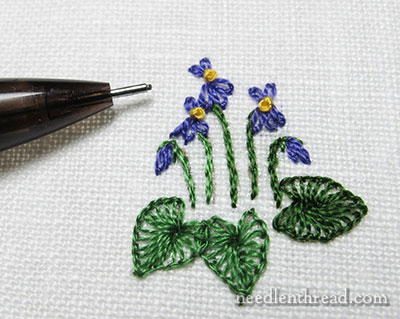
Finish your little ground cluster with flowers of your choice. I used stem stitch for the stems and detached chain stitch and French knots for the flowers and buds. The whole finished group of flowers is about 1″ x 1″.
You can modify the size of buttonhole stitch leaves, using the same heart shaped outline, and stitch with different, heavier threads like wool or perle cotton. Floche also works well!
You can also fill out the spray of leaves by overlapping them, and working them in different shades of green to get a nice, lush patch of leaves.
And, of course, the fun part of Stitch Fun – experiment with it!
Stitch Fun is a tutorial series on Needle ‘n Thread in which we explore obscure stitches, different uses for common stitches, and fun combinations of all kinds of stitches. For more Stitch Fun tutorials, visit the Stitch Fun Index, where you’ll find a whole slew of tutorials to spice up your surface embroidery!

