Here’s one more leaf-stitching technique to add to repertoire of hand embroidery stitches for creating various types of leaves.
So far in this mini collection that parts of the Stitch Fun series, we’ve looked at fly stitch leaves, cretan stitch leaves, tiny buttonhole stitch leaves, and today, we’re looking at the rose leaf stitch.
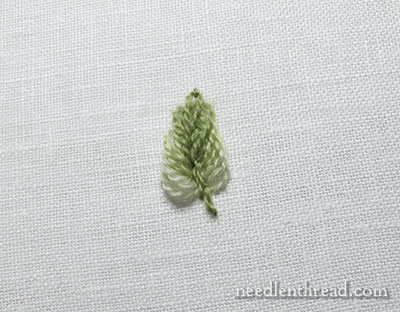
The rose leaf stitch is a rather obscure embroidery stitch. You don’t see it in very many stitch dictionaries, and in the ones I have seen it in, the explanation of turning the stitches inside-out is lacking. They usually just say, “Carefully turn the stitches inside out.”
But what does that mean? And how does one go about doing it in a way that is manageable and makes sense?
Today I’m going to walk you step-by-step through the stitch and demonstrate the key movement of it – turning the stitches inside-out – so you can see how easy it is to create a pretty shaded leaf.
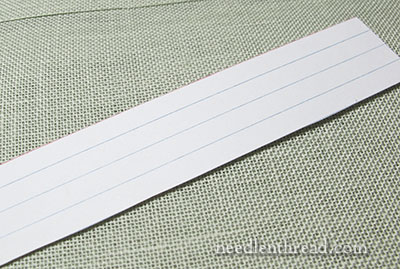
There are a couple “tools” that will help make this stitch easier.
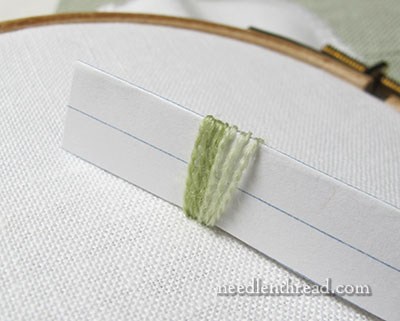
The first one is a strip of card stock about an inch wide and a couple inches long. Since one of my handy helpers in my workroom is my stack of 3×5″ index cards, I just used one of those.
I cut out four of the line areas, which gave me a 1″ wide piece of card.
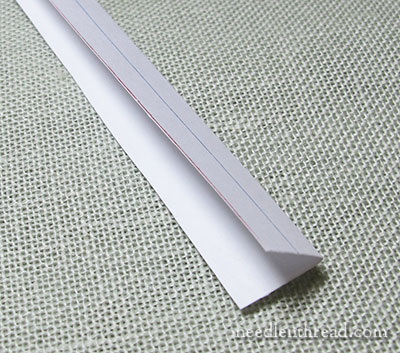
Fold the piece of card in half, so that you now have a 1/2″ wide piece of evenly folded card. With lined index cards, it’s very easy and quick to accomplish a straight fold, because you can fold the card right along the line. However, you can really use anything – an old business card, a used greeting card, whatever you have to make a 1/2″ evenly folded piece of card.
You can make these leaves smaller, by using a smaller folded piece of card (for example, a 1/4″ folded piece of card), but they become a bit more fiddly. If you’re using a smaller piece of card, use a finer thread for your small leaves.
In this demo, I’ll be using one strand of crewel wool in three different shades of green – light, medium, and dark.
I started with the lightest shade of green. If you want your leaf color to be reversed with the lightest shade at the tip of the leaf, start with the darkest shade of green.
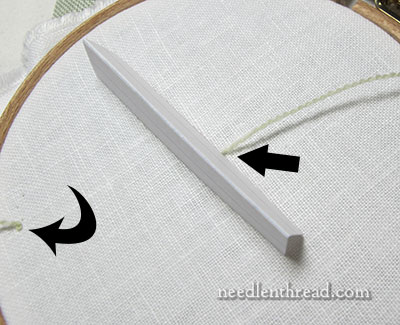
The easiest way to get the thread started for this leaf is to use an “away” waste knot. You can see on the left of the photo above (where the curved arrow is pointing) my waste knot. I knotted the end of the thread, took it down into the fabric on the far edge of my hoop, and left the knot on top to hold the thread.
Then, I brought the needle and thread to the front of the fabric on the far side of my folded card, away from the waste knot.
When I’m finished with the leaf, I’ll clip the waste knot and take the tail underneath the threads on the back of the leaf to secure it.
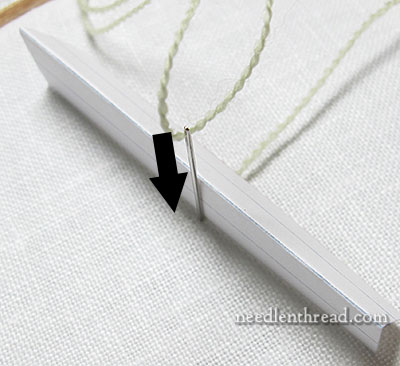
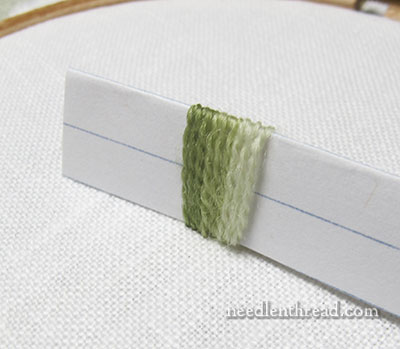
Now I’m taking the needle and thread to the back of the fabric on the other side of the card, very close to where I originally brought it up. Once I pull through, the “tent” shape of the card will diminish, because the two sides will be held together by the stitch.
You want your starting and ending of each stitch over the card to be as close to each other as possible, without going down in the same hole you came out of when you started the stitch.
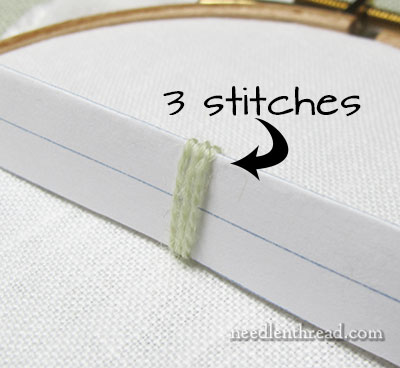
I’ve made three stitches over the card with the lightest green. Each stitch is close to the previous one, without being in the same hole. Just a thread of fabric to separate the stitches is fine. Think of it as satin stitching over the card.
With a bird’s eye view, you can see that the card has been squeezed closed by the stitches.
Once you’ve finished the first three light green stitches, turn your work over to the back and run your needle under the threads on the back a couple times, pulling your thread through each time until it is secure, and then clip the thread.
Leave the waste knot for now – you can end all the waste knots when the leaf is complete.
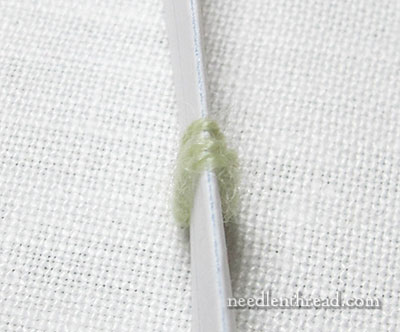
Now, in the same manner, work three more stitches above the light green, this time in medium green, and end the thread on the back again.
Finally, work three stitches above the medium green in the same manner, but this time, in the darkest green.
Do not end the dark green thread on the back.
Once you’ve finished the three dark green stitches, your needle and thread will be on the back of your fabric. Take your needle up into the fabric over on the side of your hoop, and pull through, thus “parking” the needle and giving some tension to the working thread so the stitches are held in place.
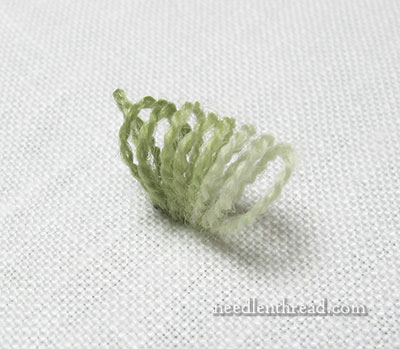
Pull the card out, and you’ll have a little tunnel of tall loops on your fabric.
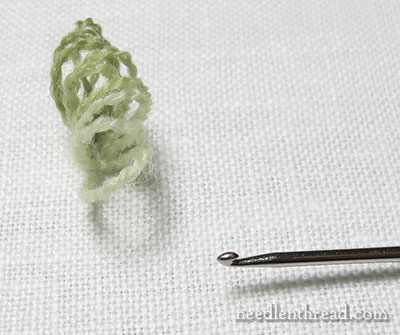
Here, we introduce the second “tool” that makes this stitch easier. It’s a small crochet hook (#9, I believe, though any smaller crochet hook will do). You can accomplish the stitch without one, but the crochet hook makes this part of the stitch So Much Easier, so if you have one, use it!
Any kind of fine, small hook-type-thingy will work, too. In place of a hook, you can use the eye-end of a long needle, but it won’t be as easy!
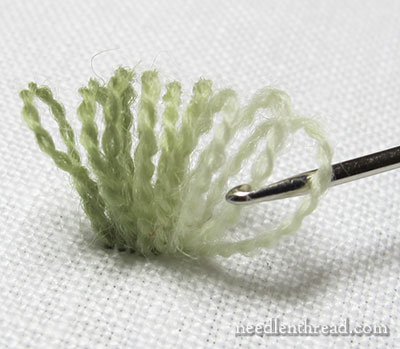
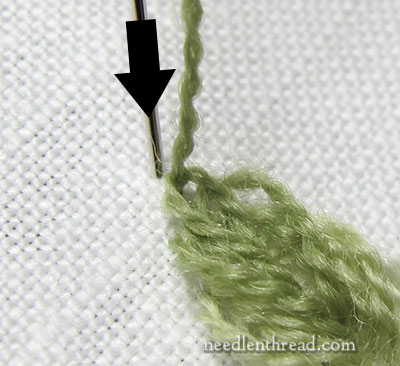
Starting from the lightest end of the tunnel, slide the crochet hook into the tunnel formed by the loops, passing inside the first loop, and then grab the second loop and pull it inside the first loop and out the end of the tunnel.
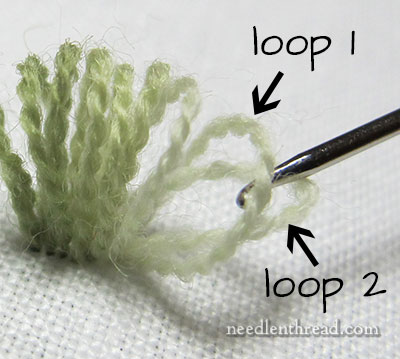
In the photo above, you can see more clearly what you’re supposed to do. Loop 1 is pretty much still in place, but Loop 2 has been pulled through Loop 1 and out.
Pass your crochet hook back into the tunnel, inside loops 1 & 2, and grab loop 3, and pull it through and out the end (passing inside both loops 1 & 2, and out the end).

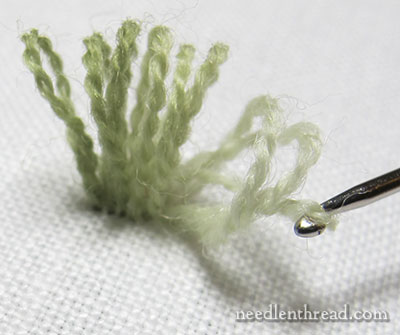
Continue doing this one loop at a time – passing into the tunnel inside all the loops and grabbing the next loop and pulling it through – until you’re at the last loop.
And do the same with the last loop, too – pull it through the tunnel to the other end, so that all the loops are now inside-out.
Then pull that last loop up and over all the loops and lay it back down on the fabric on the dark end of the tunnel. See what’s happening?
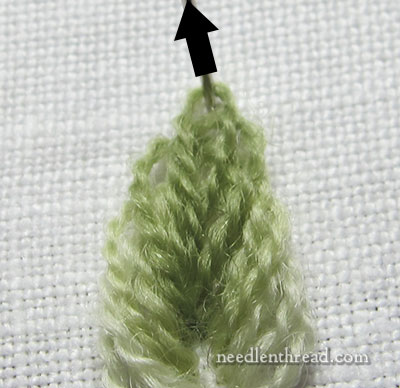
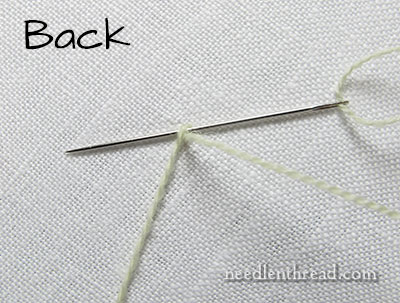
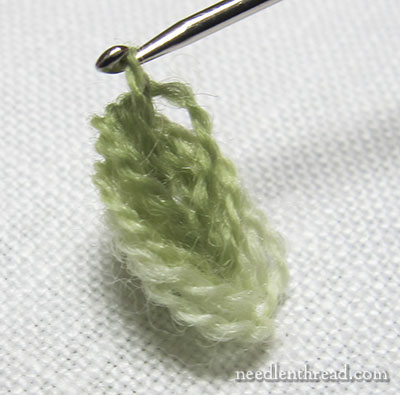
Now, take your regular needle and thread (still threaded with the dark green) and come up inside only that last loop, so that you can anchor that last loop on the fabric, just like you’d anchor a chain stitch. Come up inside the last loop…
…and take your needle down just on the other side of it.
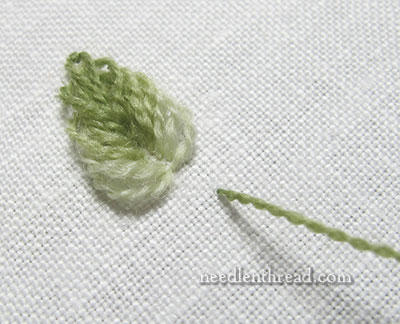
Now, bring your dark green thread to the front of the fabric below the leaf, to work the stem.
Using stem stitch, stitch a stem up the center of the leaf, covering up the split in the lower part of the leaf.
And there’s your inside-out rose leaf stitch! Don’t forget to clip your waste knots and run the tails underneath the stitches on the back of the fabric.
It sounds complicated, but once you work through the stitch one time and see the mechanics of it, you’ll be able to work the stitch pretty quickly and easily, to create shaded, slightly puffy, pretty leaves.
Stitch Fun is a series of hand embroidery tutorials here on Needle ‘n Thread that explores obscure stitches, composite stitches, and easy stitches used in various combinations. If you’d like to play with more stitches, drop by the Stitch Fun Index, where you’ll find a linked list of all the Stitch Fun tutorials.

