Every time I went out to work on the goldwork on the inner frame of the Mission Rose project, I found myself humming the same song… and humming it and humming it and humming it.
It’s stuck in my head right now, and I can’t get it out!
Occasionally, while stitching, I’d even start singing out loud (good thing no one’s out there but me!). I don’t know all the words, so it’s just the same little bit, over and over again.
Gold fever! Nothin’ can help you but the yellow stuff!
What can stop that itchin’ ain’t around the kitchen!
Gold, gold, hooked am I. Susannah, go ahead and cry!
It’s from Paint Your Wagon – a bit before my time, but my older sister had the record (yes, record, as in LP, on vinyl or something), and I remember hearing the songs as I grew up.
It wasn’t until I was an adult that I went back to discover what that whole thing was all about. The mere fact that Clint Eastwood was singing in a musical… oh dear.
In any case, I have found that, when working on the frame here, I’m struck with gold fever!
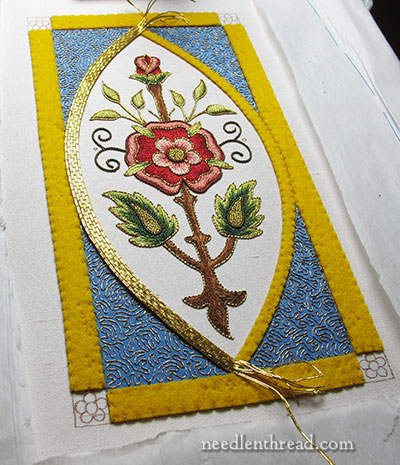
I love finally adding gold to a piece of embroidery like this. Oh, yes, there’s a little bit of gold on it already, but when you begin to add the solid gold parts, that’s when things really start coming together!
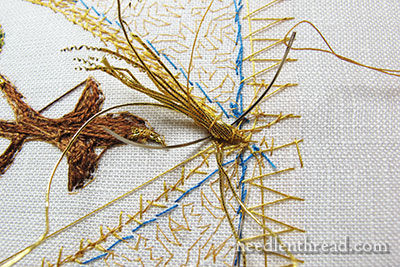
In the photo above, you can see that I’ve couched the gold passing thread we talked about last time onto the left side of the frame.
Incidentally, it worked out to exactly five pairs of threads to cover the whole frame, top to bottom. I do admit to a little squeezing on the upper and lower sides, but it worked out ok.
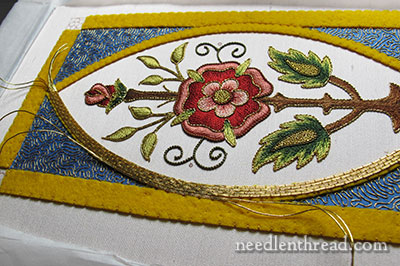
When working the outermost pair of couching threads, I started in the middle of the bowed edge and worked to the two tips of the frame. This gave me the ability to end the outermost thread early if I ran out of space on the felt frame.
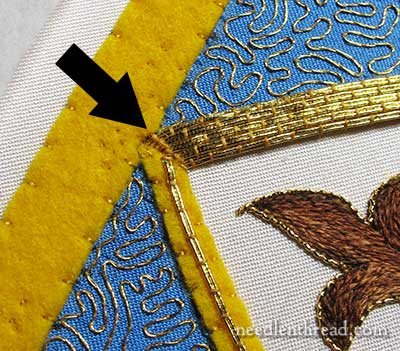
You can see in the photo above that the threads are couched in pairs – two at a time – and that I used a standard “bricking” pattern with the couching thread.
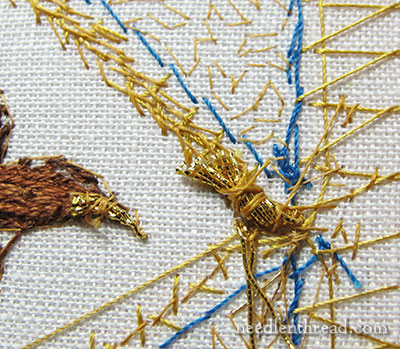
Regrettably, at the tip, I couched over the threads right where they would be plunged. I usually like to have a couching thread right next to where a thread will be plunged to the back, just to keep things in place and secure when plunging the threads.
But I don’t like the little obvious line of couching stitches right at the tip of the frame – the arrow in the photo above points to them. From far away, it’s not really noticeable, but they still bug me!
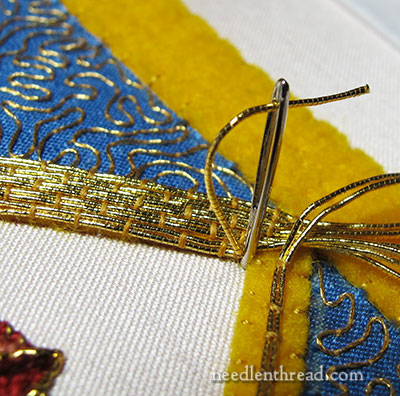
To plunge the threads in this area, I used a chenille needle. I stuck the needle in the fabric where I wanted to plunge the thread, then threaded the needle with the goldwork thread, and pulled the needle to the back.
Why a chenille needle in particular? Because they have long eyes (like a tapestry needle), making them easier to thread, but unlike a tapestry needle which is blunt, a chenille needle has a sharp tip, so it easily pierces through the layers of fabric.

These are all the threads from one side of the frame, plunged to the back.
You could plunge one thread at a time, working in twos, and anchor the two at one time on the back, then flip the frame over, plunge two more threads, turn the frame over, anchor the two threads, and so forth.
Sometimes, when you need to make sure your plunged threads are kept as “slim” as possible on the back (for example, when the front of the embroidery doesn’t have much padding on it), it’s a good idea to sew down the threads two at a time.
But in this case, there’s enough padding on the front of the piece that I’m not to concerned about bunching these guys all up in a tidy bundle and anchoring them all together.
Once they’re all tamed and lying down in the right direction, it’s just a matter of whipping over them with a waxed thread, using a curved needle.
The two threads pointing towards the bottom of the photo above are from the other half of the frame, so I want them to lie in a different direction, so that they are folding back under their half of the frame.
Once the bundle is secure, give it a little trim, and voilá! The threads are anchored!
I plan to work a bit more on the frame today – which bodes badly for any chance of getting this blasted song out of my head!
Gold, gold, hooked am I….
*Sigh*
You can follow the Mission Rose project from start to finish and everywhere in between – in chronological order as the project developed – by visiting the Mission Rose project index.

