Recently, I began lending a helping hand on an embroidery project – it’s a project of reconstruction, re-creation, and repair. I’m not doing much of the “real” work – mostly just advising on thread selections, color matching, fabric selections, and so forth. Maybe towards the end of the project, if time allows, I may help with the final goldwork.
But I thought I’d show you the piece, and chat a bit about selecting colors and threads, the types of embroidery on it, and what exactly is going to happen to it.
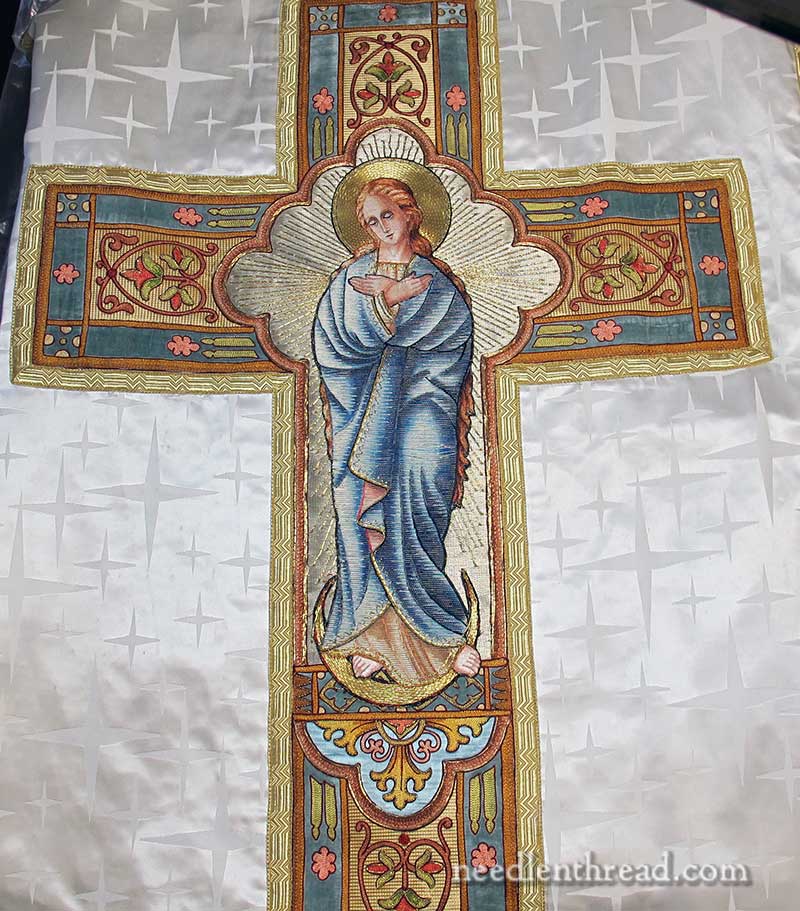
Above is the main piece of embroidery on the vestment. You can click on the photo above for a larger image.
The central image of the Virgin is in fairly good shape, and it really is an exquisite piece. It needs some minor repairs.
It’s a combination of paint and embroidery, though it takes getting close to see the combination.
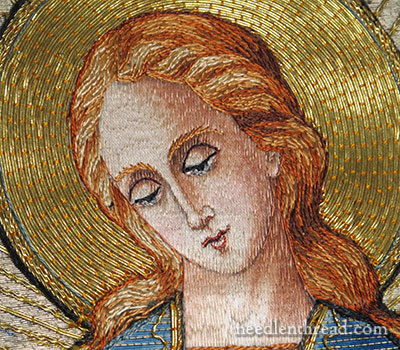
The face is quite nice. The shadows, the delicate lines, the hair – the details are very pretty.
The whole face is worked in a series of long and short split stitches in flat, very fine silk. The stitches are not crowded at all, are perfectly parallel to each other, and spaced so that you can see just a hint of the fabric behind them. Though a few different shades of silk are used, it is actually the painted image behind the silk that lends most of the detail to the shading.
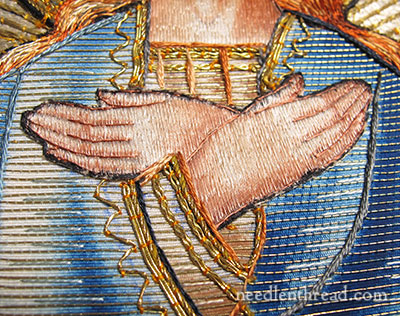
The hands are worked the same way – they are painted, and then embroidered over in a very fine silk, in long split stitches. Darker silk is used to outline the fingers.
You might notice the heavier black outline around the hands, when looking this close. If you look at the larger photo above, these black lines are not so noticeable, but up close, they are. The black along the edge is part of the appliqué. The hands were embroidered separate from the rest of the piece and fixed on top.
Around the hands, you can see the robes, and here, you get a better sense of the combination of paint and embroidery. Though the face and hands are more solidly covered with embroidery, the robes are not. The robes are worked in what I think of as a very loose relative of – you might almost call it “backwards” or “imitation” – Or Nué.
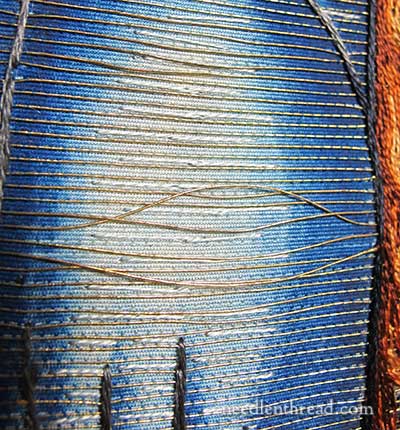
How’s it work? The robe is painted – so all the real shading you see on it, is done in paint. Then, over the painted robe, you have very neatly worked, tiny lines of gold couched horizontally. (Some of the couching has come undone in the photo above). The gold is couched with blue and white threads that match the shading on the painted background, and the couching stitches are about a consistent 1/8″ apart all the way across.
Between the horizontal gold lines, on top of the painted background, long silk split stitches are worked to highlight parts of the robe. So, in the photo above, you can see the white silk stitches over the lightly shaded areas. The silk would reflect the light and lend to that overall look of embroidered shading, when in fact, there’s not much silk embroidery actually going on here.
If you enlarge the first photo in this article, you’ll see that the little dashes of horizontal white (or light blue) encroaching over the darker blue painted areas on the robe help lend to the illusion of embroidered shading.
This combination of painting and stitchery on figures – common from the 1800′s – 1900′s – is a far cry from the intricately embroidered figures of early ages – of the Middle Ages (especially seen in Opus Anglicanum), the Renaissance, and the Baroque eras.
But it only stands to figure. After the Industrial Revolution, people began to want things much more quickly. And these “shortcuts” were a way to produce a “hand embroidered” figure relatively quickly. There’s still a lot of hand embroidery on the figure – and the figure is still beautiful and worth saving. But it isn’t quite the same as the solidly embroidered figures of previous eras. Ah, the evolution of embroidery…
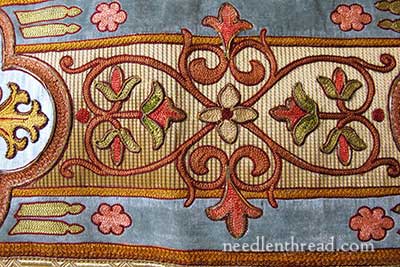
In any case, that figure will be fixed up – repairs will be done to the loose gold threads – and the whole figure will be re-applied to a new ground, recreated from the same designs and in the same techniques as the old.
In addition, the remainder of the set will be re-created, including dalmatics, cope, and all accompanying small pieces – stoles, maniples, and so forth. These don’t exist anymore, and they have to be made.
So, my first job was to meet with the embroiderer and seamstress involved and to discuss ground fabrics and thread types. The embroiderer is working the silk embroidery on the panels entirely in tambour work, so it was necessary to test different types of threads with the tambour needle to see how they would compare to the original. Then, it was time to color match the threads on the embroidered panels.
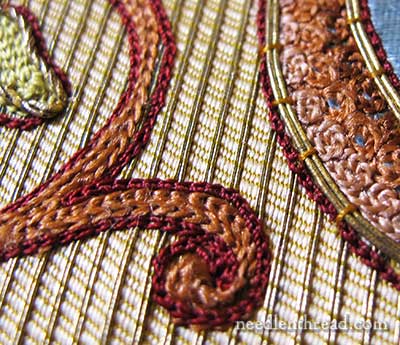
You can see that different types of thread are used in the tambour work. The thread in the center of the vine has little twist and a lot more “spread” than the outlining red thread.
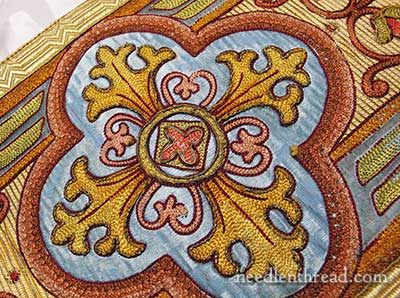
This particular medallion will be repeated thirty six times on the whole set of vestments!
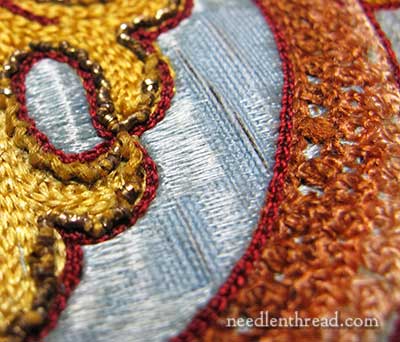
When you look up close, you can see that the fabric behind the tambour work (and much of the tambour work itself) is falling apart. From a distance, it’s not as noticeable, but get up close, and the piece is almost crumbling in parts.
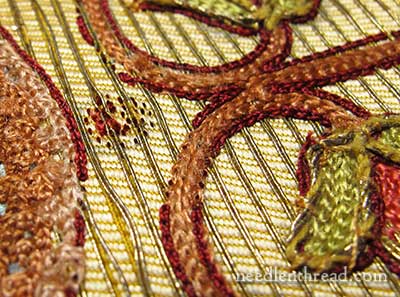
Some of the embroidery here is completely missing. And the goldwork around the leaf on the right is disintegrating as well.
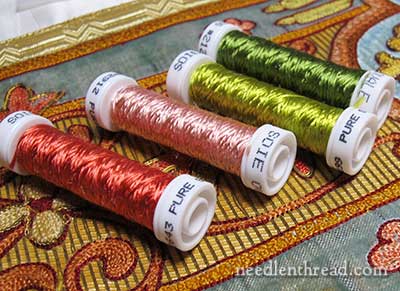
And so, onto the color matching and thread selections! I love doing this kind of stuff, because it gives me the opportunity to re-familiarize myself with certain threads.
The embroidery for the set will be done entirely with Au Ver a Soie silks of various types. They really are the best silks for this type of work, and they have the widest range of types and of colors within those types.
Are you looking at the bright green in the photo above and thinking “Whoa! That’s bright!”?
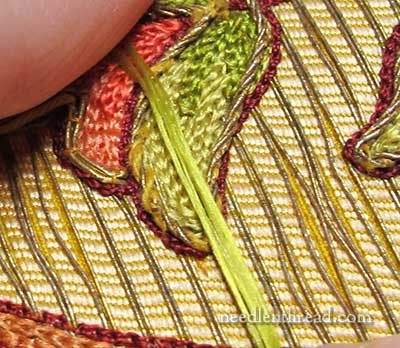
Originally, I almost didn’t even pick it up to test it. I thought, “No way – toooooo bright.” But it works. It is The Color.
When matching up colors to old pieces like this, you have to get close, and you have to get close in the areas that are least damaged, most clean, and would have been least exposed. That’s where you’ll find the true colors. Up close, you suddenly realize what a magnificent splash of color this whole piece must have been!
So, Soie Ovale is being used for the floral accents (leaves and buds). These accents extend down the front and back of the chasuble, down the double orphreys on the front and back of the dalmatics and on the horizontal banding on the dalmatics, and on the orphreys on the cope and on the hood of the cope. Lots of little buds and leaves…
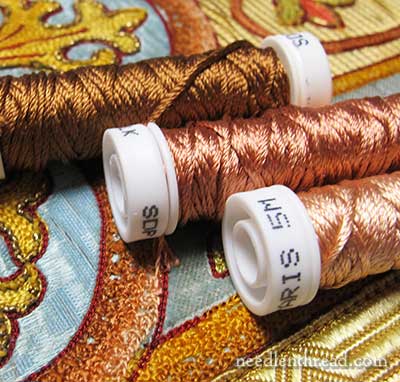
Soie de Paris will be worked on some of the “tendrils” on the floral pieces, and also in the outline around the various medallions.
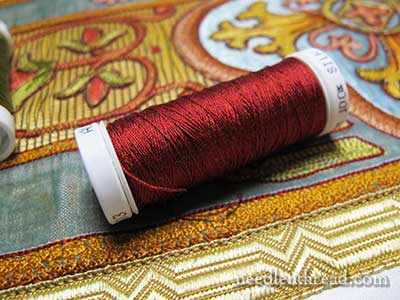
This Soie 100/3 in deep red is perfect for the all the outlines, dots, and occasional little wispy tendrils here and there.
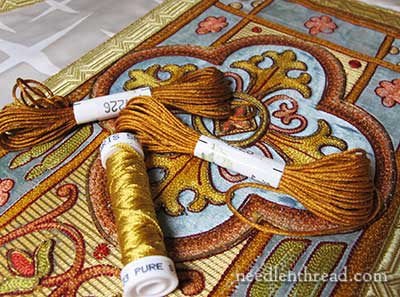
And a combination of Soie d’Alger and Soie de Paris (primarily Soie de Paris) will work for the center of the cross medallions and some of the frames.
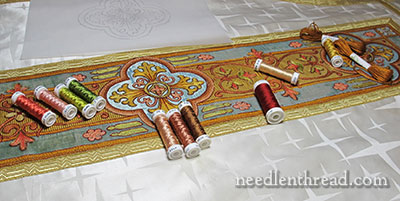
There they are, all selected and ready for ordering.
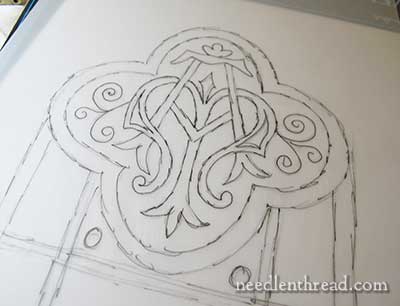
Before walking away from the piece, I made quick sketches of the various embroidered elements on it…
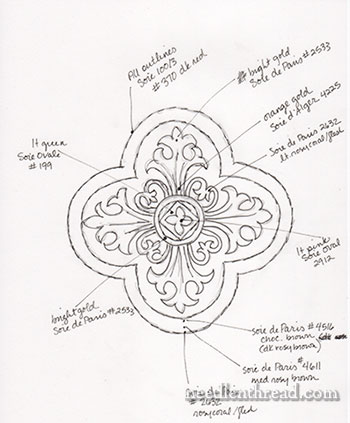
…to note what thread in what color goes where.
I’m looking forward to seeing the silk work underway!
