It’s been a while since I’ve worked on my Hungarian Redwork Runner, which was set up as a “grab and go” embroidery project exactly a year ago.
Well, fooling around with the tambour needle recently and practicing tambour embroidery led me to thinking about my poor neglected Hungarian runner. Since I haven’t had an opportunity to “grab and go” with it for quite some time, I haven’t made much progress on it.
But… I mused… couldn’t the tambour hook propel the Hungarian runner to a more rapid completion?
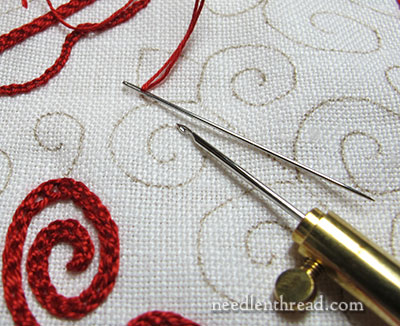
And so, a needle war! Would the tambour hook do what the crewel needle does – and do it with satisfactorily close enough results – so that I could accomplish the chain stitching on the redwork piece much more rapidly?
I set about to test the question. I started by spooling up some of the red coton a broder used on the Hungarian runner.
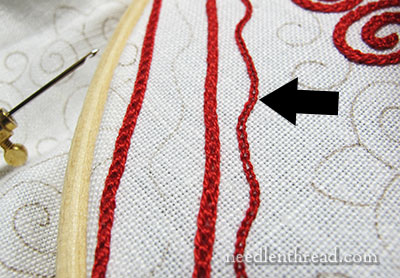
Then I hooped up the unfinished end of the runner, and set about tambouring a line. The arrow in the photo above points to the line.
The straight line just to the left of the tamboured line is worked in Hungarian braided chain stitch with a significantly heavier thread, so of course, it is a much bolder line than the chain stitch line done with the tambour hook.
But still…. the chain stitch worked with the tambour needle seemed somehow very fine and delicate – much finer than the other chain stitched lines worked with a crewel needle, if my memory served me correctly.
Was I right? Or was I imagining it? It’s been a while, after all, since I worked on this…
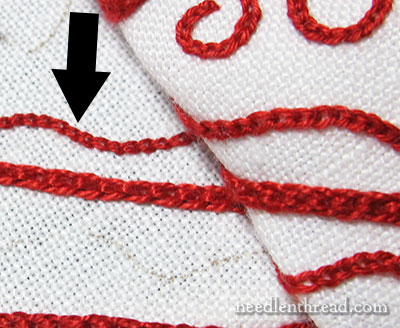
Let’s compare.
In the photo above, the arrow points to the tambour line. On the right side of the photo, past the fold of the fabric, is a line of chain stitches embroidered with the crewel needle. They are both stitched with the exact same thread.
Wow! I exclaimed to myself in my head… and out loud… with a choice word thrown in, expressing my disappointment.
Darn!
They are, you see, completely different. And that won’t do, on a project that’s over half finished.
Then I thought, Maybe it’s just the way I’ve got these particular lines lined up…
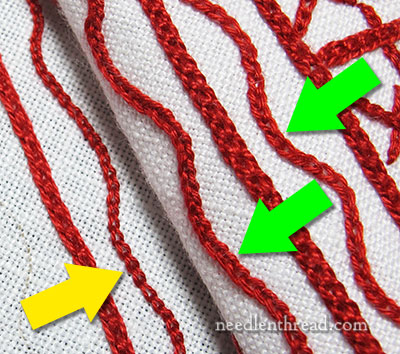
Deep down, I knew it wasn’t the case. Above, the yellow arrow points to the tambour line. The green arrows point to chain stitched lines embroidered with a crewel needle in the same thread.
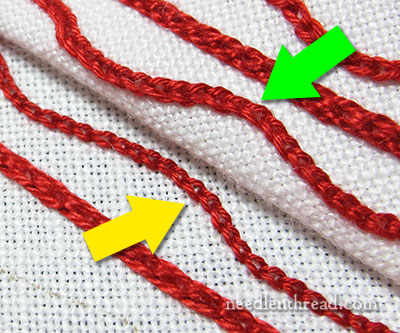
And just to convince myself, here they are again, a little closer.
The culprit, no doubt, is Tension, accompanied a little bit by Twist. When working with a tambour needle, the tension is automatically much tighter than when working with a regular crewel needle. The thread, in tambour embroidery, is always under tension, and, in fact, that tension is necessary in order for the needle to work properly.
Also, the twist on the thread stays a little tighter with the tambour hook – which makes a difference with this type of thread especially, as it has a softer twist than most embroidery threads.
But, mused I, ever hopeful, could I loosen up the tension just a little bit? And maybe if I spaced the stitches a little closer, that would also help.
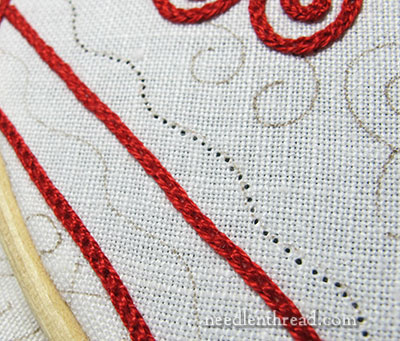
And so, I removed the tamboured line.
Now, you just cannot beat tambour work when it comes to easy removal. It takes 1/4 of a second to zip the line straight out, and there isn’t a speck of thread residue to contend with.
Considering it only took a couple minutes to stitch the line in the first place, and no time flat to rip it out with no mess, I really didn’t mind experimenting!
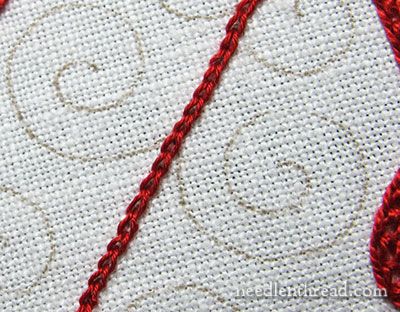
I stitched a short straight line with the tambour hook, being mindful of my tension, trying a little bit to loosen it up, without making it too loose that the tambour hook wouldn’t function the way it’s meant to.
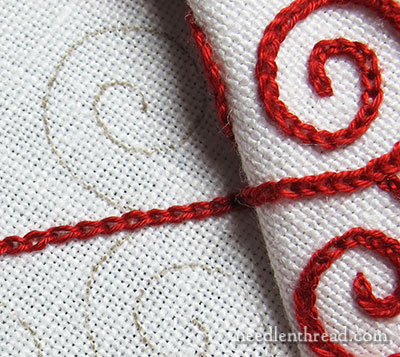
Tambour on the left, crewel on the right.
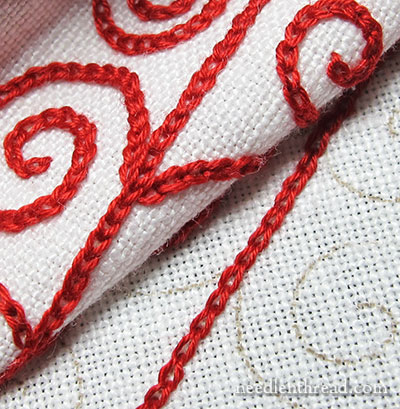
From a different angle….. it’s not as noticeable a difference, but there’s still a difference.
Time to shorten up the stitch length, loosen up the tension, and see if that fattens up the stitches.
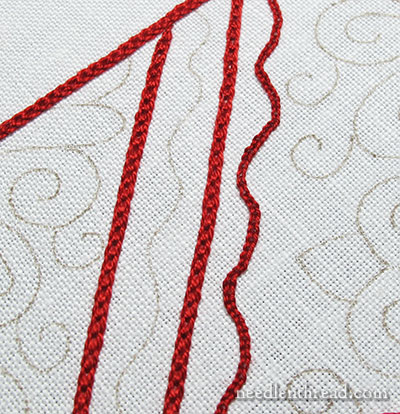
Ick. It’s the line on the right.
Working with a tambour needle is a lot like learning to type. Once you know how to type, you can speed up and up with practice and improve accuracy at the same time. But if you must go to a different sized keyboard altogether – especially one with a key here or there out of place – your typing skills suffer until they get used to the new situation.
Every analogy limps, but you get the idea.
Suddenly, I was changing the size of the stitch that would naturally be associated with the thread, fabric, and needle size I was using. I had to concentrate with all my effort on adjusting the tension of the thread with each stitch – keeping it looser than I naturally would.
And…. the line suffered for it. It is jerky, uneven, and just not quite The Desired Thing.
I’m not super skilled with the tambour needle, though. Undoubtedly, an experienced tambour embroiderer could change the approach on tensioning, stitch length, and so forth, and still achieve satisfactory results.
Though my results look a bit cruddy, do they create a line that is comparable in thickness and “look” to a line of chain stitches embroidered with a crewel needle?
To answer that question, I got out a crewel needle.
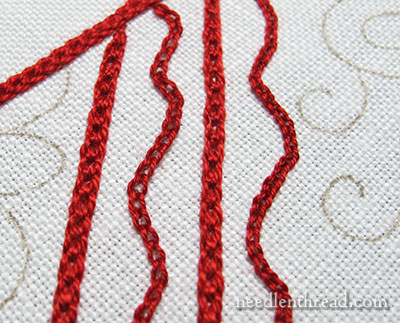
The wavy chain stitch line on the left is the crewel line. The wavy chain stitch line on the right is the tambour line.
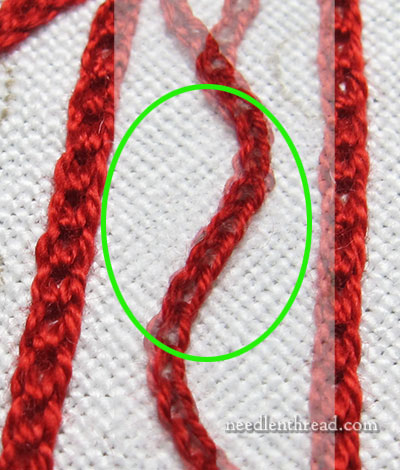
Using Photoshop, I superimposed the tambour line on top of the crewel line and faded the opacity, so that we could compare the thickness of the lines. Size-wise, they’re fairly comparable.
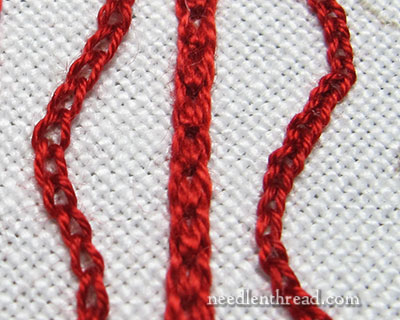
But look how much more compact the tambour stitches are on the right, compared to the crewel stitches on the left.
So, to achieve a comparable thickness in the line with the tambour hook, I’d have to work the stitches much closer together than I would normally do with the crewel needle. And this would change the overall look of the stitching – which would be a bad idea, halfway through the project.
Then again, it may just be a matter of practicing!
In any case, I think we can conclude that, when working with this type of thread, stitches of the same size worked with the tambour needle will normally end up finer than stitches of the same size worked with the crewel needle – unless, of course, the crewel stitches are worked with more tension on the thread than would normally be desired when embroidering.
I’ll keep playing with it and let you know if I ever even out the results!
