After I finished Gertie, my first filling experiment with tambour embroidery, I immediately set up another project to keep me going through my practice regime.
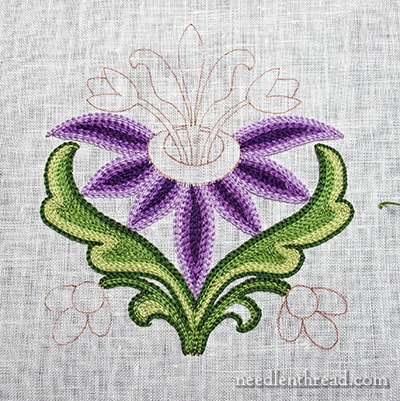
With the next project, I wanted to work with shades of color and filling odd shapes. I picked another one of the free hand embroidery patterns here on Needle ‘n Thread – this sprouting floral drawing – and selected colors of coton a broder 25 to use for the embroidery.
While working through this practice piece a little bit each day, I’ve learned a few more bits about tambour embroidery, which I thought I’d share with you.
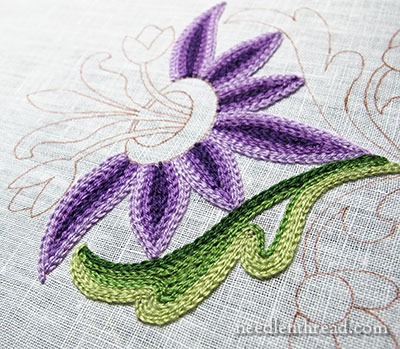
I found out that DMC’s coton a broder 25 (also known as “cutwork thread” or Art. 107, and not to be confused with regular 6-stranded floss) is a terrific thread for tambour embroidery.
It’s really easy to use, once you’ve determined you’ve got the right end of the pull skein. I didn’t wind the skeins onto spools first – I just didn’t want to take the time, and the pull skeins work fine if you’re pulling from the correct end.
Thread for Tambour Embroidery
Pretty much any decent hand embroidery thread can be used for tambour work. I’ve tried it with silk; I’ve tried it with tightly twisted cottons (like the Sulky Petites I used on Gertie); I’ve now tried it with non-strandable, more loosely twisted cottons; I’ve tried it with gold tambour thread; and on my next practice piece, I’m working with wool.
I haven’t tried rayons and the like, because I don’t really have a supply of rayons (I prefer working with natural fibers), but I’m sure it would work. There’s no reason why it wouldn’t.
In any case, I found working with the coton a broder 25 quite delightful.
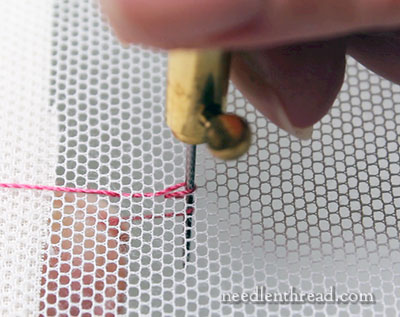
Starting Threads in Tambour Embroidery
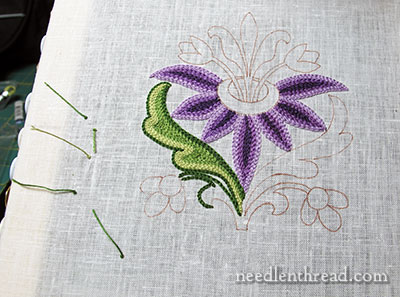
In the photo above, off to the left side, you can see some hairy little bits sticking up from the linen. These are waste knots.
I’ve been trying several different ways to start and end threads with tambour embroidery. The fact is, there is no “absolute way” that it must be done. Each expert writing his or her book has a different way of starting and ending the threads.
I’ve found the waste knot a very quick way to get started. The only disadvantage to it is that, eventually, you do have to finish off all those little knots and secure the threads on the back. Personally, this is a process I love – there’s something very satisfying about finally removing all the last waste knots and securing the threads.
But there are other ways to start and end threads – really, it’s just common sense. You can start and end threads in tambour work pretty much the same ways you start and end threads for any kind of embroidery.
Working Mirror Elements
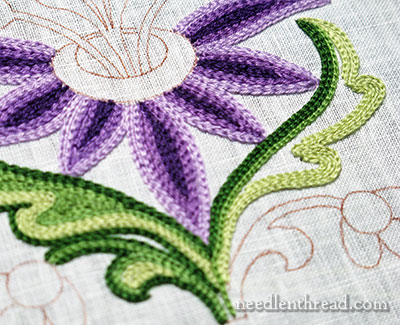
Good lesson for future reference: when working mirror elements (the two large leaves on this pattern are mirror elements), it’s better to work individual colors and areas on each side of the mirrored image consecutively.
Work the right side, then the left, in one color or area. Or the left side and then the right. Otherwise, you may very well forget exactly what you did in a given area, if you work one side completely first and then move on to the other side. And sometimes, it’s hard to go back and count exactly how many rows of tambour stitches you have in a given area, or see clearly what path your tambour needle took (although you can always turn the work over to easily see your stitching paths).
Case in point, concerning mirror elements: the left leaf was worked first in its entirety, then the right. You can especially see a difference in the light green at the “turning” where the leaves scallop inwards. I couldn’t remember exactly what I did on the left leaf when working the right leaf, and I saw, once I was finished, that I didn’t quite get it right.
Spirals & Circles with a Tambour Needle
Working complete circles with a tambour needle is just like working complete circles in chain stitch.
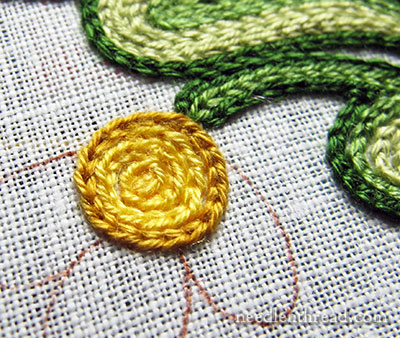
If you want the circle join to be invisible, you have to thread up a regular needle and complete the circle exactly as we did it in this tutorial for perfect chain stitch circles.
Spirals are fun to work with a tambour needle! They should start from the outside of the spiral and work in to the middle. It’s important to keep the stitches small, so that they take the spiral well (just as you would with regular chain stitch). Work each circle of the spiral as close as possible to the one previous, if your intention is to create a filled dot.
Tambour Tutorial – Coming Up!
I have a little tutorial of the basic tambour stitch coming up for you.
Really, once you “get” the basic stitch, the rest is pretty easy. If you want to improve with a tambour hook, it just takes regular practice, and before you know it, you’ll be wielding that hook swiftly and surely!

