Once the inner frame on the Mission Rose was covered with gold thread, my next move was to consider how to “finish” the inside edge of the inner frame.
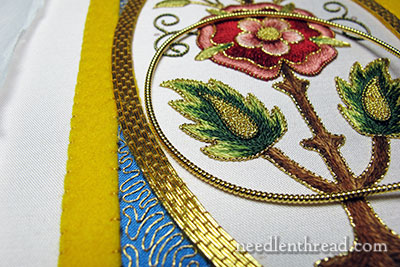
The edge I’m talking about is the edge where the thick gold pearl purl is touching, in the photo above.
First, I thought about using pearl purl and red silk combined, as we discussed last week in this tip on how to pull red silk through pearl purl with a beading needle.
But it was Too Busy. There’s already plenty of color on the inside of the project, and adding another “striped” thread in there was too much. So I settled for plain old gold.
I suppose that’s like saying Paris settled for plain old Helen. There’s nothing really “plain old” about gold! It can stand on its own two feet (metaphorically speaking), without any excuses!
You’ll notice that the pearl purl in the photo above looks Huge. And it is, if you compare it to the passing thread next to it. This is a #3 pearl purl, which is a Big goldwork thread.
But remember, it has to snuggle up next to this felt padding and the gold passing thread and cover up that felt.
Stretching Pearl Purl
Start by cutting a piece just slightly longer than the length you need. Grip the ends of that piece (I do this by slipping my fingernails between the last little beads of the purl on each end), and very gently and very barely, give the piece of pearl purl a tiny, minute bit of a stretch.
I’m really emphasizing the little bit of a stretch here for a reason. If you stretch the pearl purl too far, it’s not going to bounce back. And when you’re dealing with a thread that retails around $13 or $14 for a yard, there’s no point in making it unusable for your purposes!
So, a Very. Gently. Barely-There. Stretch. You want to pull it just enough to barely separate the coils – and in fact, you don’t really see the separation. It’s just enough to give some space for the couching thread, and to tame the pearl purl. Once you give it a little stretch, you notice that it is not as boingy-bouncy as it was. It stiffens up a little.
Incidentally, you can accomplish the same faint stretch by holding the end of the purl pearl in one hand (your less dominant hand) and running your finger and thumb down the length of the pearl purl, with just an ever-so-slight pressure. If you do that in one pass, you can get an even, gentle stretch.
Use Beeswax on the Couching Thread
Before couching the pearl purl, you’ll want to wax up your couching thread with beeswax by running the thread (without the needle!) on the edge of a cake of beeswax a few times, then running the thread through your fingers to clean off any extra wax and to work the wax into the thread. Then thread your needle.
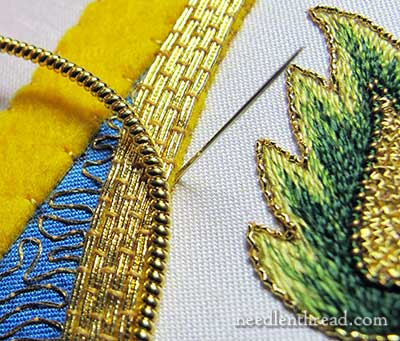
Couching the Pearl Purl
In the photo above, you can see that I’m bringing the needle out to the top of the fabric just at the very edge of the felt, in the ground fabric. I’ve pulled the pearl purl aside here, so you can see the needle coming up. It should be on the outside of the pearl purl.
Then I’m taking the needle down into the fabric right up next to the passing thread. In this case, because I have a sliver of felt still showing, I’m going into the felt and then into the ground fabric.
The couching stitch needs to be between two bumps in the pearl purl. Give the thread a little tug and the stitch should pop (literally, it sounds like a pop) through into the space between two pearls on the pearl purl.
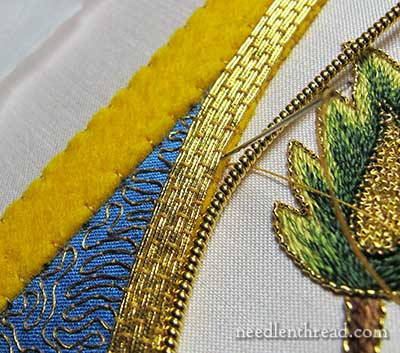
The couching stitches can be every several pearls in the line – they don’t need to be between each pearl. I skipped four or five per stitch.
Stepping back a bit, you can see the finished edge on the lower part of the frame in the photo above. The opposite edge isn’t finished yet.
The pearl purl makes a nice, clean, pretty beaded-edge finish.
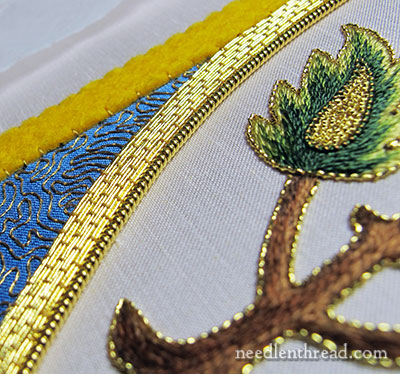
Here’s a close-up, so you have a better idea of the size of the pearl purl next to the passing thread on the frame.
You can see why a larger pearl purl is needed. Had I used a finer pearl purl, the felt would have probably still shown, and the edge wouldn’t look so completely “finished.”
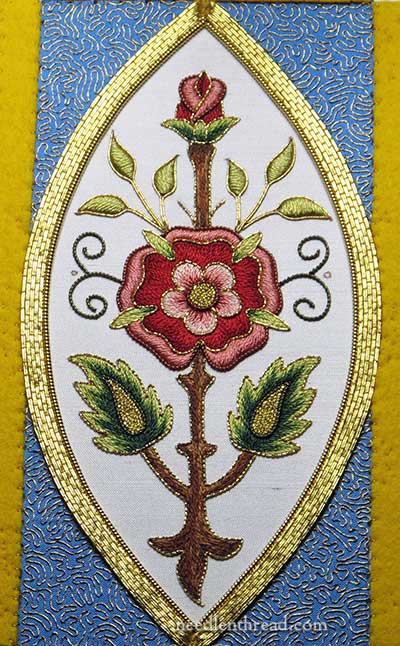
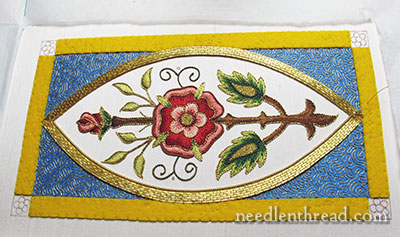
Here, the two edges are finished. This photo is not quite straight on, but it gives you an idea of what the inner frame looks like, straight on.
Notice that I cut the pearl purls and worked each side separately, rather than bending it at the tips and doing both sides with one piece. The thread was too thick to get a sharp bend at the tips without warping the coils.
The piece photographs from the side much better, for some reason – you really get the play of the light on the gold and the silk, when viewing it from the side.
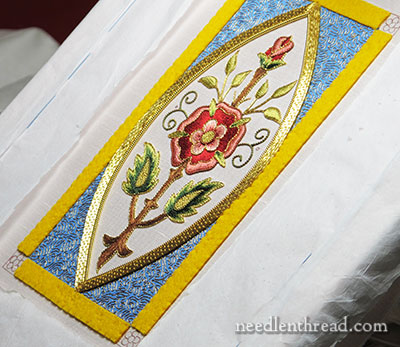
So, that’s the inside of the inner frame, finished!
I’ll do the outside of the inner frame after the outside frame is complete. I’ve been working on the outside frame – it takes heaps more time than the inside frame. I never realized how much “bigger” the outside frame is, until I started covering it up, stitch by stitch.
Any questions? Comments? Suggestions? Feel free to have your say below!

